How to fix battery icon disappearing on the GPD WIN MAX 2 2025
A problem has been discovered affecting the GPD WIN MAX 2 2025 HX 370 series of devices. It has been observed that after updating the AMD graphics driver software, it can sometimes cause the battery status indicator to vanish from view.
In the past, several alternative solutions have been suggested; however, their effectiveness has been inconsistent, resolving the issue for some individuals but not for all. The solution detailed below has been successfully verified across multiple devices. We would like to acknowledge user expormz on Reddit for providing this information.
Take the text that follows and place it in a new file that you name scan-devices.xml. As an alternative, you can use the provided link here to download and unzip the file.
     2025-10-09T23:43:33.4221277
     GPDWINMAX2\expormz
     \scan-devices


       true


       S-1-5-21-329286994-4123067376-2057571490-1001
       S4U
       HighestAvailable


     IgnoreNew
     false
     true
     true
     false
     false

       true
       false

     true
     true
     false
     false
     true
     PT72H
     7


       C:\Windows\System32\pnputil.exe
       /scan-devices
Perform a right-click on the Windows Start menu icon and from the context menu that appears, choose Computer Management.
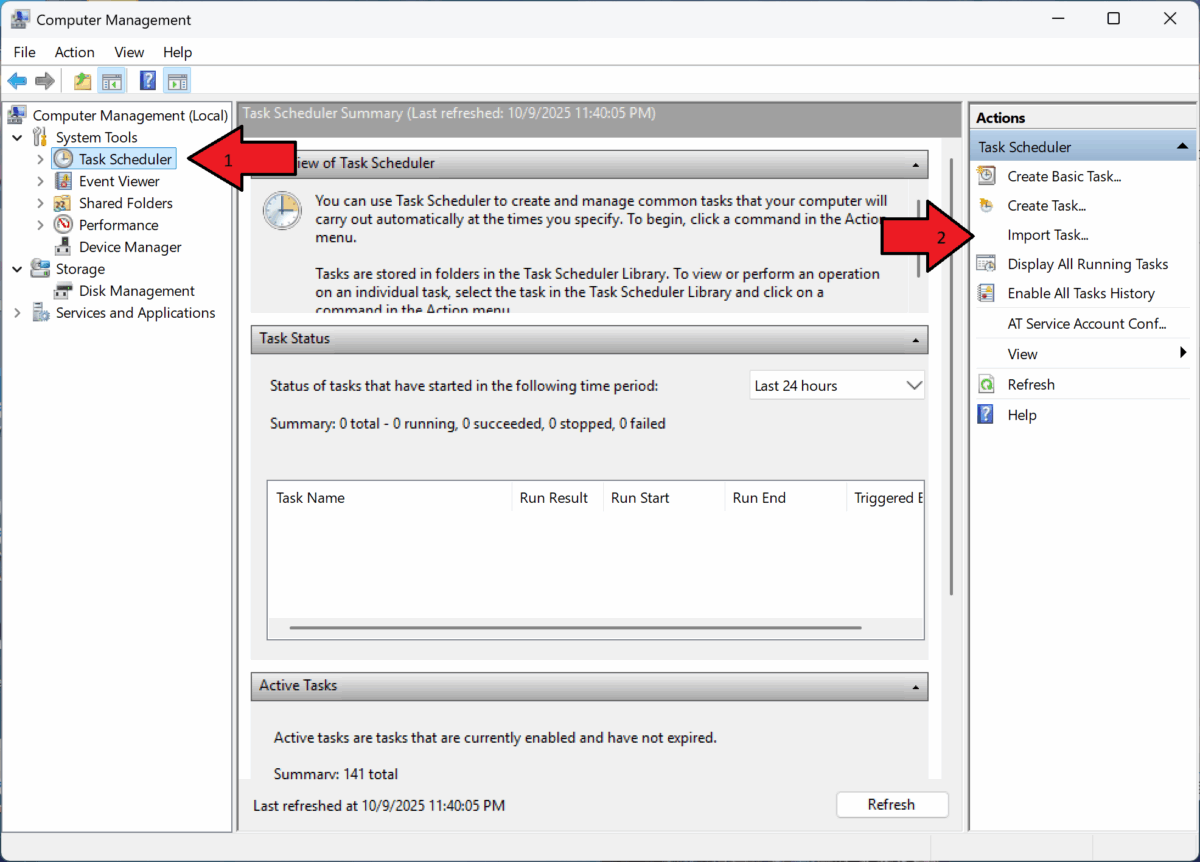
Inside the Computer Management window, navigate to and click on Task Scheduler. Afterward, find and select the Import Task option located in the right-hand pane.
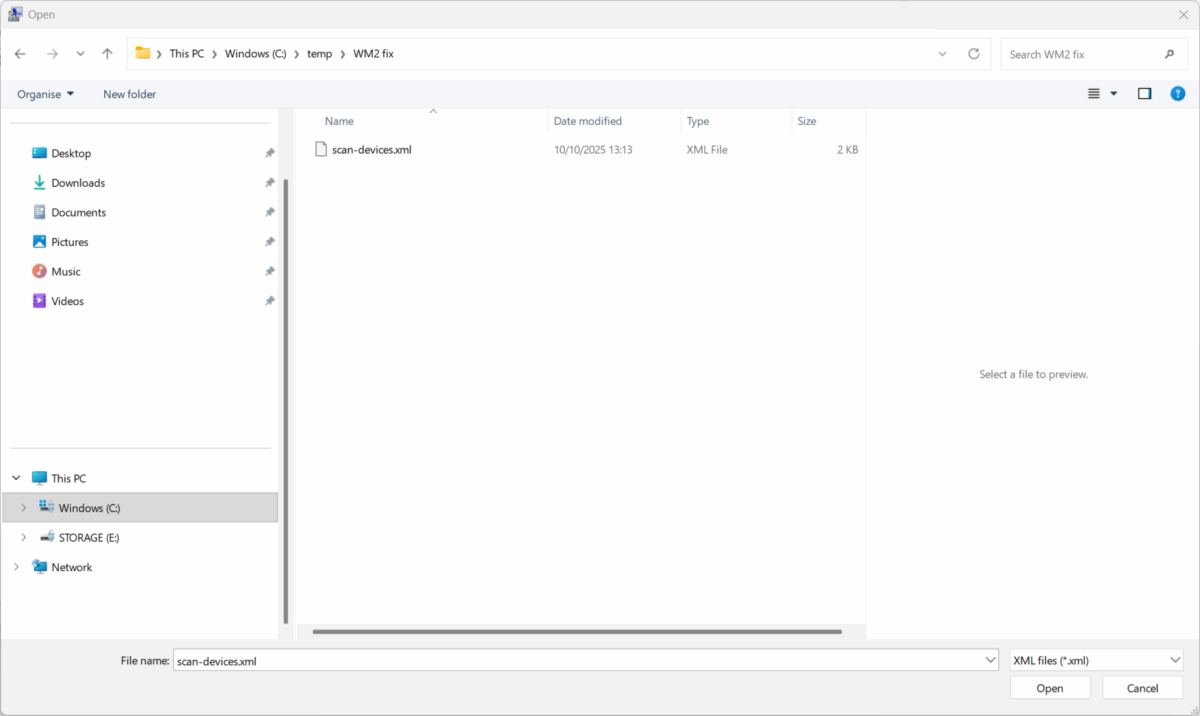
Browse to the location of the scan-devices.xml file you created or downloaded, select it, and then confirm by clicking OK.
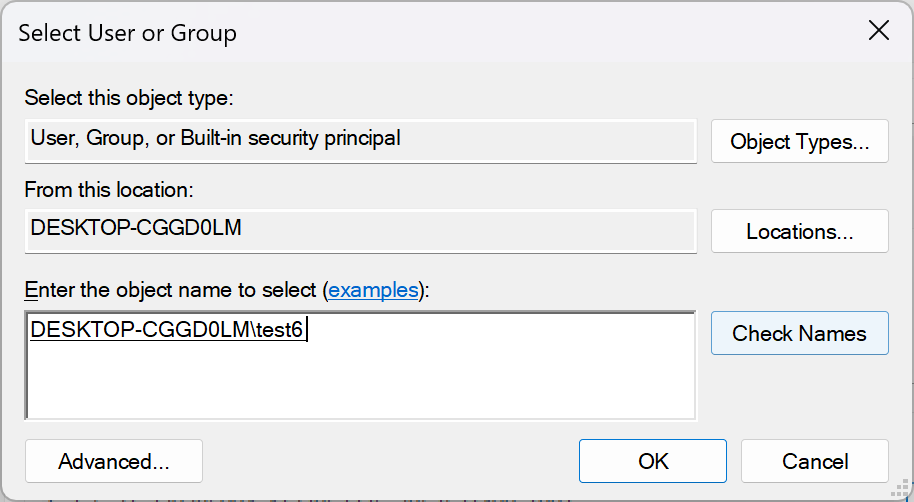
In the provided text box labelled Enter the object name to select, type in the name of your Windows user account, then click the Check Names‘button to validate it.
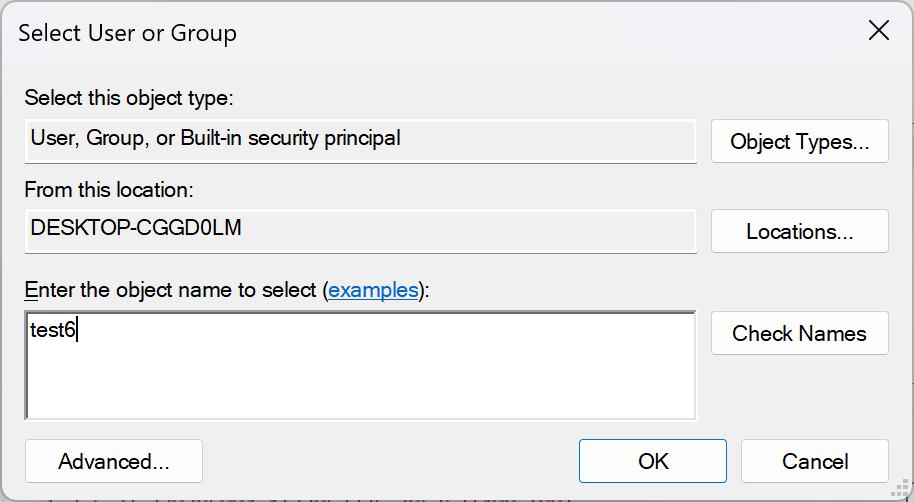
After your Windows account name has been successfully verified, you may proceed by clicking the OK button.
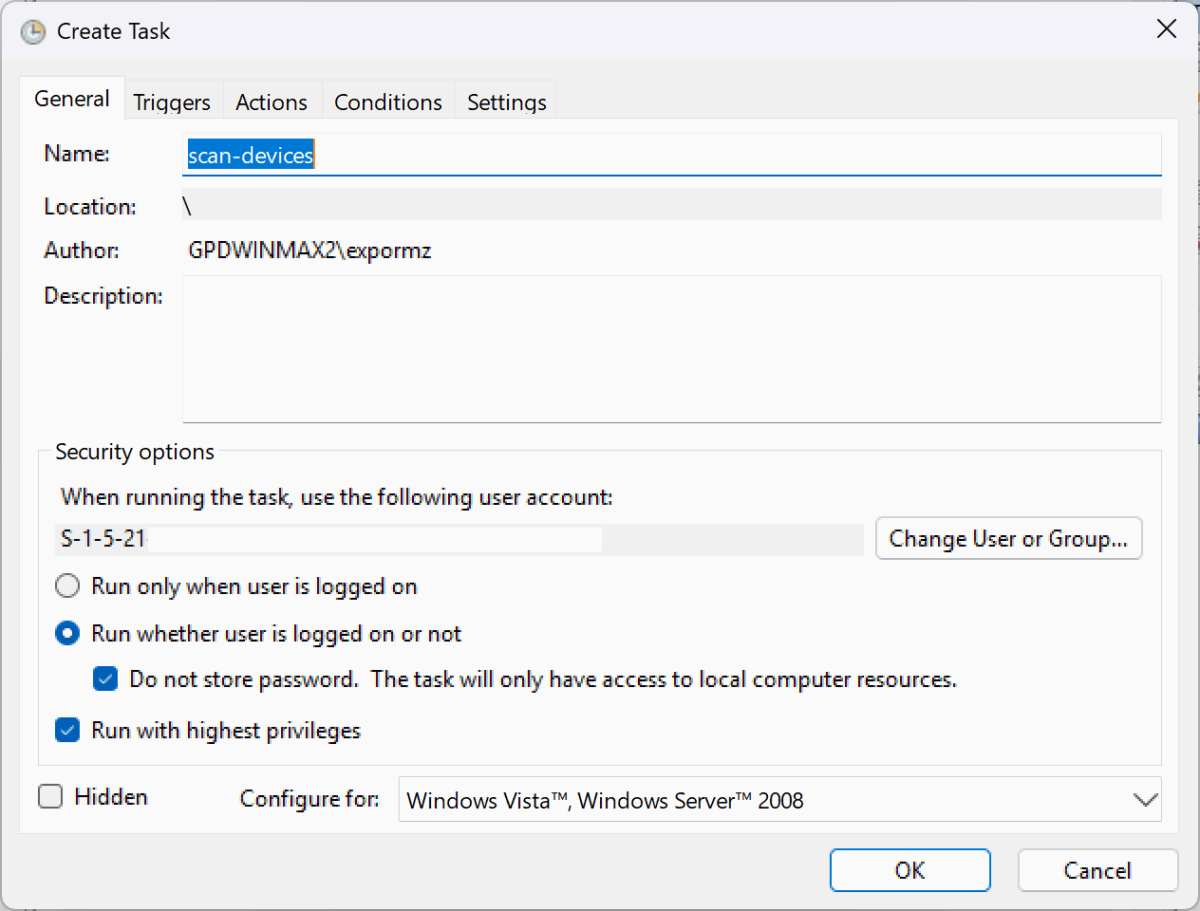
When the Create Task dialog box appears, you must ensure that the options for Run whether user is logged on or not and Run with the highest privileges are both ticked, as illustrated in the image. With these settings confirmed, press OK to continue.
Returning to the main Task Scheduler interface, you are now able to exit the program. Restart your GPD WIN MAX 2 2025 device, and upon rebooting, the battery indicator should be restored.

Important considerations: This solution is specific to the user profile you selected during the setup. For any other Windows accounts on the device, you will need to perform these steps again.
Should you encounter any difficulties after attempting this procedure, we kindly ask you to reach out to our support team by emailing [email protected]. Please include your original order number along with a description of the problem, and we will be glad to assist you.