Ready to Boost Your GPD G1 2023 eGPU? #
Updating the BIOS on your GPD G1 docking station can significantly improve its performance. Whether you’re new to the process or just need a quick refresher, this guide walks you through it step-by-step, from formatting your USB to completing the installation.
Please note that this guide applies to the GPD G1 (2023) model and NOT the GPD G1 2024 version. We will provide updates when a BIOS is available for the 2024 model.
Why Update Your G1’s BIOS? #
Updating your GPD G1’s BIOS is a smart way to enhance performance, fix bugs, and improve overall stability. A BIOS update ensures your G1 docking station stays efficient with the latest hardware and software, providing a smoother and more reliable gaming and computing experience. In short, keeping your BIOS up to date is essential to getting the most out of your GPD G1 eGPU, ensuring compatibility and optimal functionality.
GPD G1 Setup #
Before proceeding with driver or vBIOS updates, it’s important to properly set up your devices to avoid any installation issues. Start by setting up your GPD G1 docking station and ensuring it is receiving power. Next, connect the GPD G1 to your handheld device, preferably using the GPD USB 4.0 cable that came with your G1 eGPU. Insert the USB flash drive into your handheld device—if you’re out of available ports, transfer the necessary files to the handheld and remove the USB before connecting the dock.
Make sure both the G1 eGPU and your handheld device are powered on. The GPD G1 should be recognized as an AMD Radeon RX 7600M XT.
If you encounter any other issues with your docking station, refer to our getting started with the GPD G1 eGPU guide.
Reformat USB #
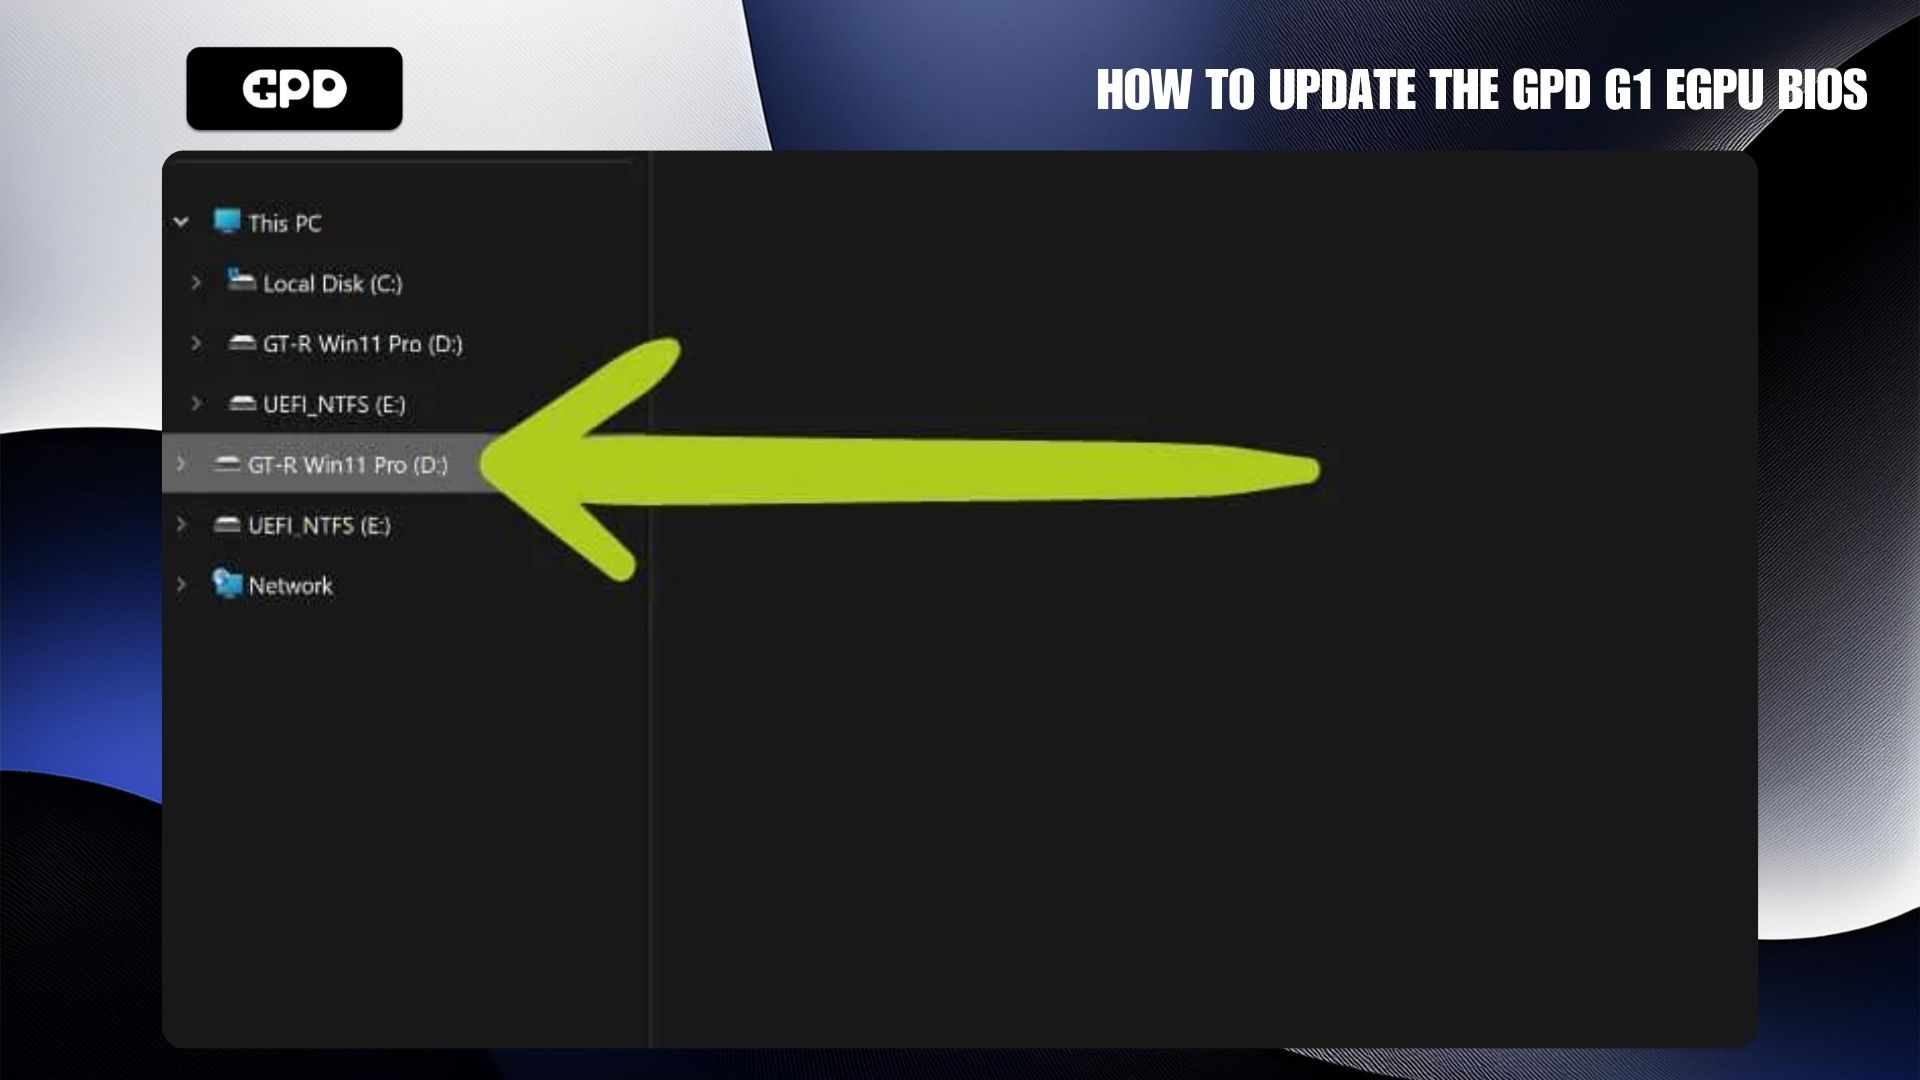
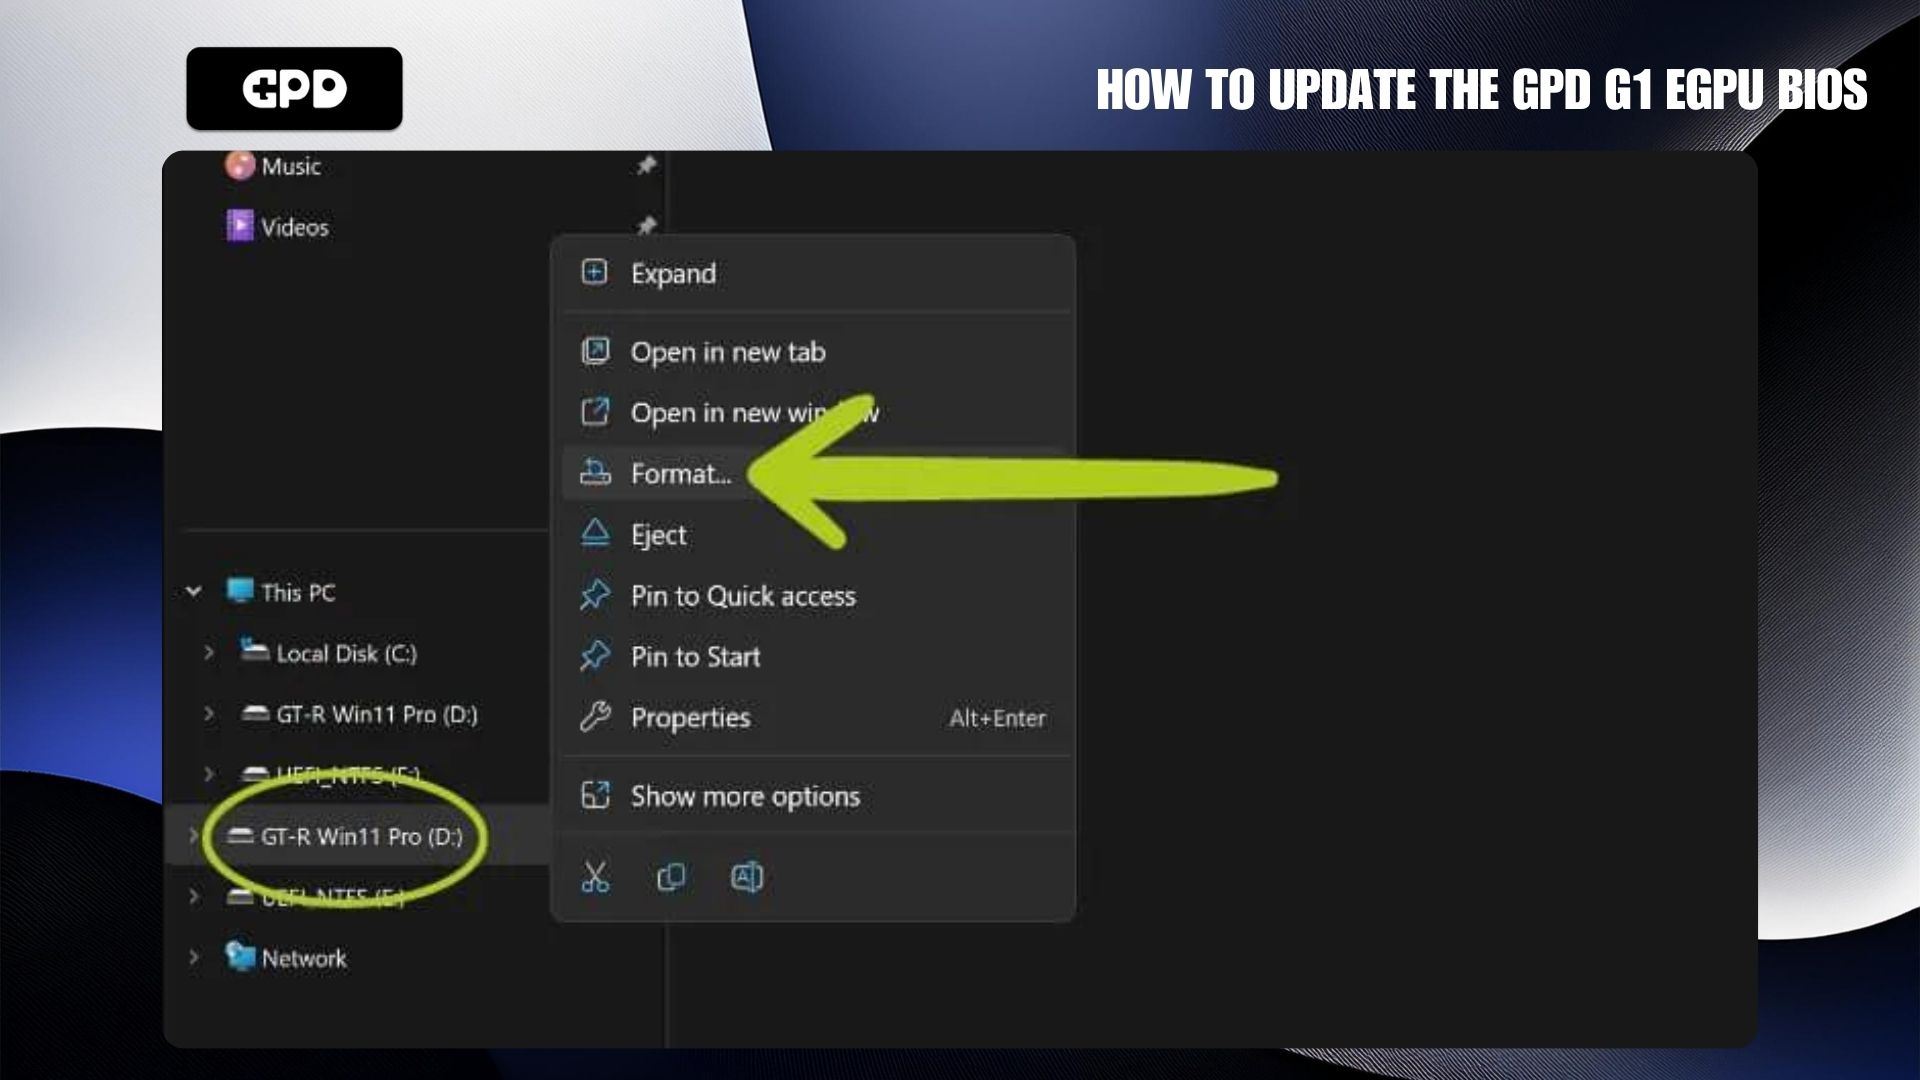
The first step in updating your GPD G1 eGPU is preparing a USB drive for BIOS flashing. Be aware that formatting the USB will erase all its contents, so it’s recommended to use an empty USB or one without important data. After connecting the USB to your PC, open File Explorer, right-click the USB drive, and select the ‘Format’ option (see Images 1 & 2 below). Note that the name of your USB drive may vary depending on its brand, model, or any previous renaming.
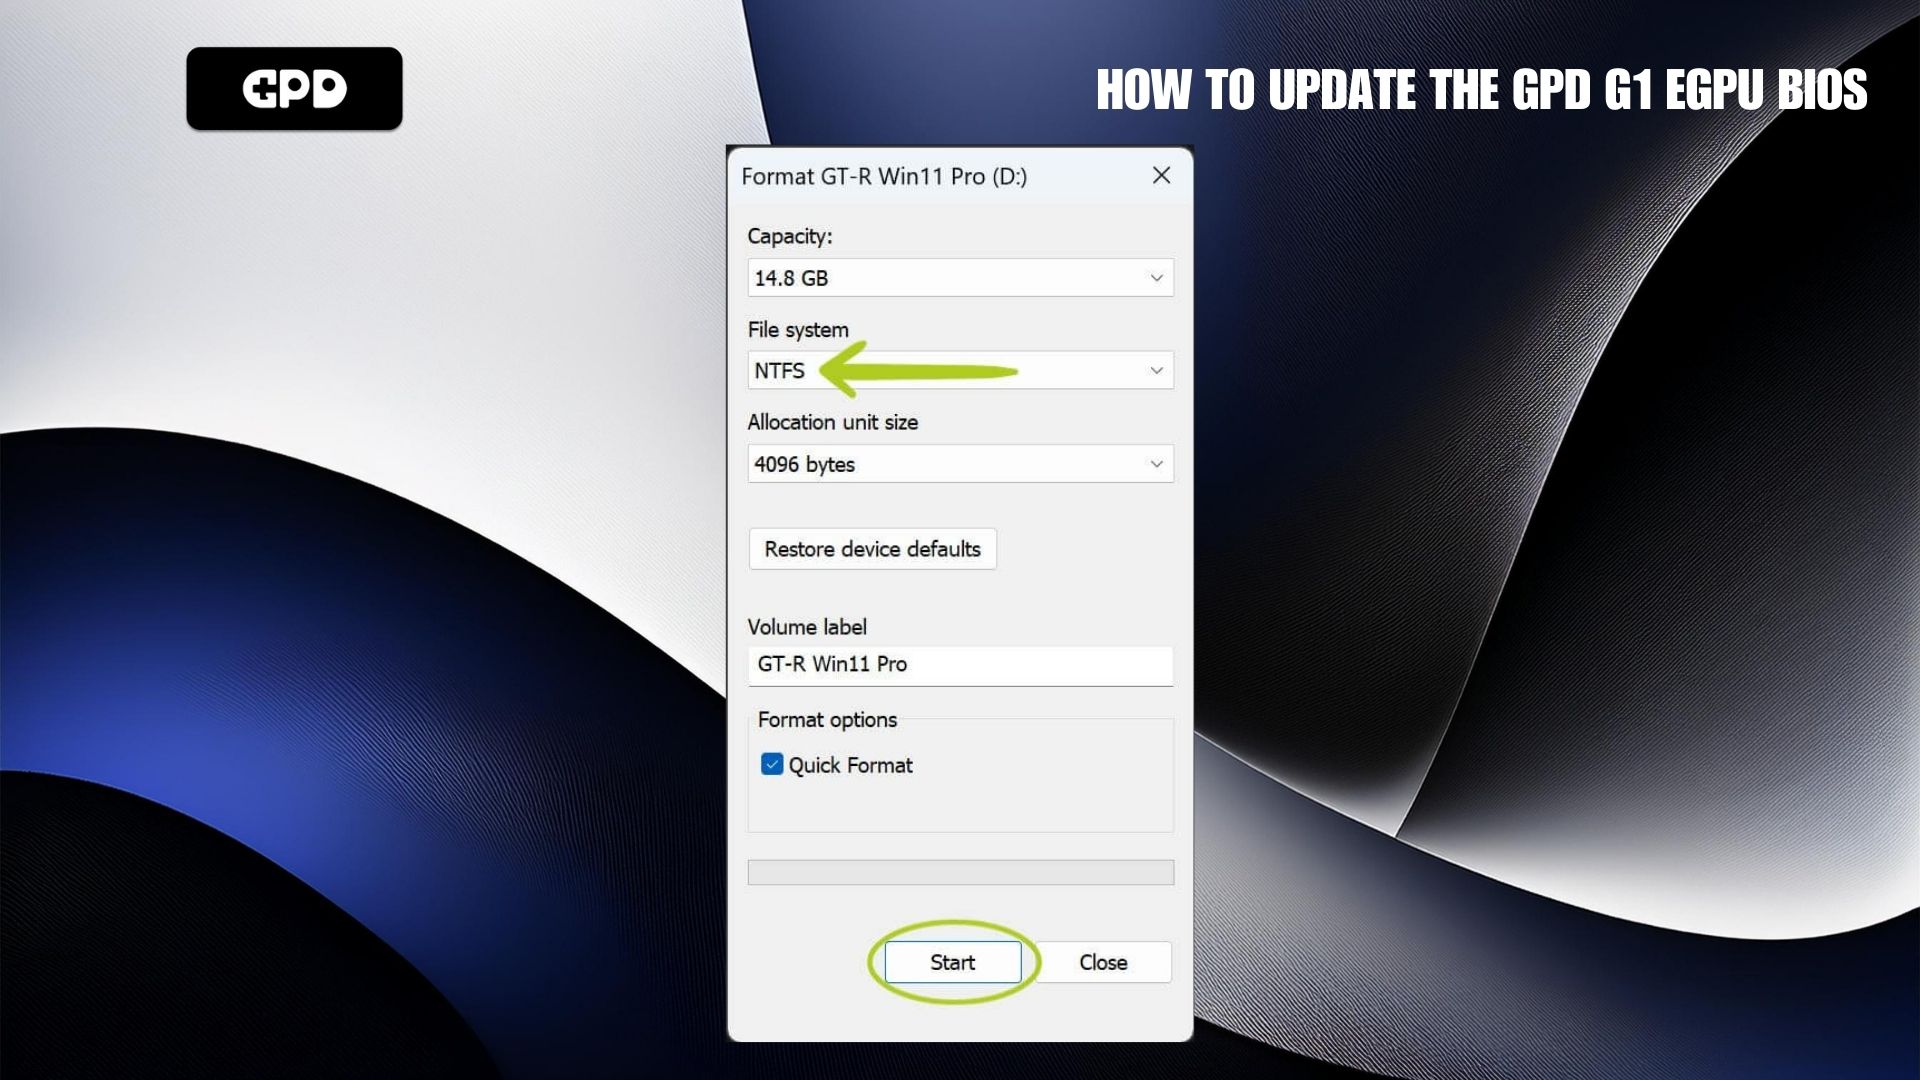
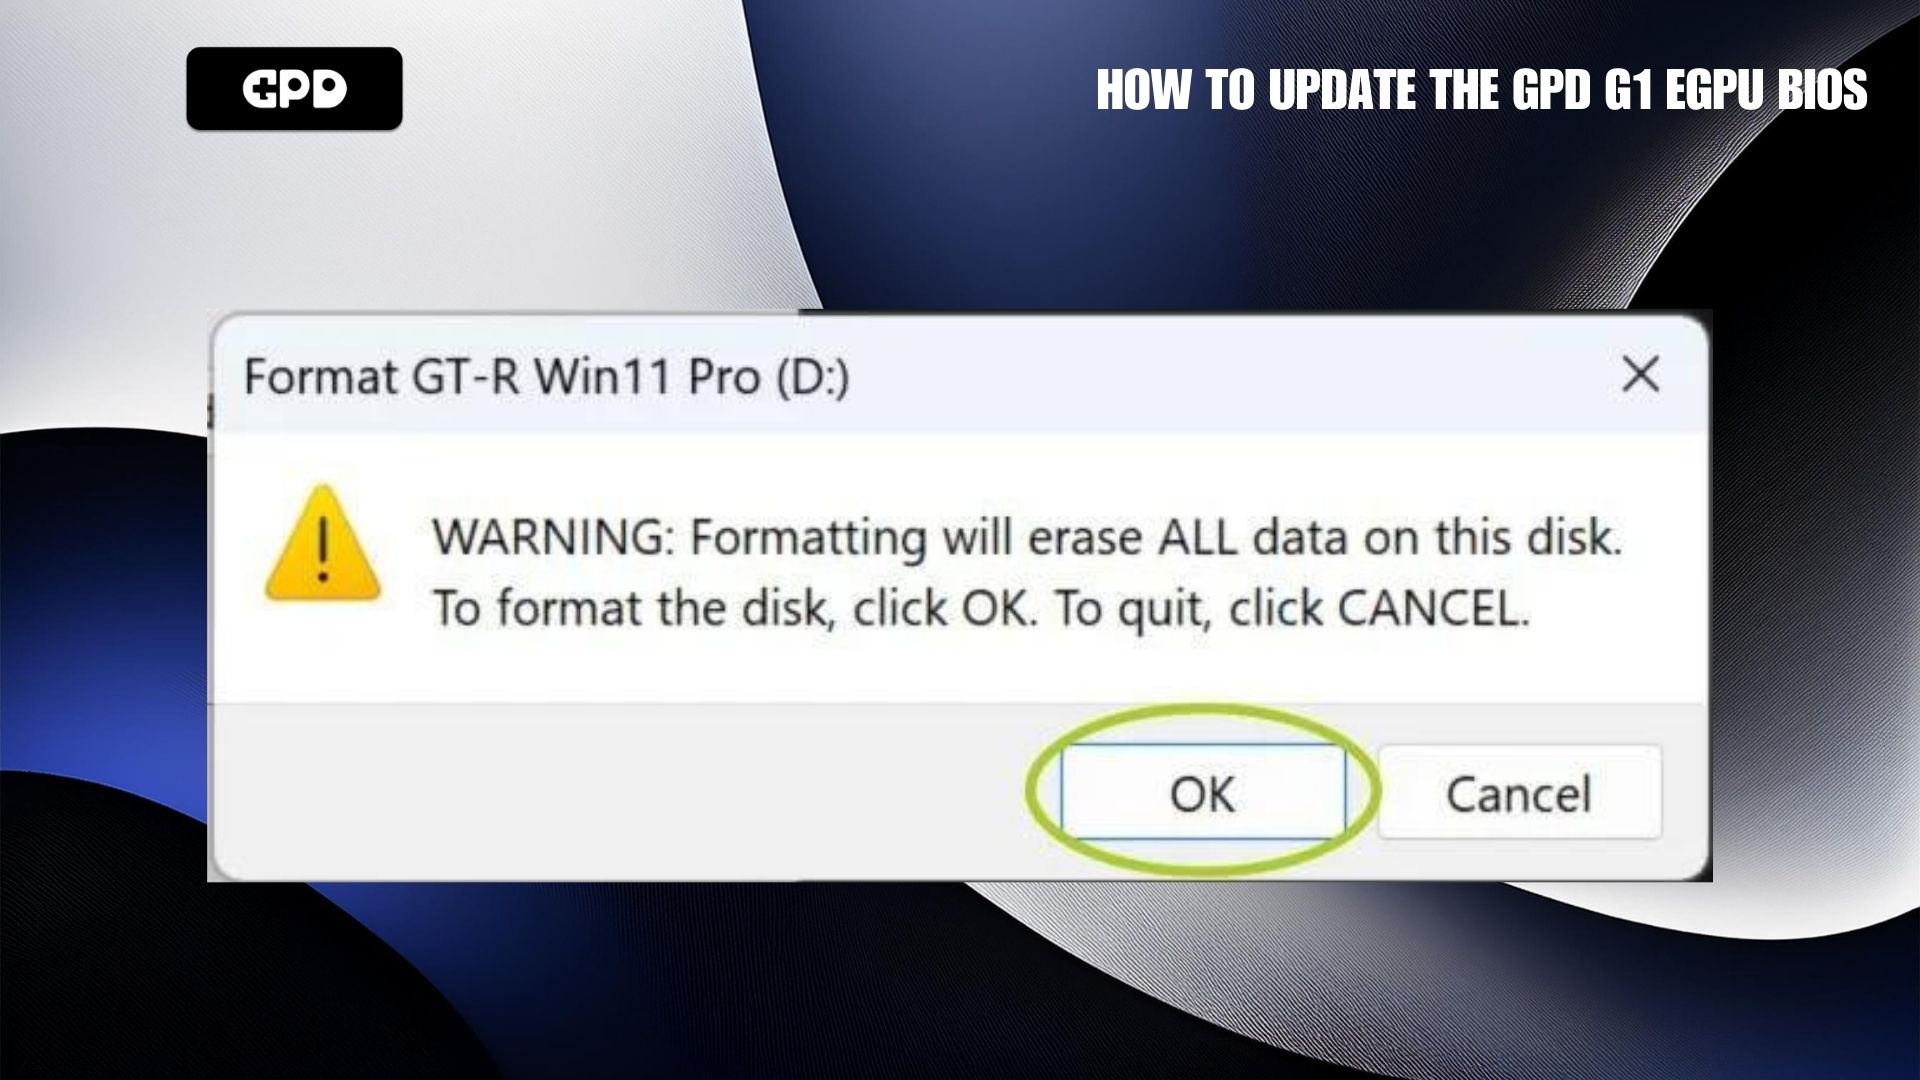
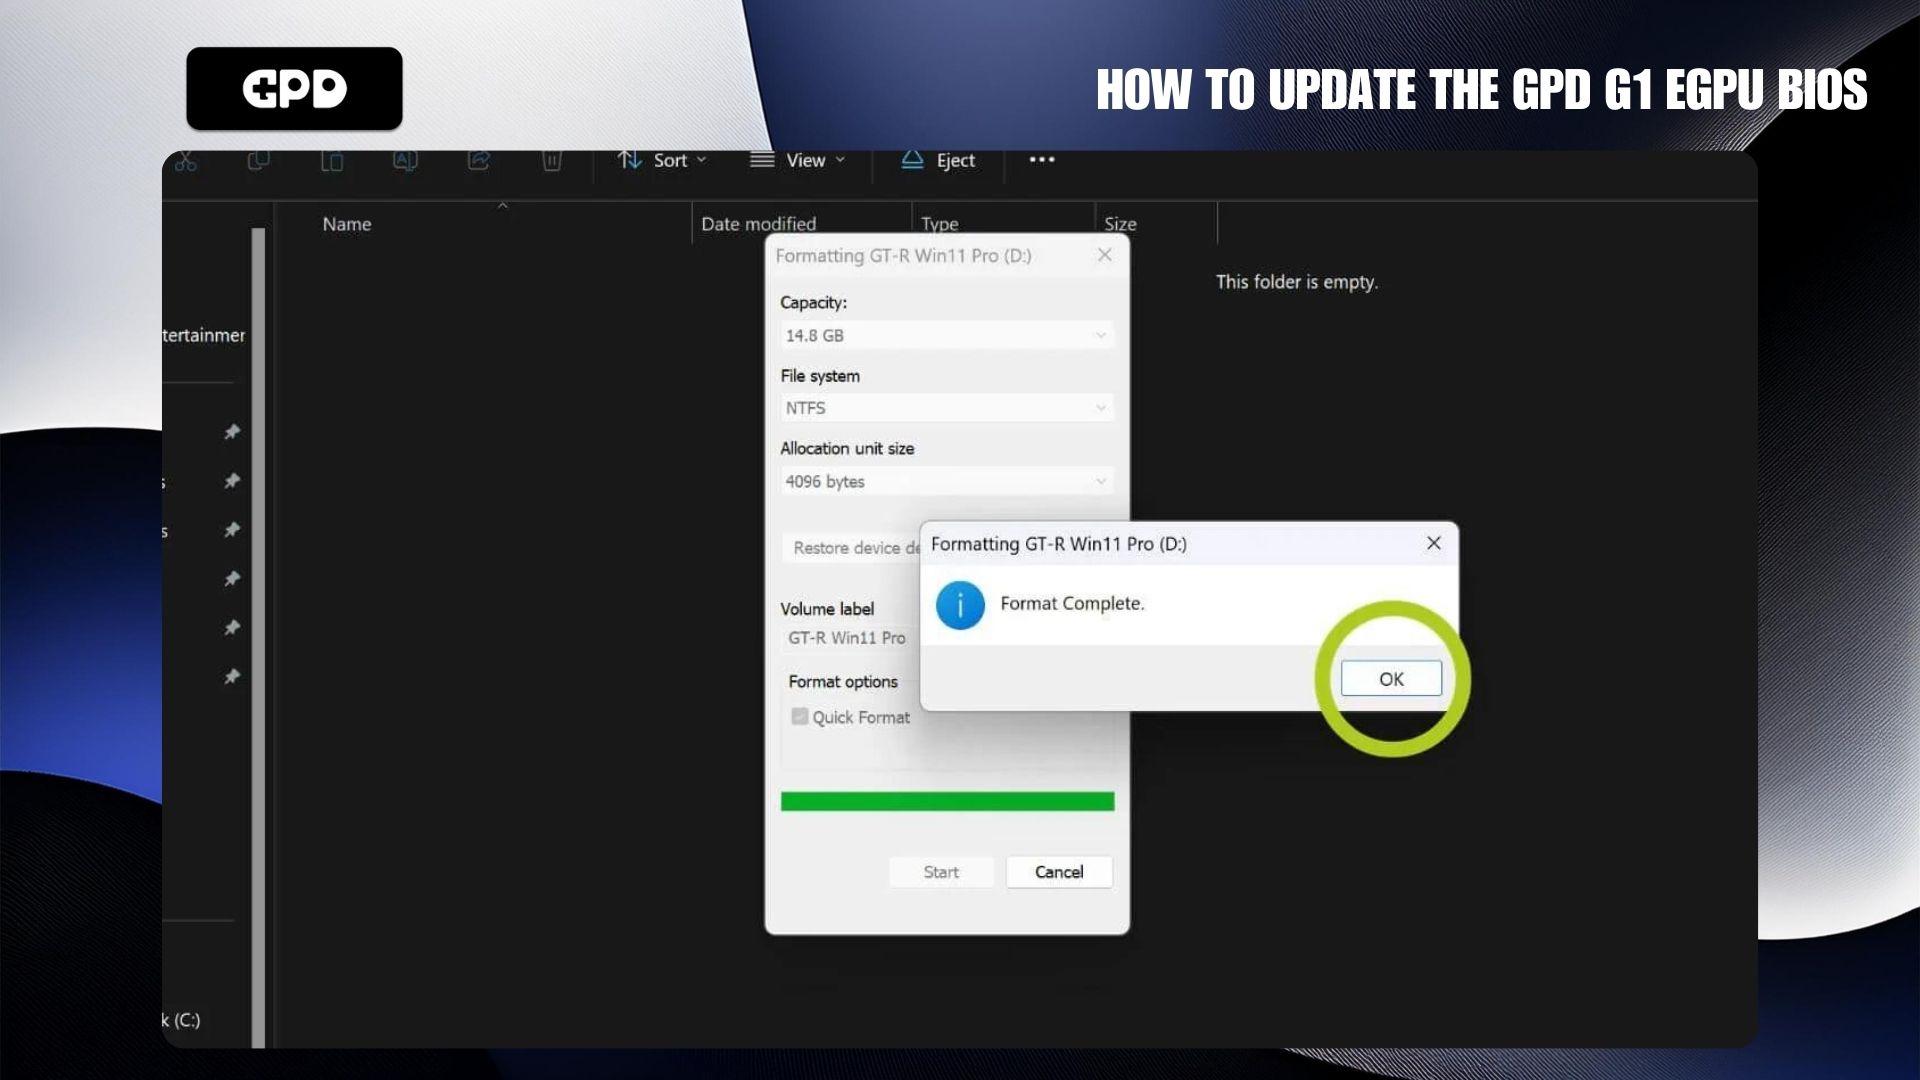
When the format window appears, set the ‘File system’ to NTFS, FAT32, or FAT16, then press ‘Start’ to begin the formatting process (refer to Image 3 below). You will be warned that all data on the USB will be erased—select ‘OK’ (see Image 4 below) to proceed. The USB will then begin formatting. Once complete, a notification window will confirm the successful format (see Image 5 below).
With the USB now formatted, you can proceed to download and transfer the appropriate firmware and driver files onto it. These files are crucial for successfully updating your GPD G1 docking station.
Download Latest Firmware & Drivers #
The next step is to download and install the latest firmware and drivers, specifically the vBIOS and AMD Graphics Drivers. Direct links to both are provided below, and we’ve also included an alternative link for the G1 2023 eGPU firmware from GPD’s website.
The vBIOS firmware files are intended for the 2023 model of the GPD G1 eGPU only. Any deviation from the instructions or negligence may render your device inoperable. GPD Store assumes no responsibility.
| FIRMWARE & DRIVERS | DOWNLOAD |
| vBIOS | Download, Alternative Link (2023 models only) |
| AMD GRAPHICS HARDWARE DRIVERS | Download, Alternative Link (2024 models only) |
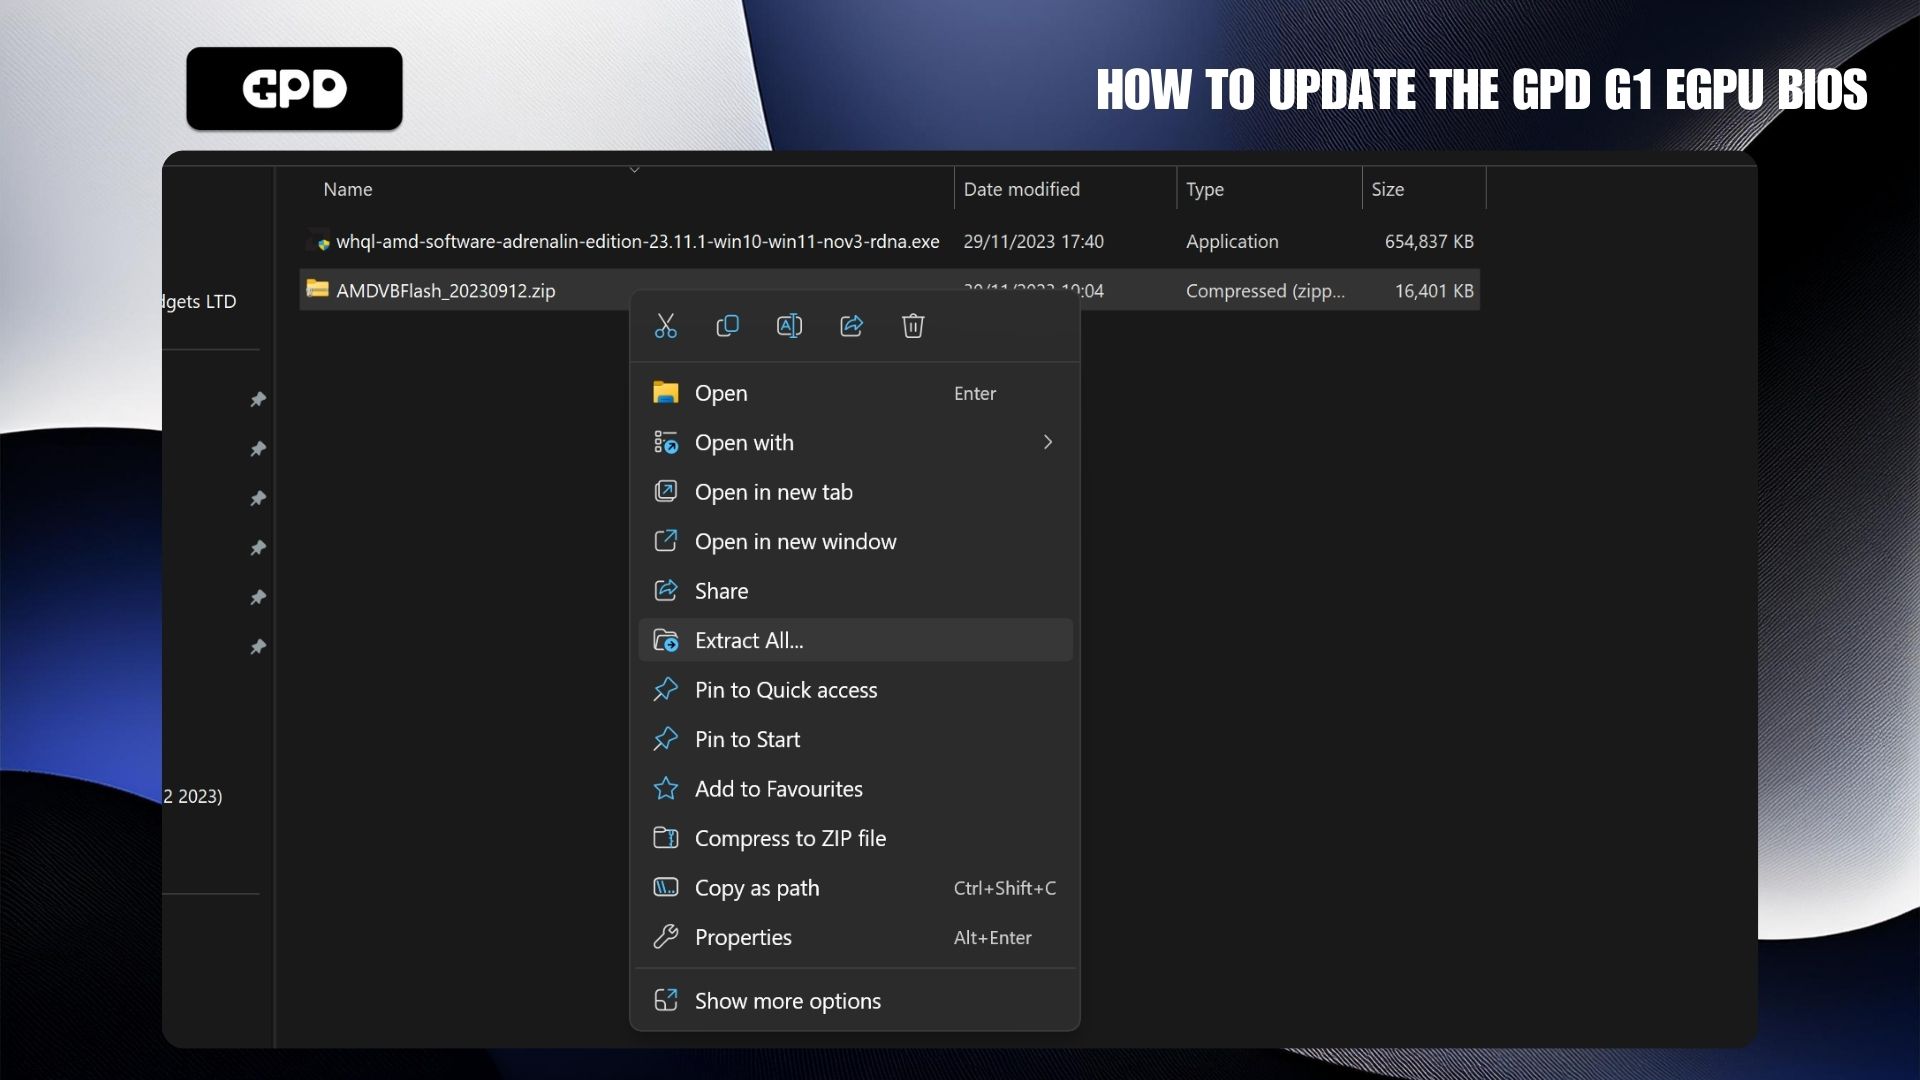
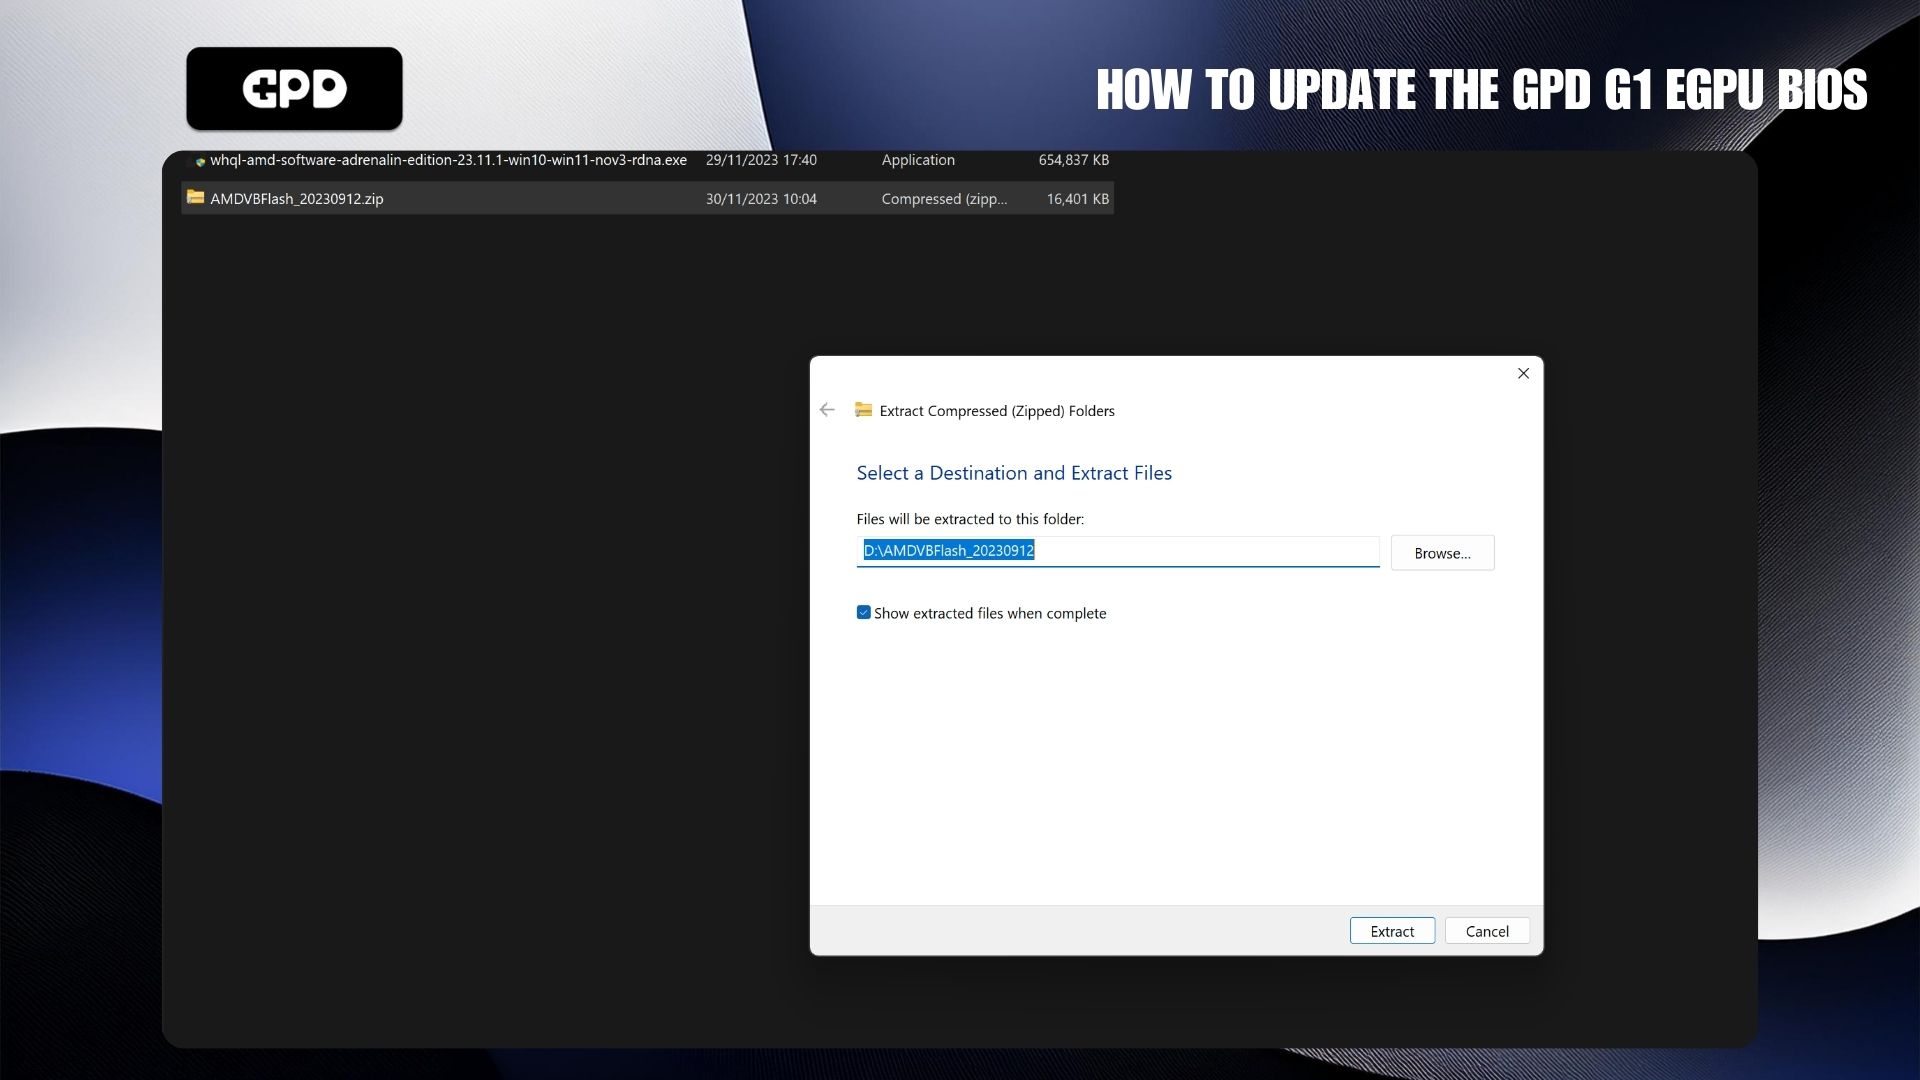
Be sure to save the firmware and driver files to your USB drive. After downloading, you may need to unzip the folders. To do this, right-click the folder and select ‘Extract All’ (refer to Image 1 below). A window will appear asking where to extract the folder—simply proceed without making any changes and let the process finish (see Images 2 & 3 below).
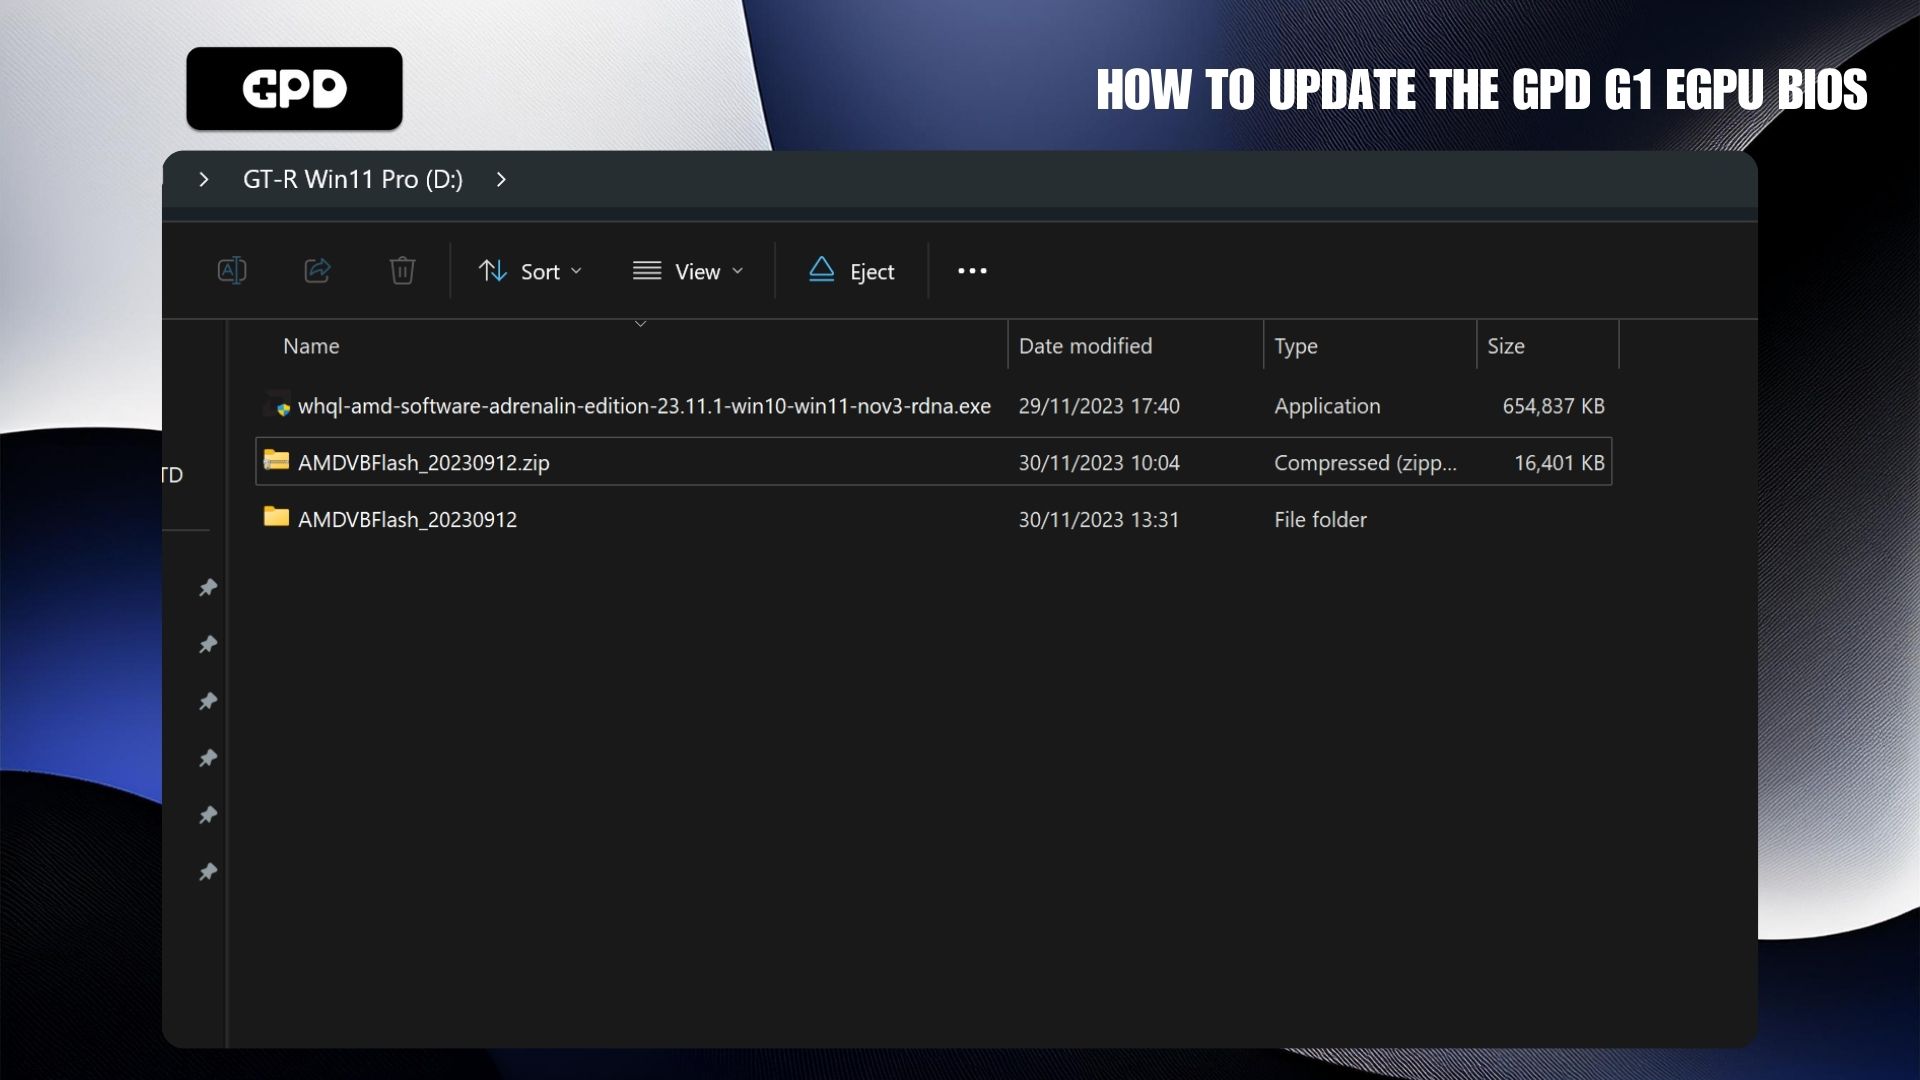
Once the extraction is complete, safely eject the USB and insert it into your handheld device.
Installing the vBIOS #
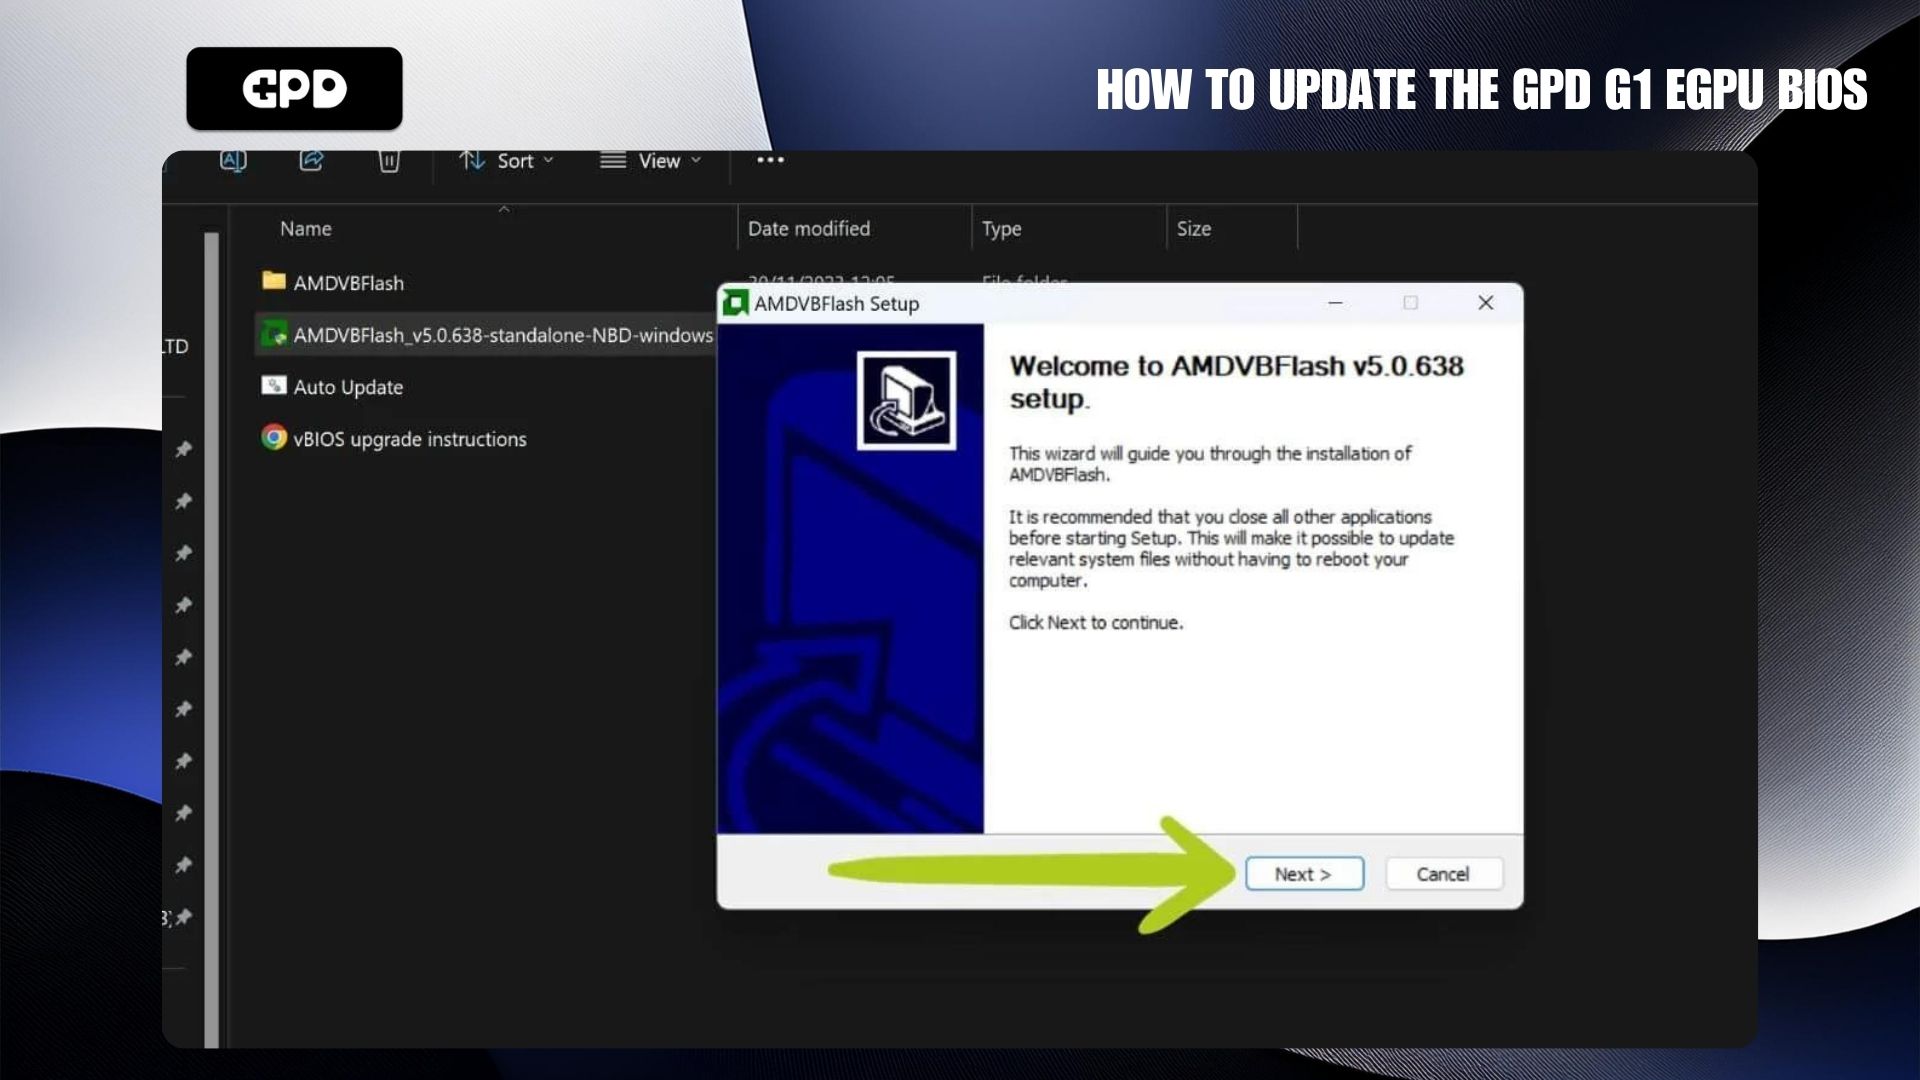
To begin the vBIOS installation, navigate to your vBIOS folder and run the file named AMDVBFlash_v5.0.638-standalone-NBD-windows.exe. Please note that the exact file name may vary depending on the version you’re using. While this executable is generally recommended for non-GPD devices, we experienced a minor issue when flashing the BIOS on a GPD Win Max 2 (2023), so it’s a good idea to run it to prevent any potential problems.
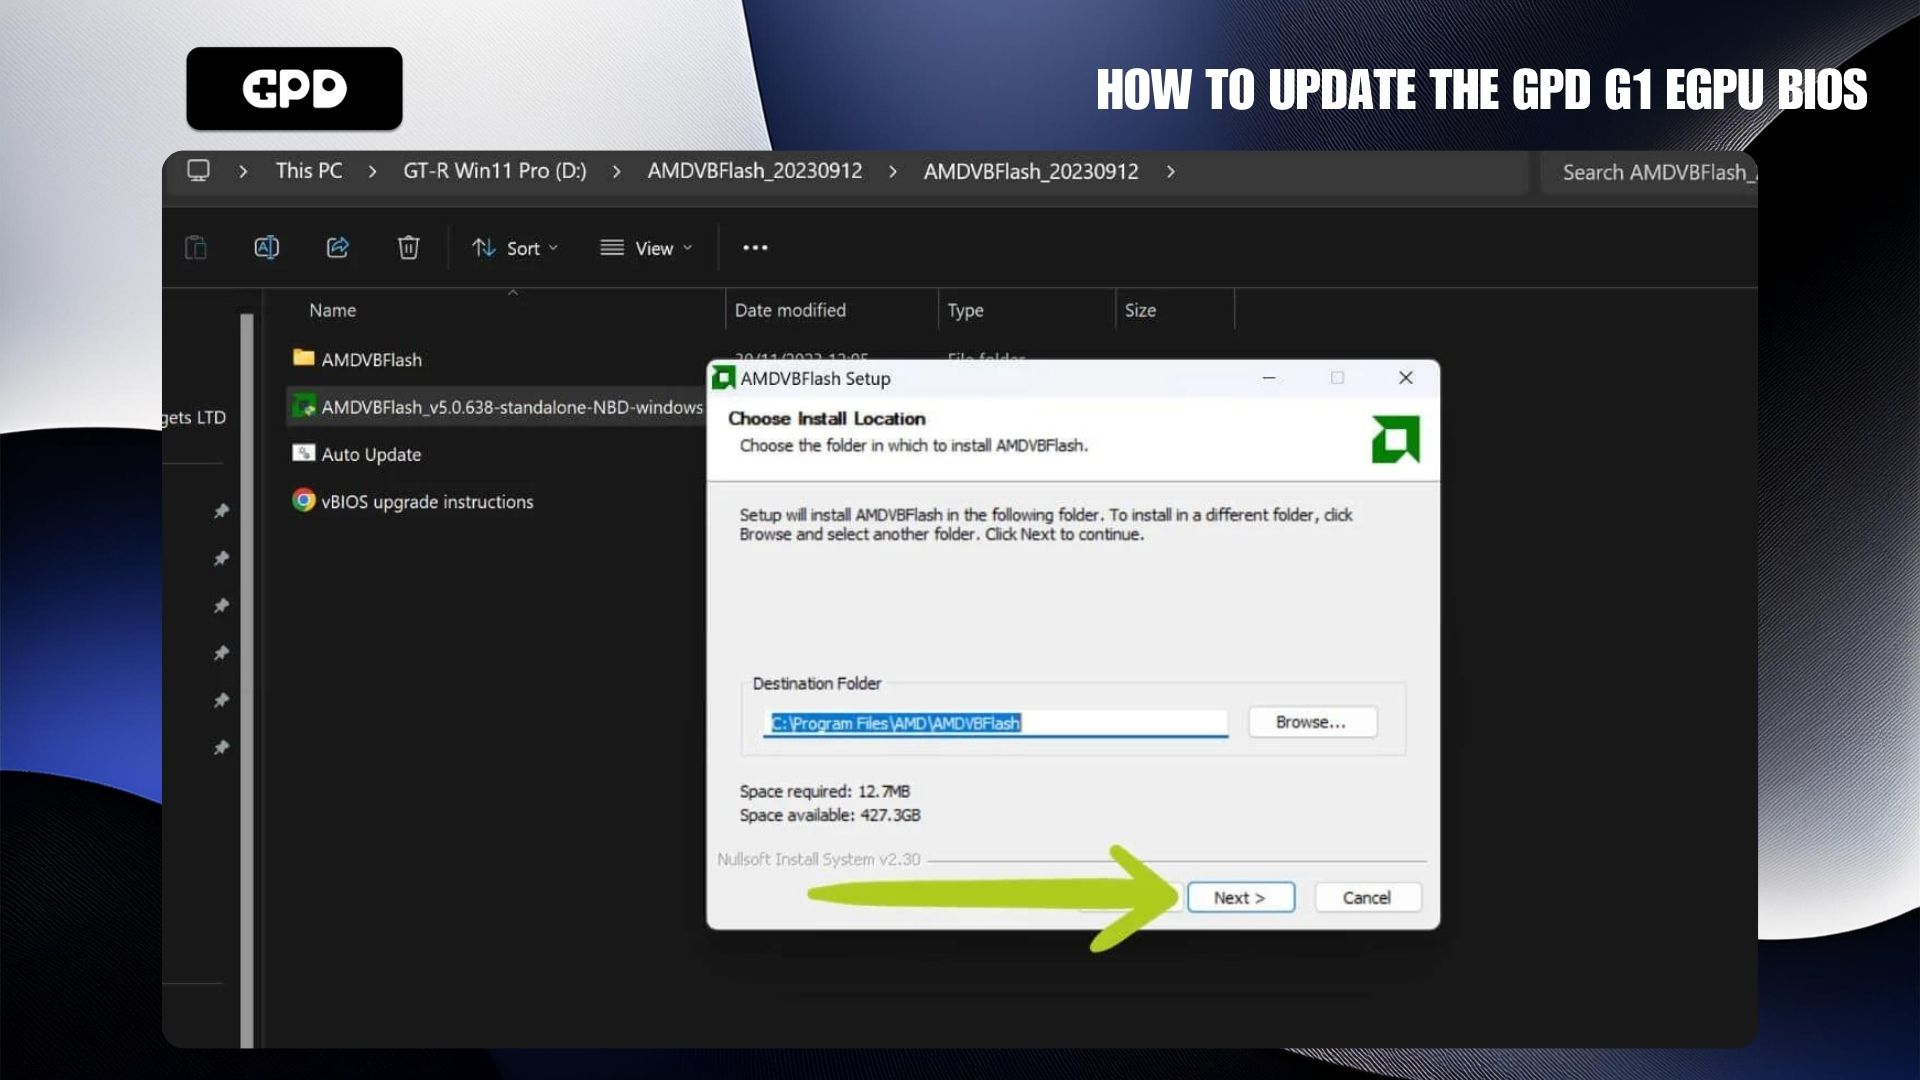
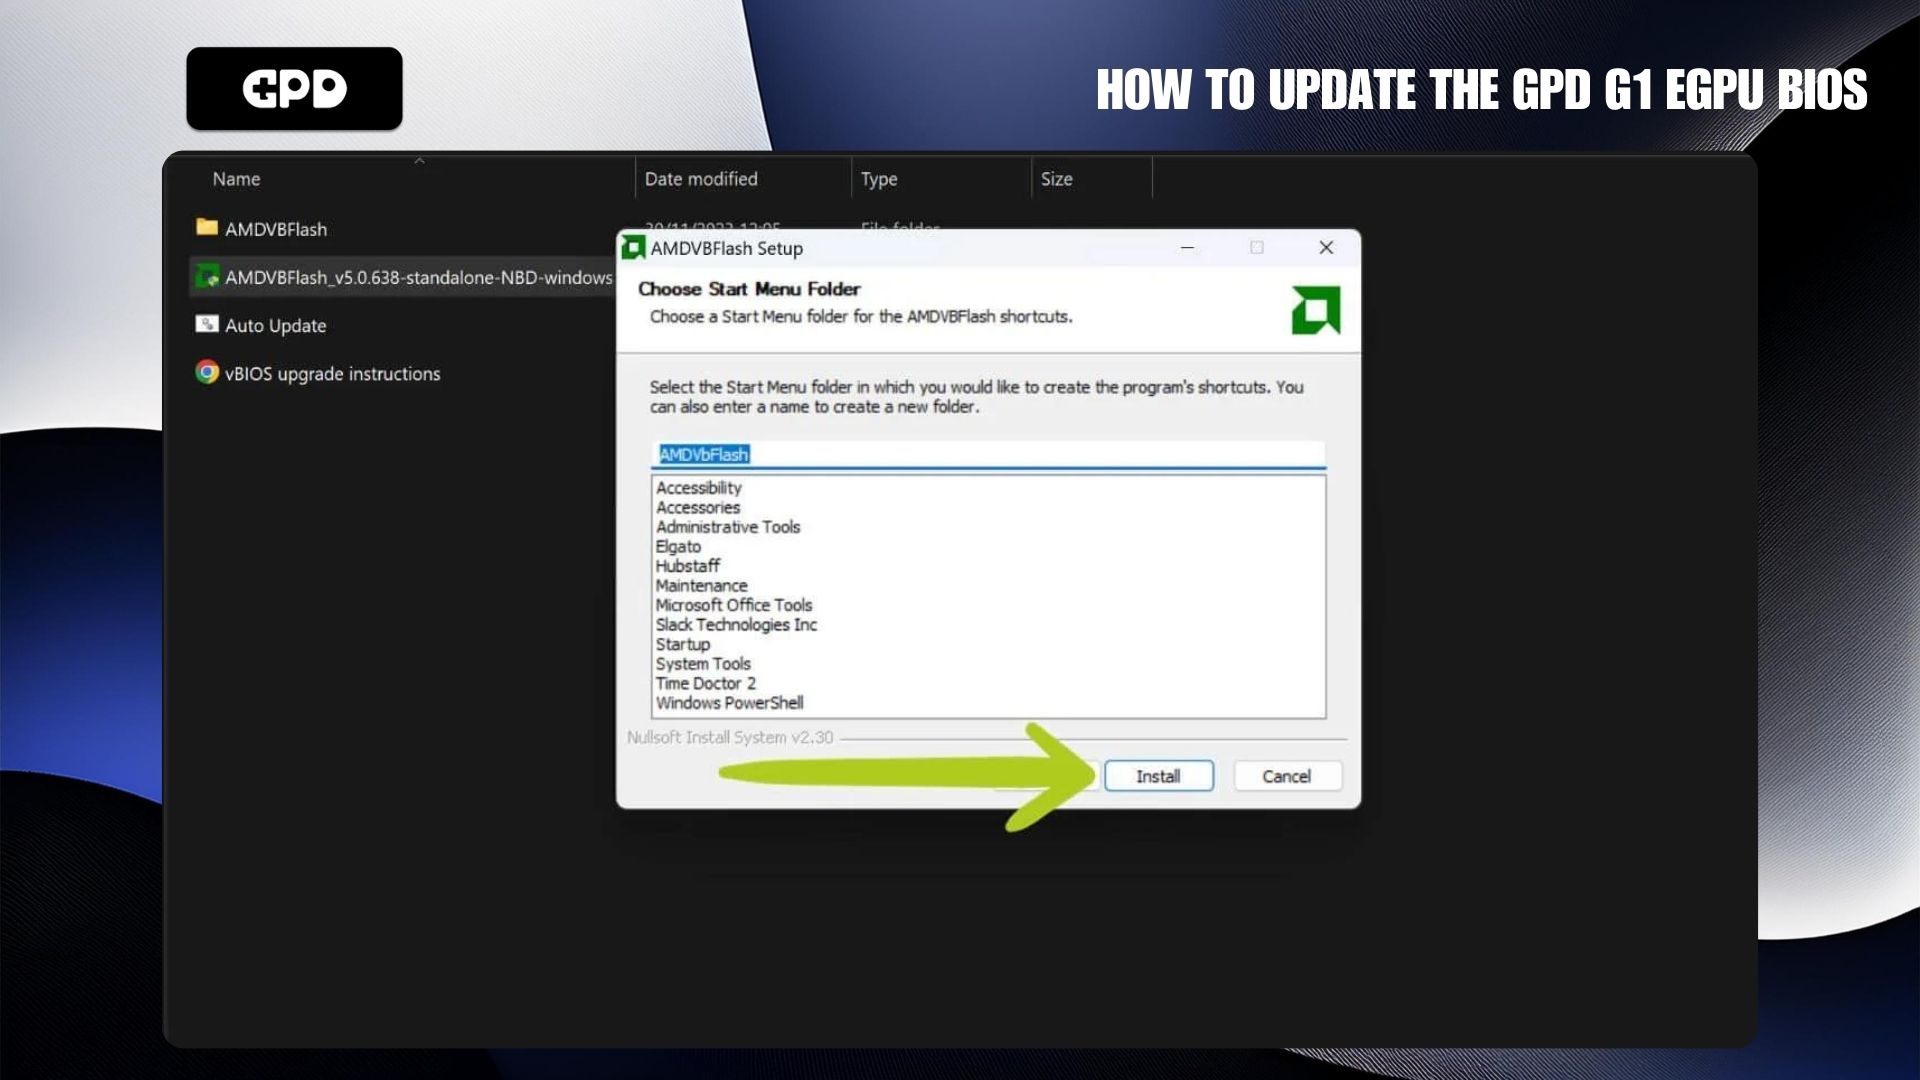
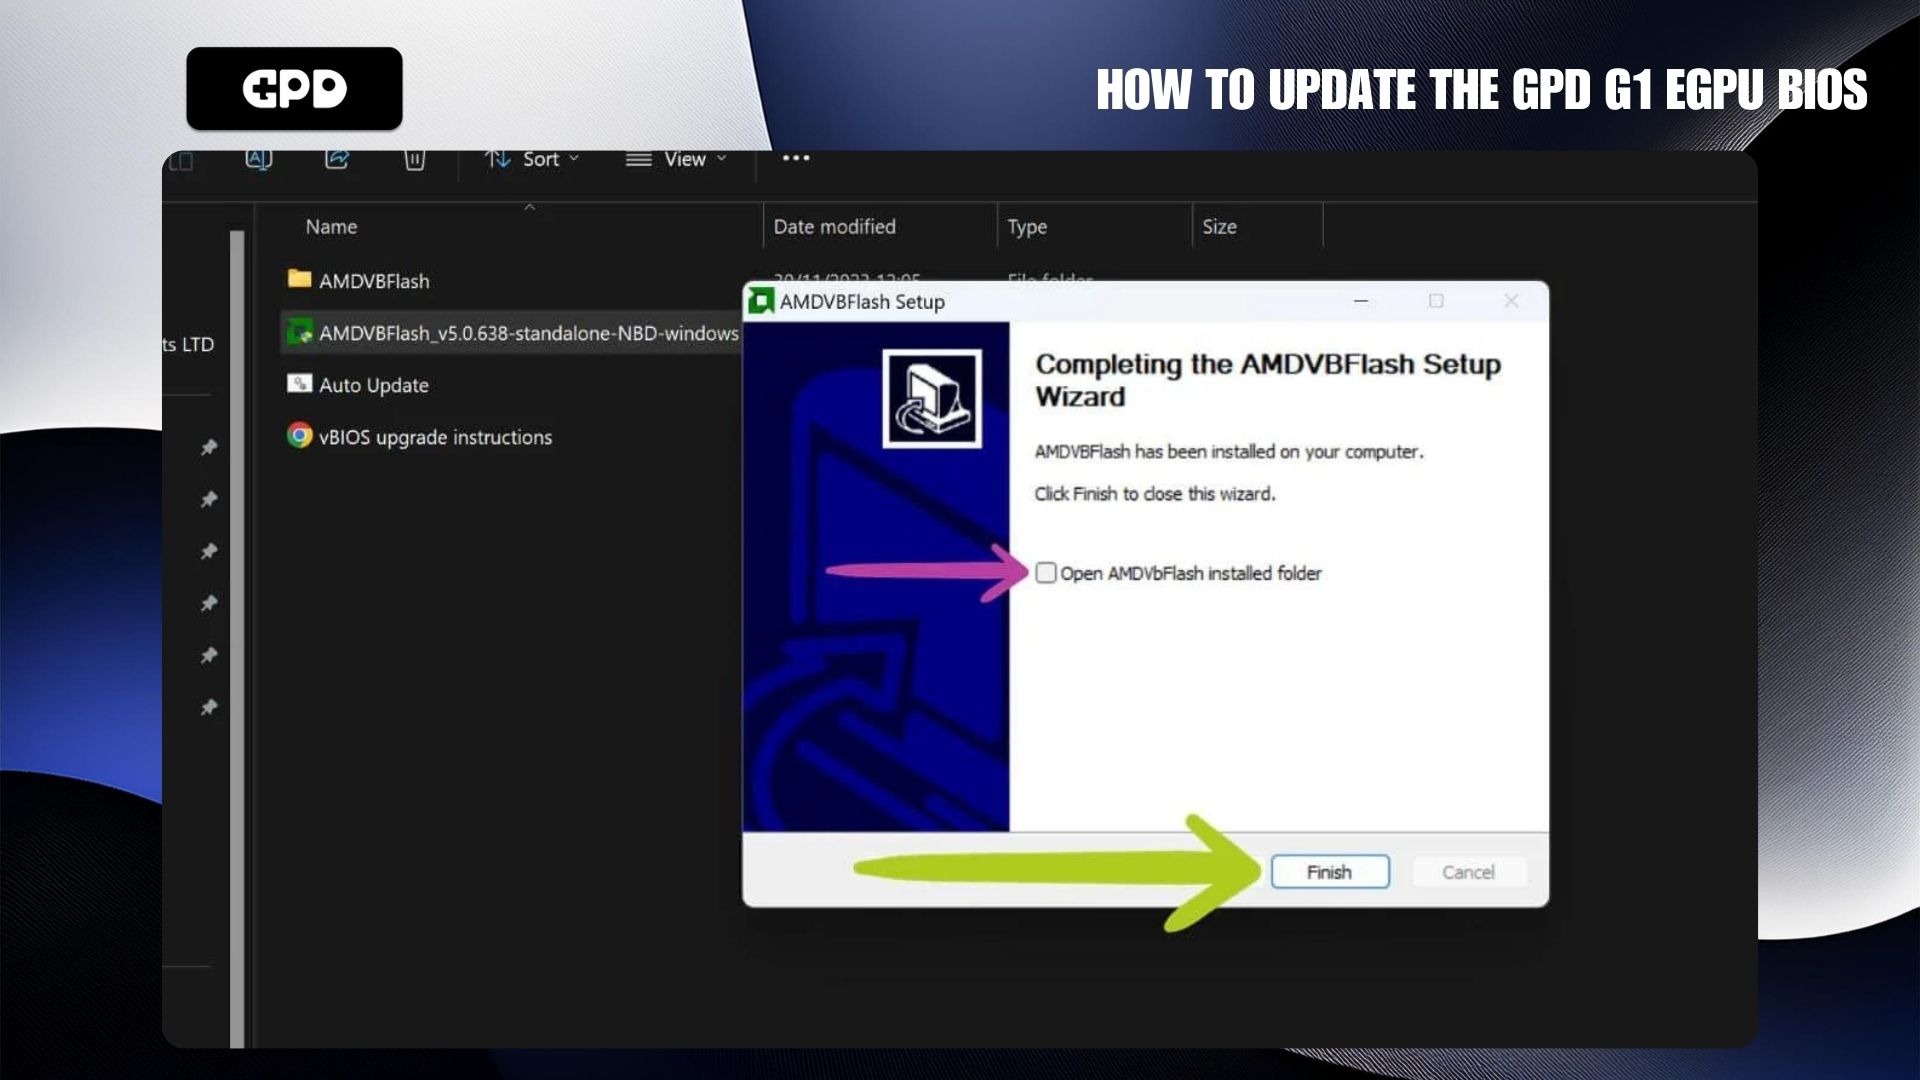
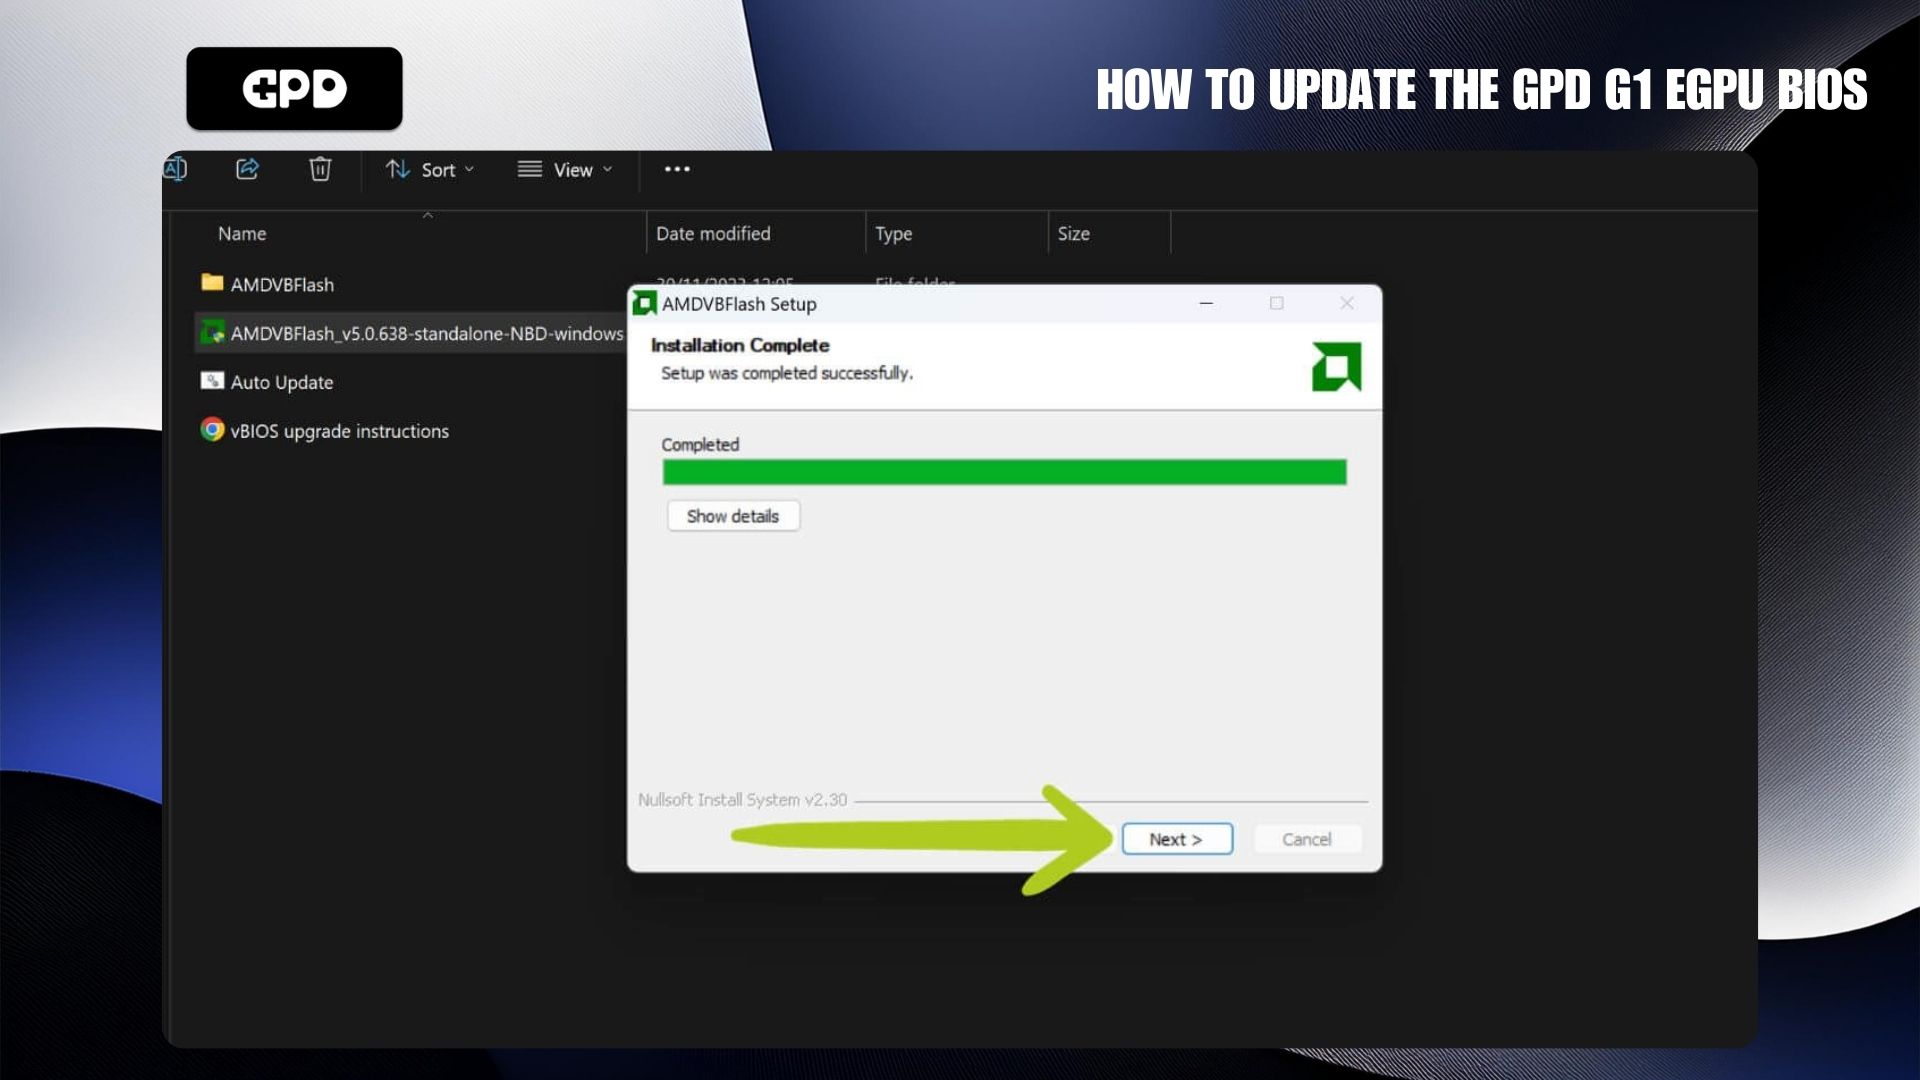
After launching the file, the setup window will appear (refer to Image 1 below). Follow the prompts until the installation begins (refer to Images 1, 2 & 3 below). Once the installation is complete, follow any on-screen instructions. Before completing the process, you can uncheck the “Open Installed Folder” option, as no further changes are needed there (refer to Image 5 below).
Changing G1 eGPU Wattage (optional) #
While updating the vBIOS, you also have the option to adjust the wattage of the GPD G1 docking station using one of several preset options. This step is entirely optional and can be skipped if desired. If you choose to skip, proceed to the next section, ‘Installing vBIOS Cont.’
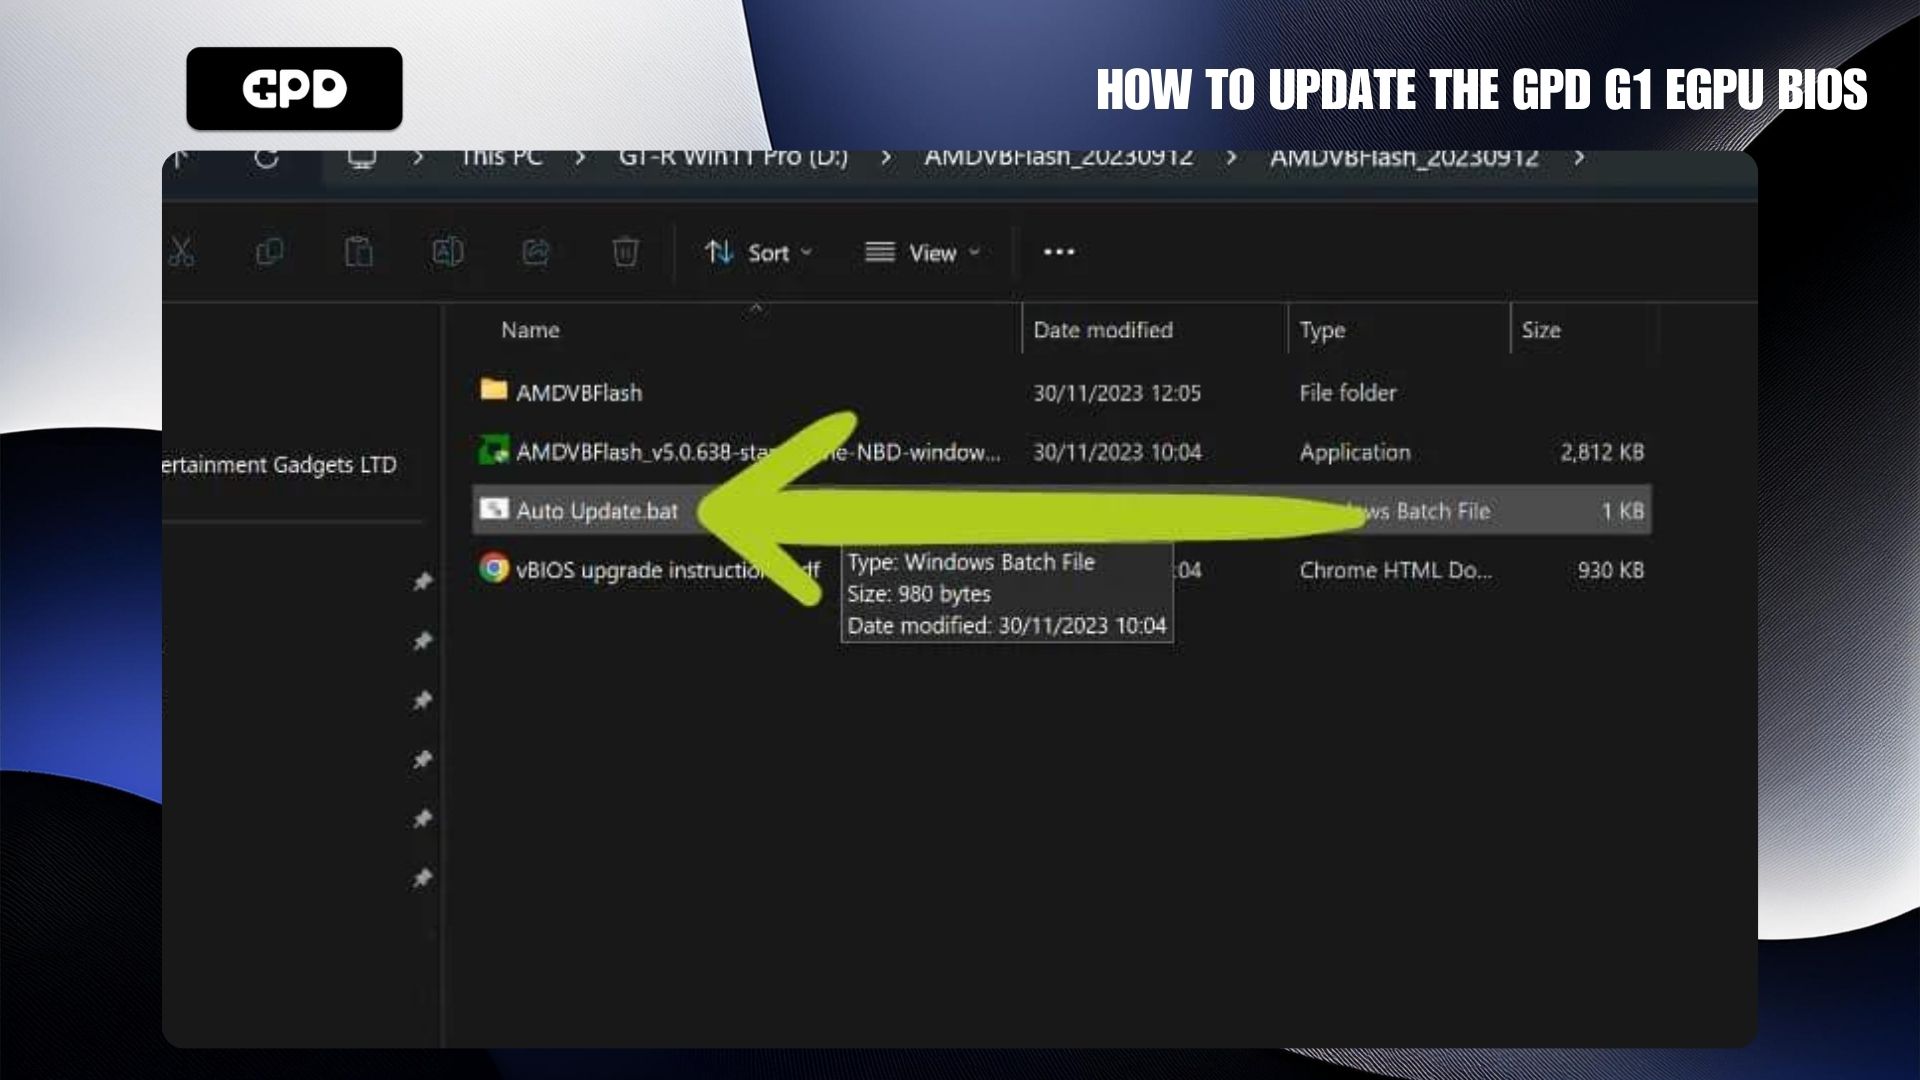
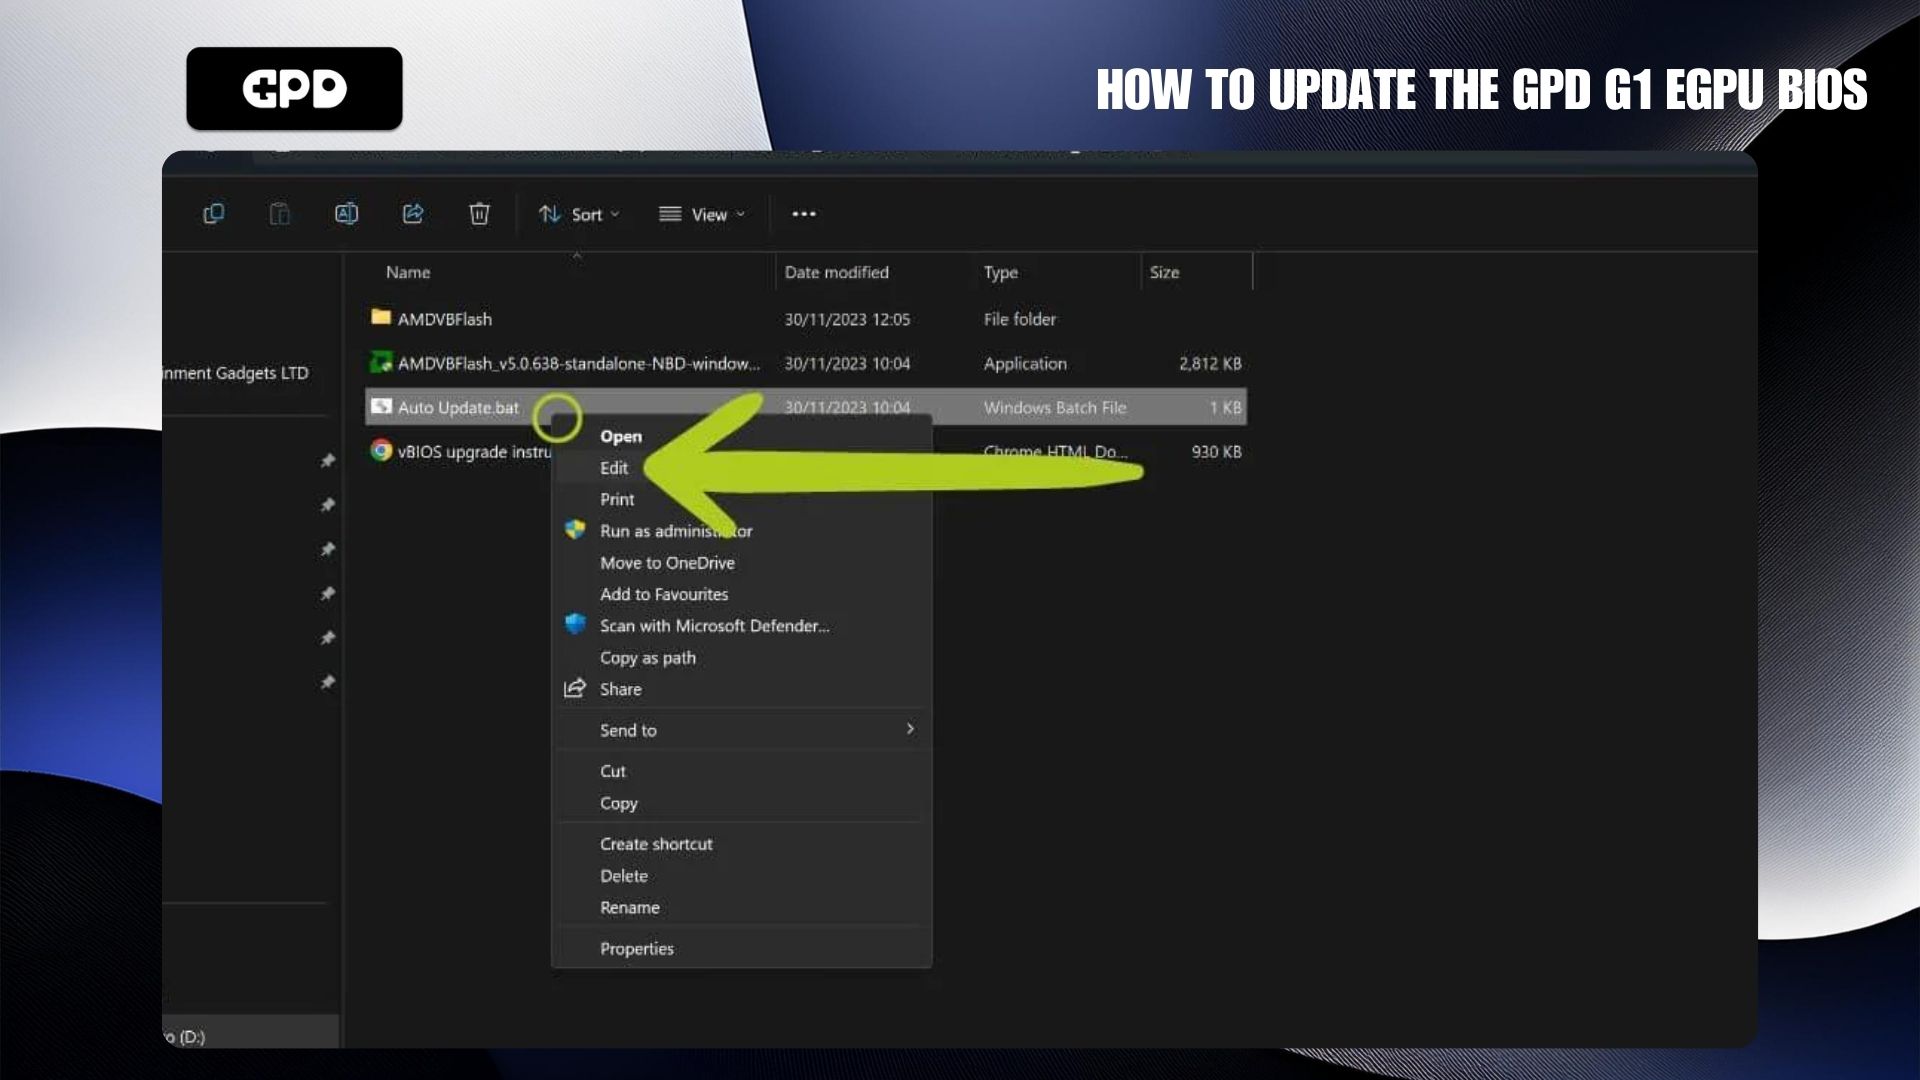
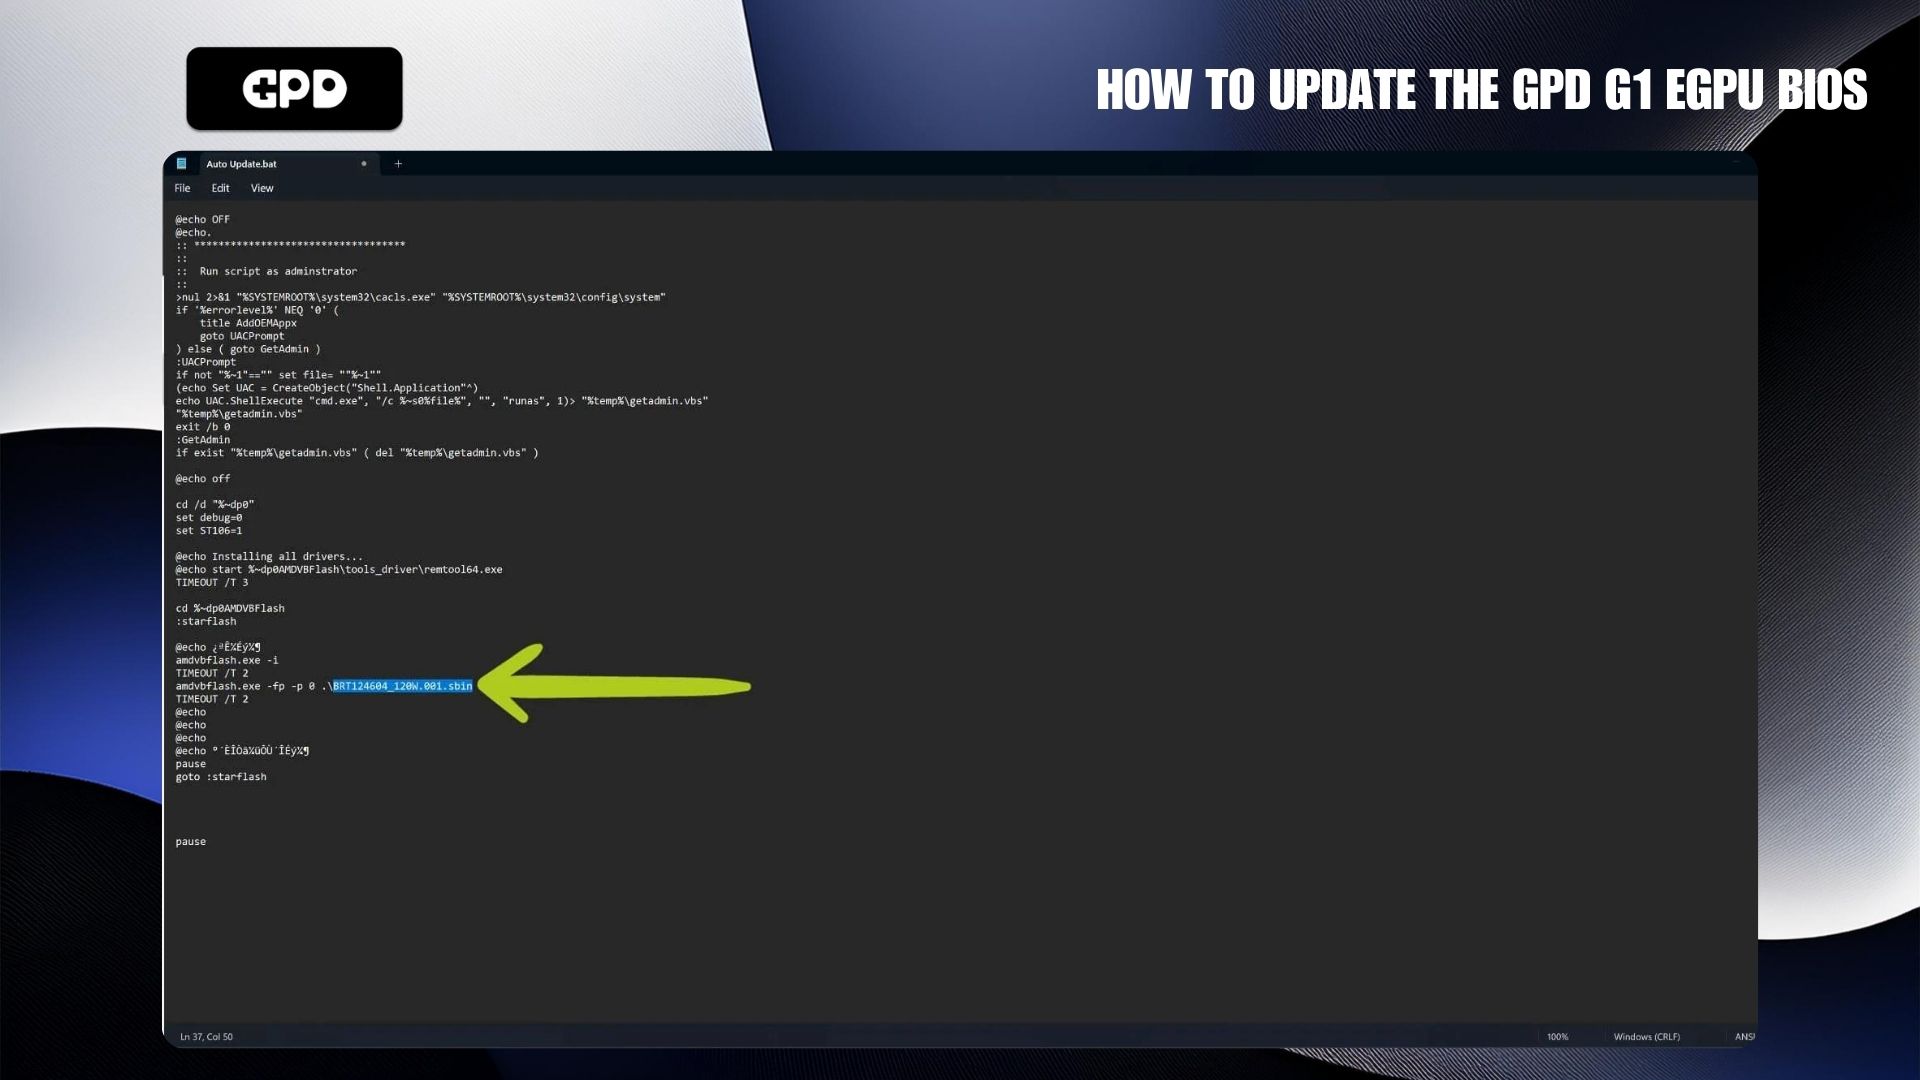
To modify the wattage, right-click the Auto Updater.bat file and select ‘Edit’ (refer to Images 1 & 2 below). This will open the .bat file in Notepad. Look for the following line:
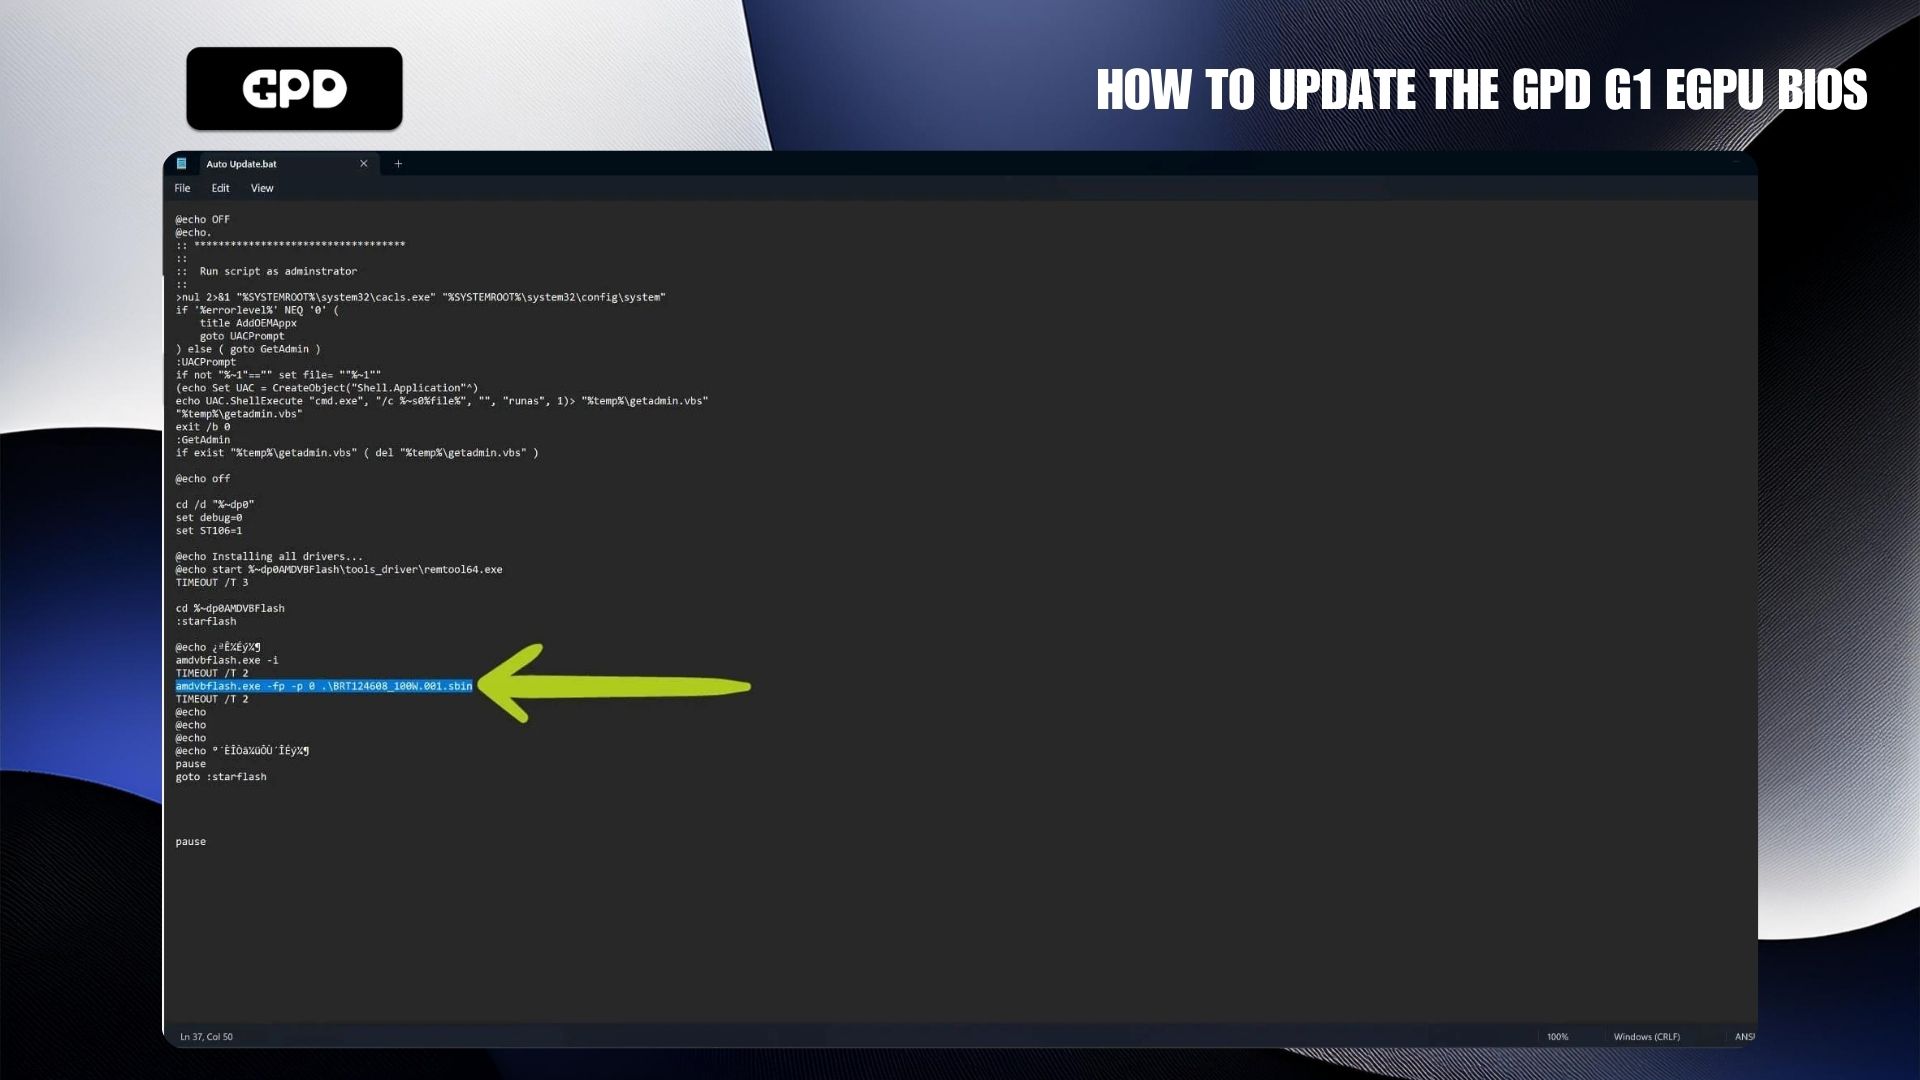
amdvbflash.exe -fp -p 0 .\BRT124608_100W.001.sbin,
which will be highlighted in blue (see Image 4 below). Change this line to one of the three preset wattage options listed below.
| WATTAGE | CODE |
| 80W | amdvbflash.exe -fp -p 0 .\BRT124609_80W.001.sbin |
| 100W (DEFAULT) | amdvbflash.exe -fp -p 0 .\BRT124608_100W.001.sbin |
| 120W | amdvbflash.exe -fp -p 0 .\BRT124604_120W.001.sbin |
Once you’ve verified that the changes are correct (refer to Image 4), save the .bat file and proceed with the installation.
Installing vBIOS (Continued) #
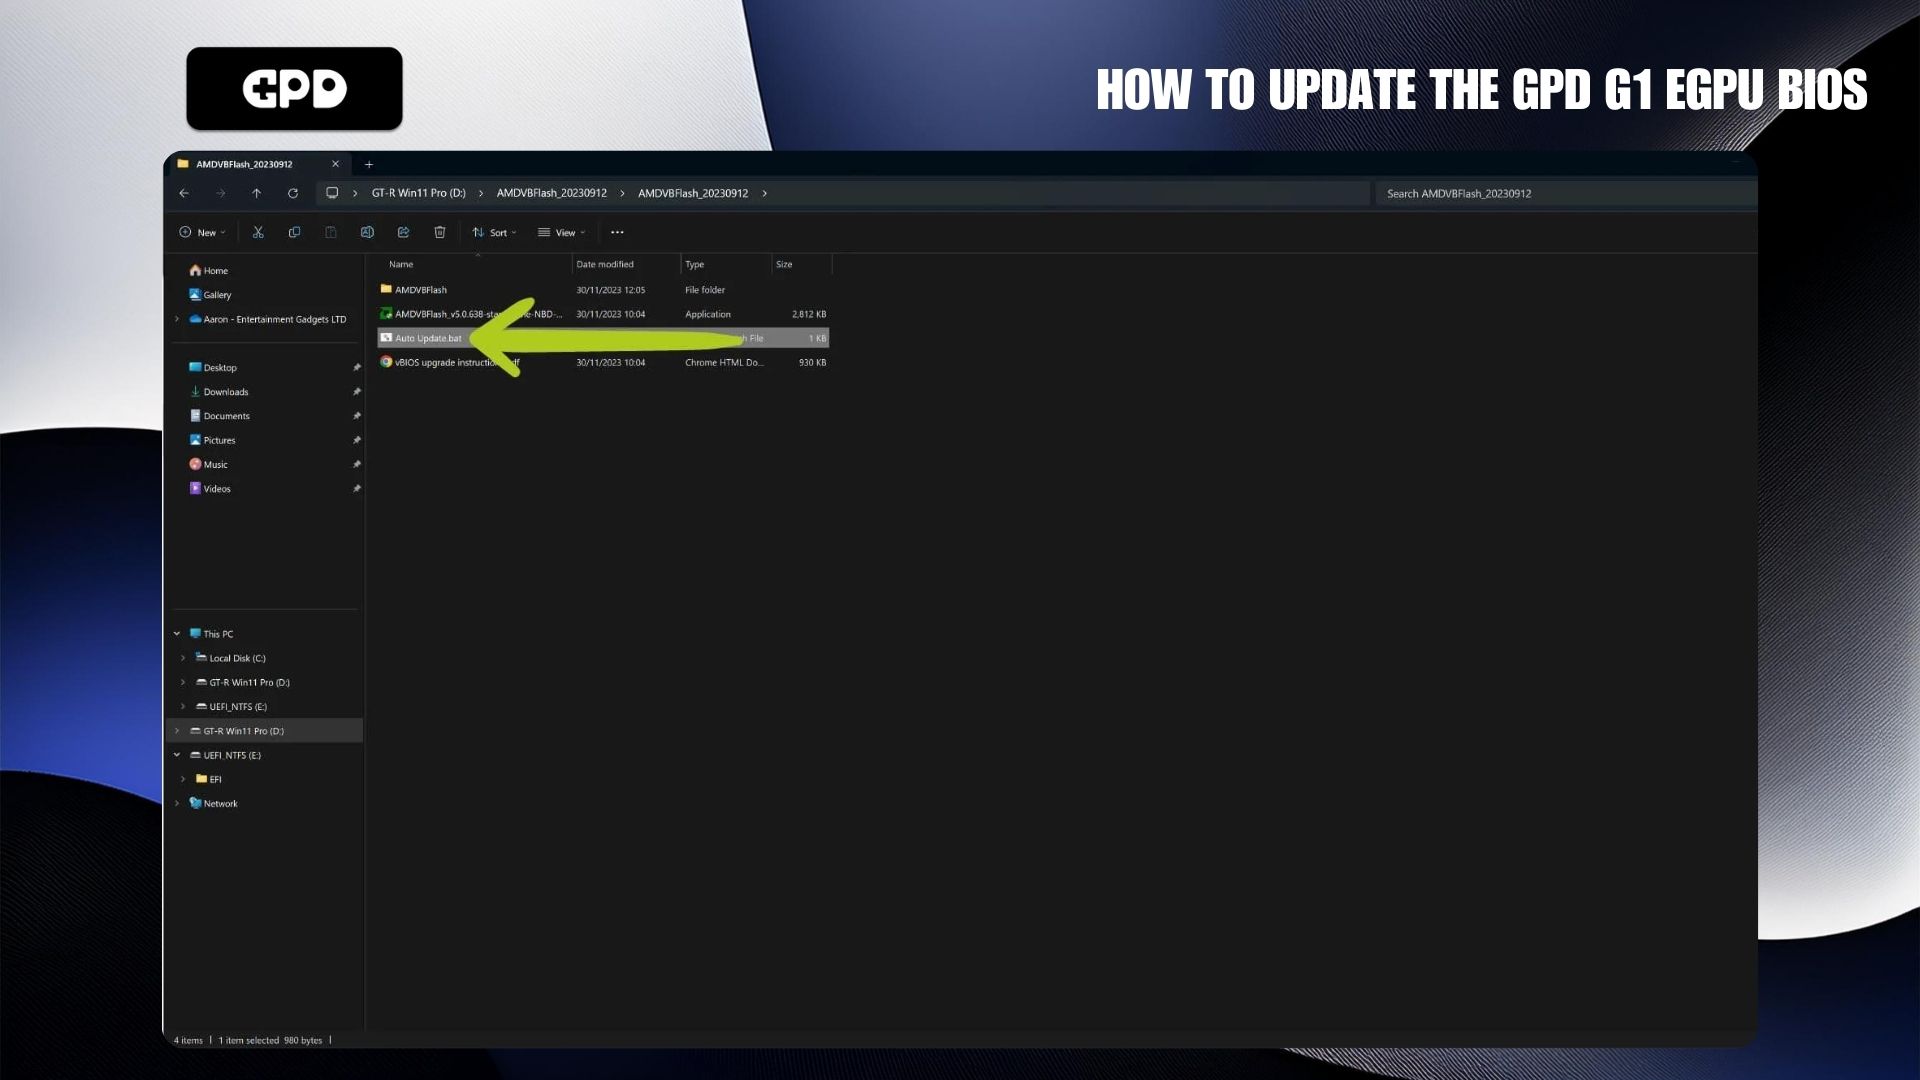
To continue with the vBIOS flashing process, run the Auto Updater.bat file (refer to Image 1 below). This will open the Command Prompt. While the screen may seem intimidating, don’t worry—you won’t have to do much!
In the Command Prompt, you will be prompted to accept the End-User License Agreement (EULA). To agree, simply type ‘y’ and press Enter, as shown in green (see Image 2 below). If everything is set up correctly, the G1 eGPU BIOS flashing process will begin automatically.
During the flashing process, it is very important not to press any keys to avoid any accidental interruptions. Once the process is complete, the Command Prompt will display a confirmation message, highlighted in green (refer to Image 2 below), indicating whether the flash was successful.

Upon completing the flashing process, a message may appear instructing you to ‘Press any key to continue...‘, which is highlighted in purple in the image above. It is strongly advised not to follow this prompt. As we experienced, pressing any key at this stage may inadvertently initiate a reflash of the vBIOS and present the same message afterwards. Creating a loop as it does not tell you how to proceed. To avoid this, simply close the command prompt once the flashing process is complete.
Successful Flash #
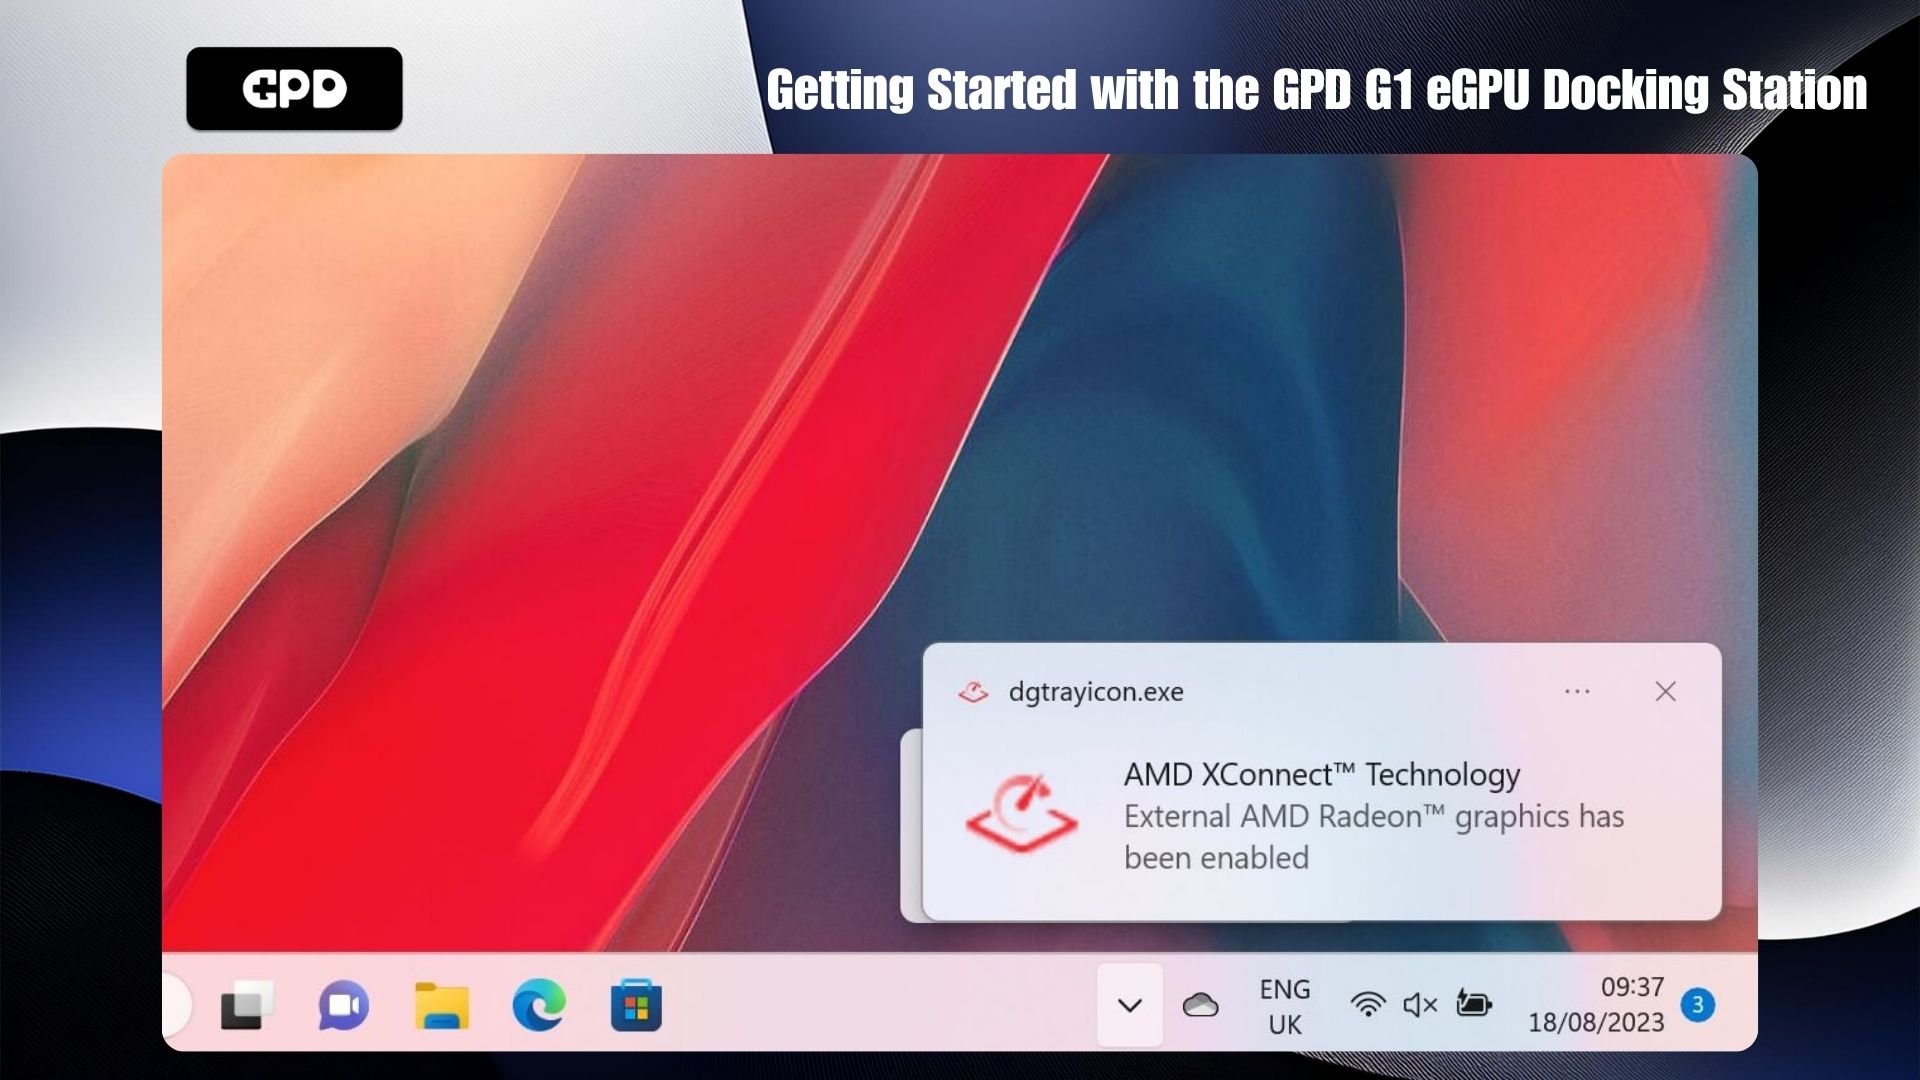
After a successful flash, close the Command Prompt and restart your G1 eGPU by turning it off and back on using the power button. The next step is to verify that your connected device recognizes the GPD eGPU. You may receive a notification when the G1 docking station is connected or disconnected (see Image 1 for reference). Alternatively, you can check the connection status in the Device Manager.
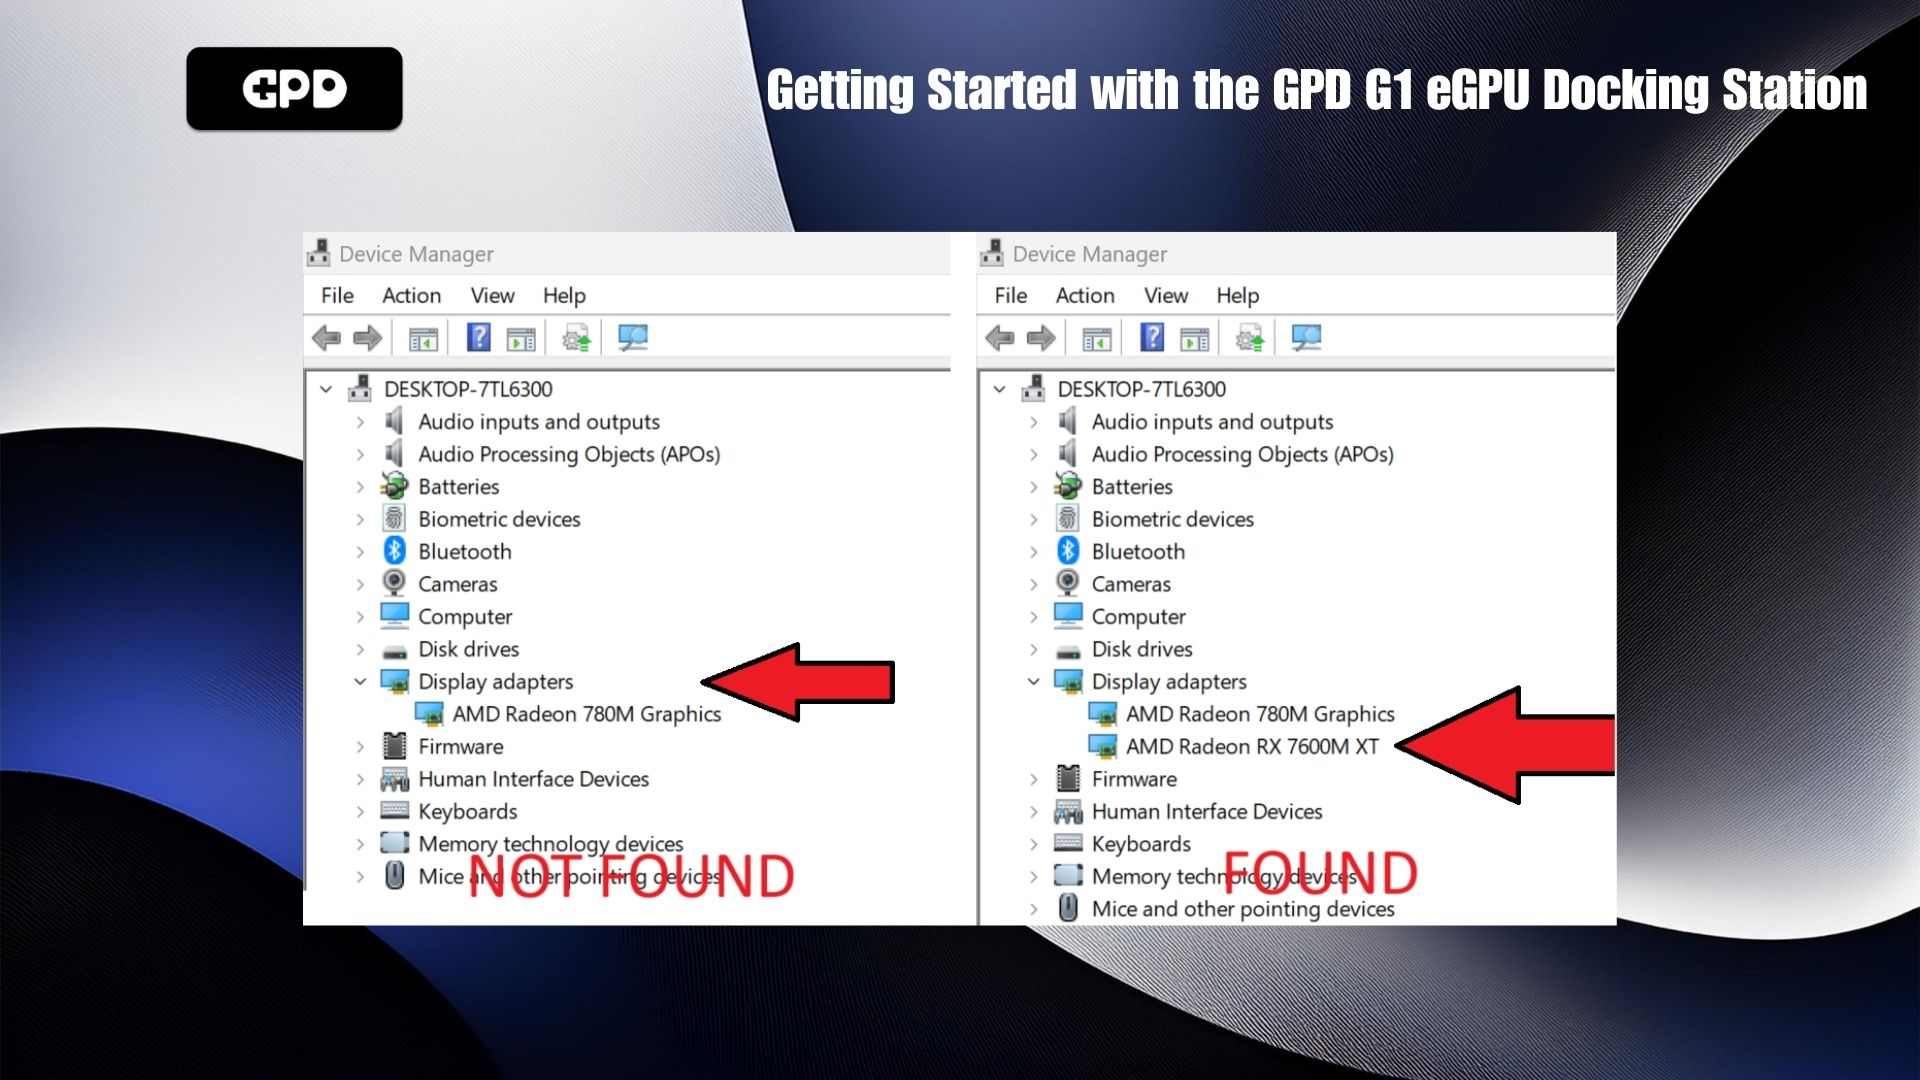
In Device Manager, the G1 eGPU should appear under Display Adapters as AMD Radeon RX 7600M XT (refer to Image 2 below). If the GPD G1 dock is not recognized or if there’s a ⚠️ warning symbol next to it, the AMD Graphics Drivers might need to be installed or updated. Even if you’ve previously installed or updated the drivers, it’s a good idea to do it again after completing the BIOS flash.
Installing AMD Drivers #
We recommend following our detailed guide for correctly installing the latest AMD Graphics Drivers here. This guide is essential when installing or updating the drivers for your G1 eGPU docking station.
Once the AMD driver installation is complete, a device restart is required to activate the new drivers. After rebooting, it’s important to verify in Device Manager that the G1 docking station is connected and working properly. The GPD G1 eGPU should appear as AMD Radeon RX 7600M XT (refer to the image below).
By following the steps outlined in this guide, you should now have successfully installed the latest BIOS for your G1 docking station and resolved any related issues. These procedures are crucial to maintaining optimal performance and reliability for your G1 eGPU. We hope this guide has been helpful in guiding you through the update process and troubleshooting any potential issues.
If you encounter further challenges or have additional questions, feel free to consult this guide again or reach out to our Customer Support team via the Contact Us page. Enjoy gaming with your newly updated GPD G1 eGPU!
Unfortunately, as soon as I accept the licenses in the Auto Update.bat, I get a blue screen saying “SECURE_PCI_CONFIG_SPACE_ACCESS_VIOLATION”.
I ran the standalone.exe before and also made sure I used the v2023 drivers as I have the GPD from 2023.
Lenovo Thinkpad E16 Gen2, Windows 11, fresh installation, Intel Ultra 7 connected via Thunderbolt 4.
I already tried to disable “Storage Integrity” in the WIndows Security Settings, but still no success.
How can I resolve this?
If you purchased it from us at GPD Store please contact our customer service at [email protected], with you order number and some details on the issue. They will be able to investigate this further. Thanks.