In this guide, we will walk you through installing and setting up the RetroArch emulator frontend on Windows-based devices, such as GPD handheld gaming PCs and mini laptops. You’ll learn how to download and install RetroArch, set up emulator cores, add new ROMs to the game browser, and much more!
How to Download RetroArch #
To get RetroArch on your Windows device, head over to the official homepage at https://www.retroarch.com.
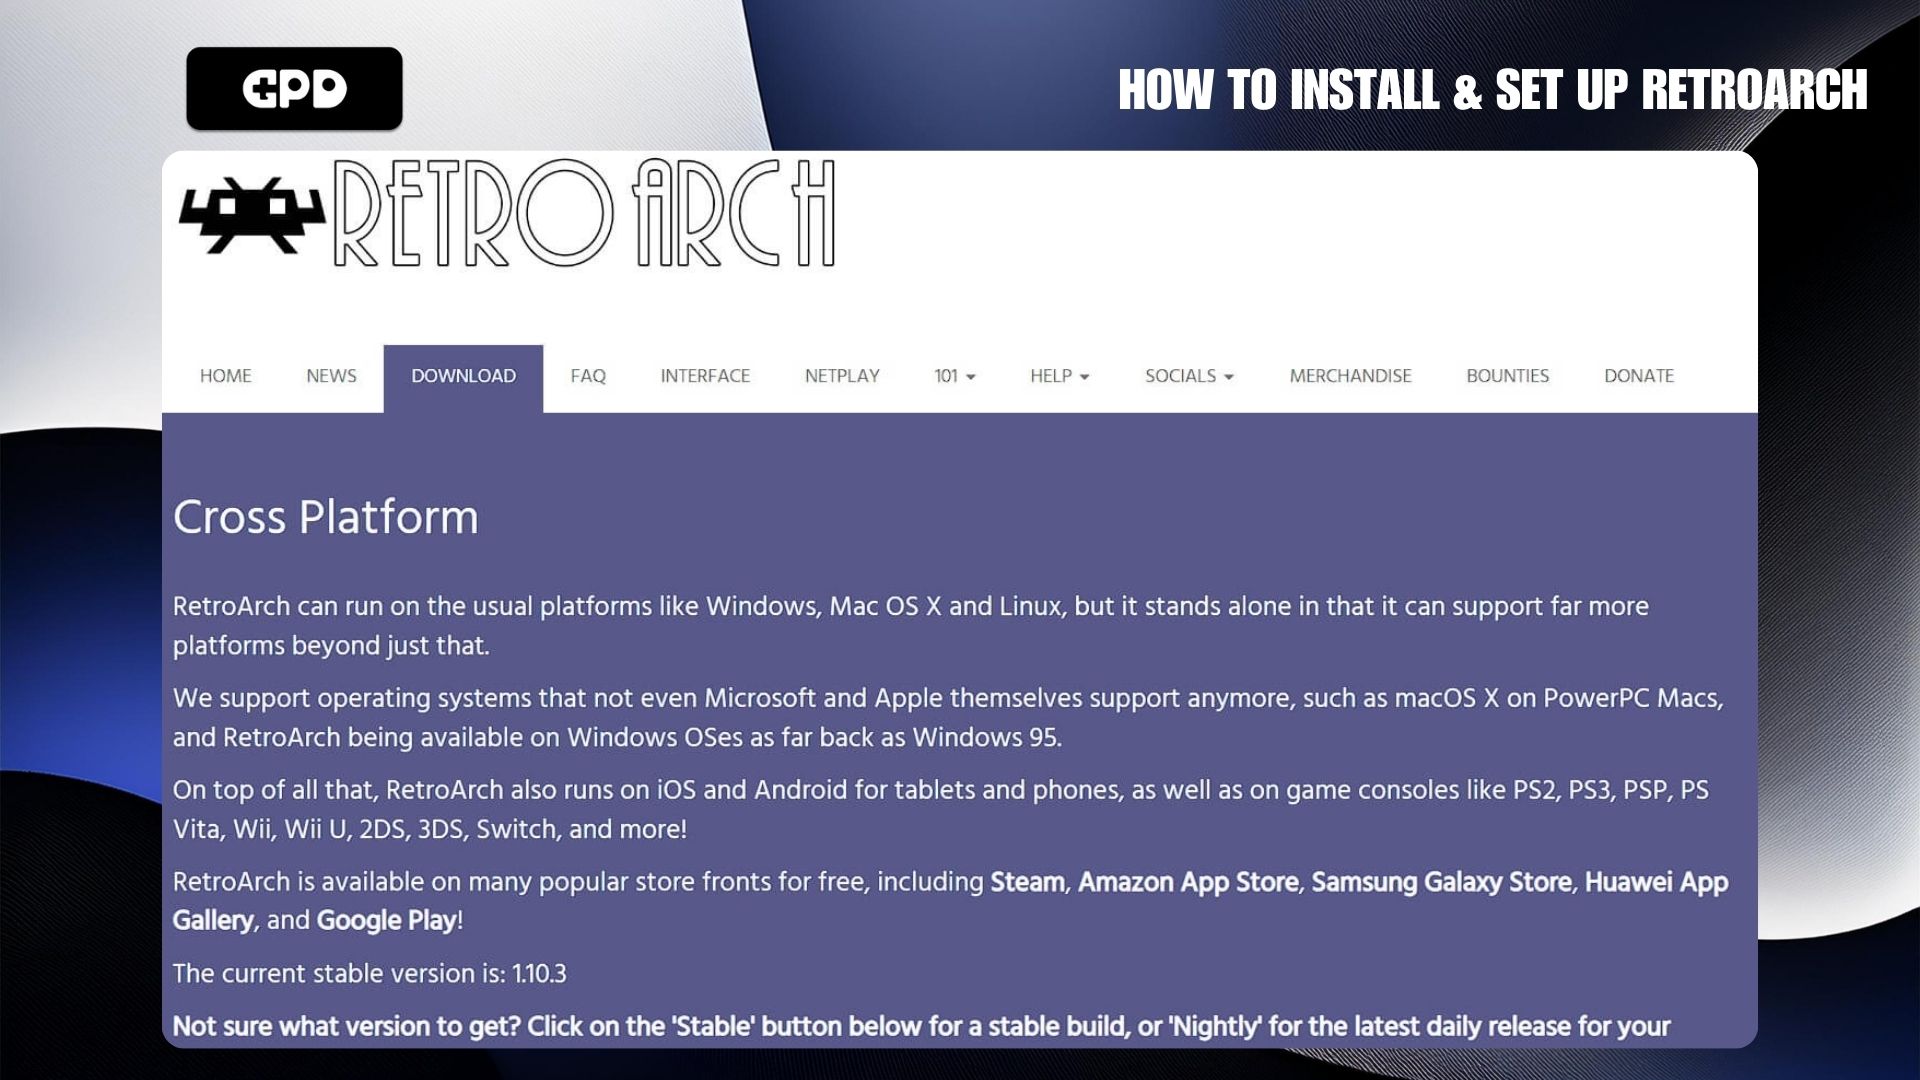
You can choose between the latest Nightly build, which may include some bugs, or the Stable version, which is slightly older but more reliable. Once the file is downloaded, open it and follow the installation instructions provided.
How to Set Up RetroArch #
Updating Configuration Files #
The first step in setting up RetroArch is to update the configuration and data files. To do this, go to the Settings menu from the main screen and select Online Updater.
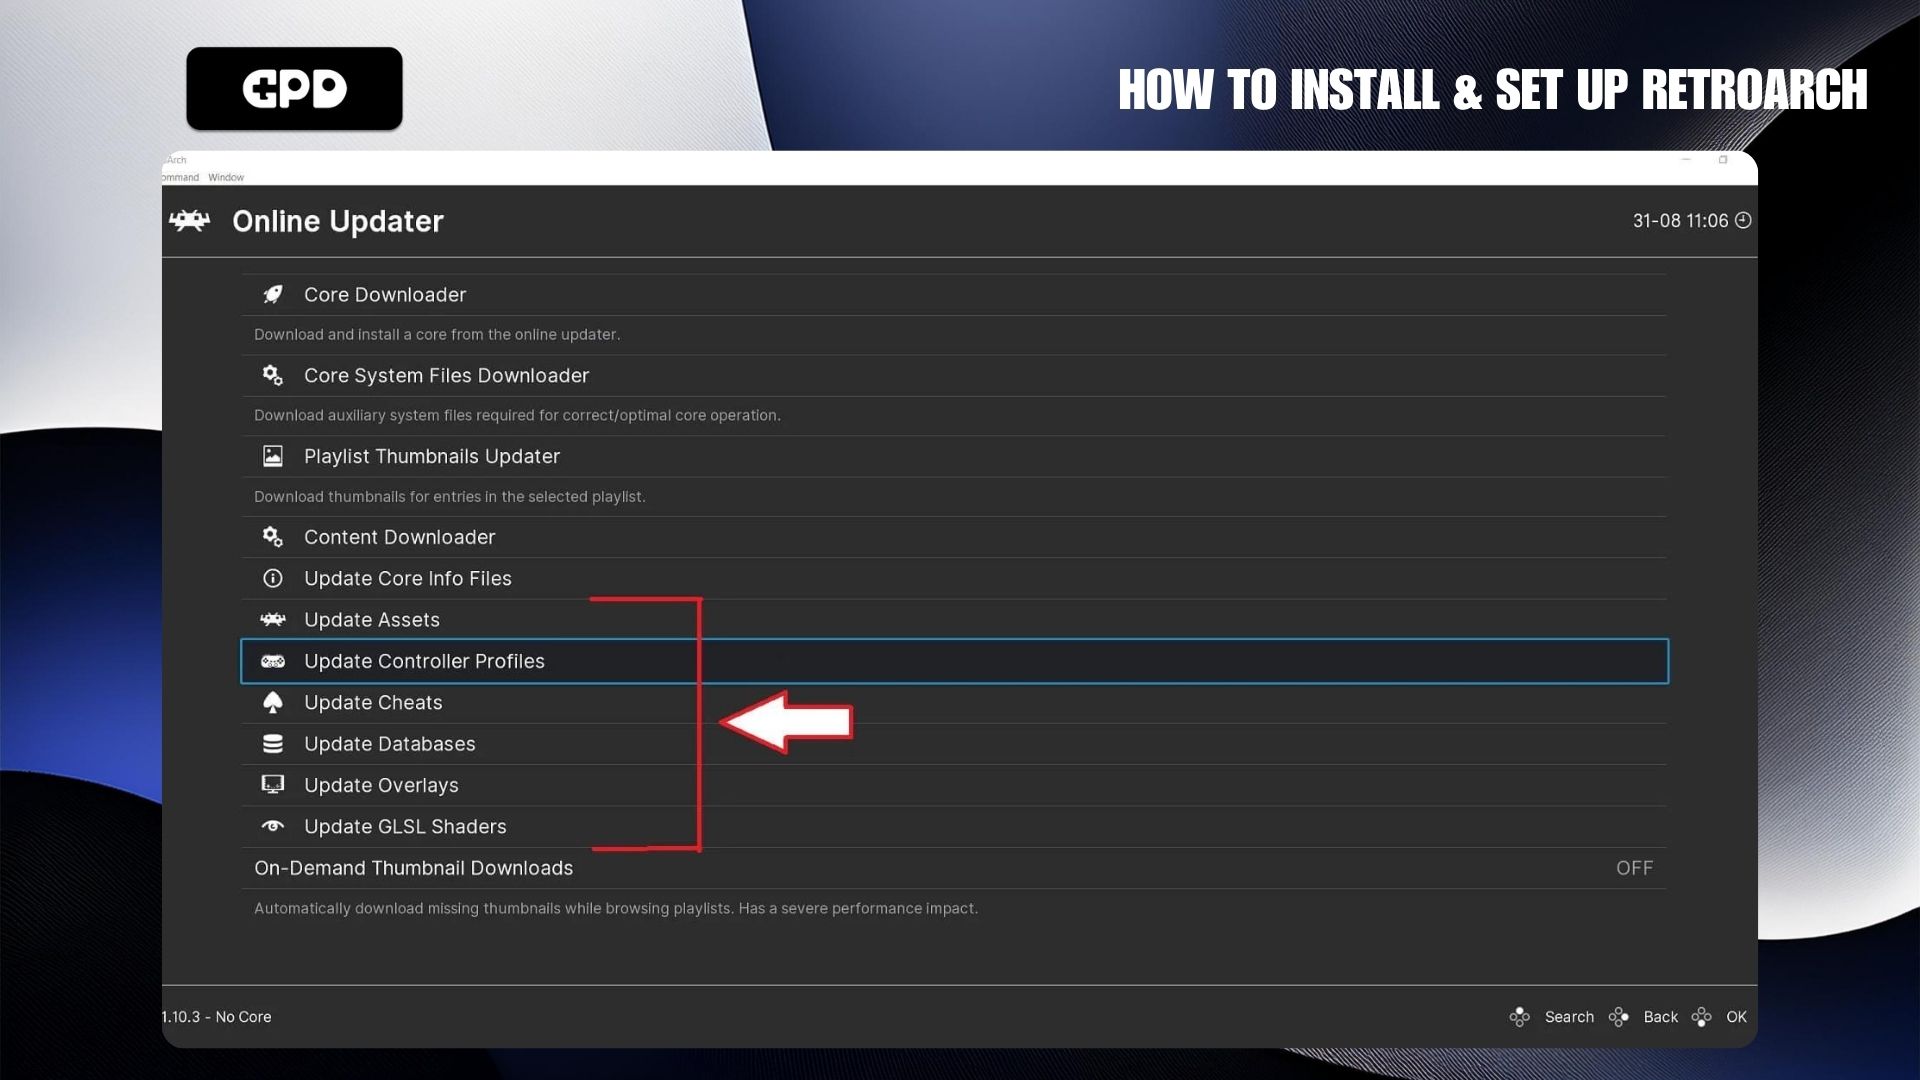
From there, choose the menu items that begin with “Update…”—each option will download and update the corresponding files to their latest versions.
Installing and Updating RetroArch Cores #
Once your configuration files are up to date, you can start downloading emulator cores. These cores represent the various emulators available for your device. From the Settings > Online Updater menu, select Core Downloader.
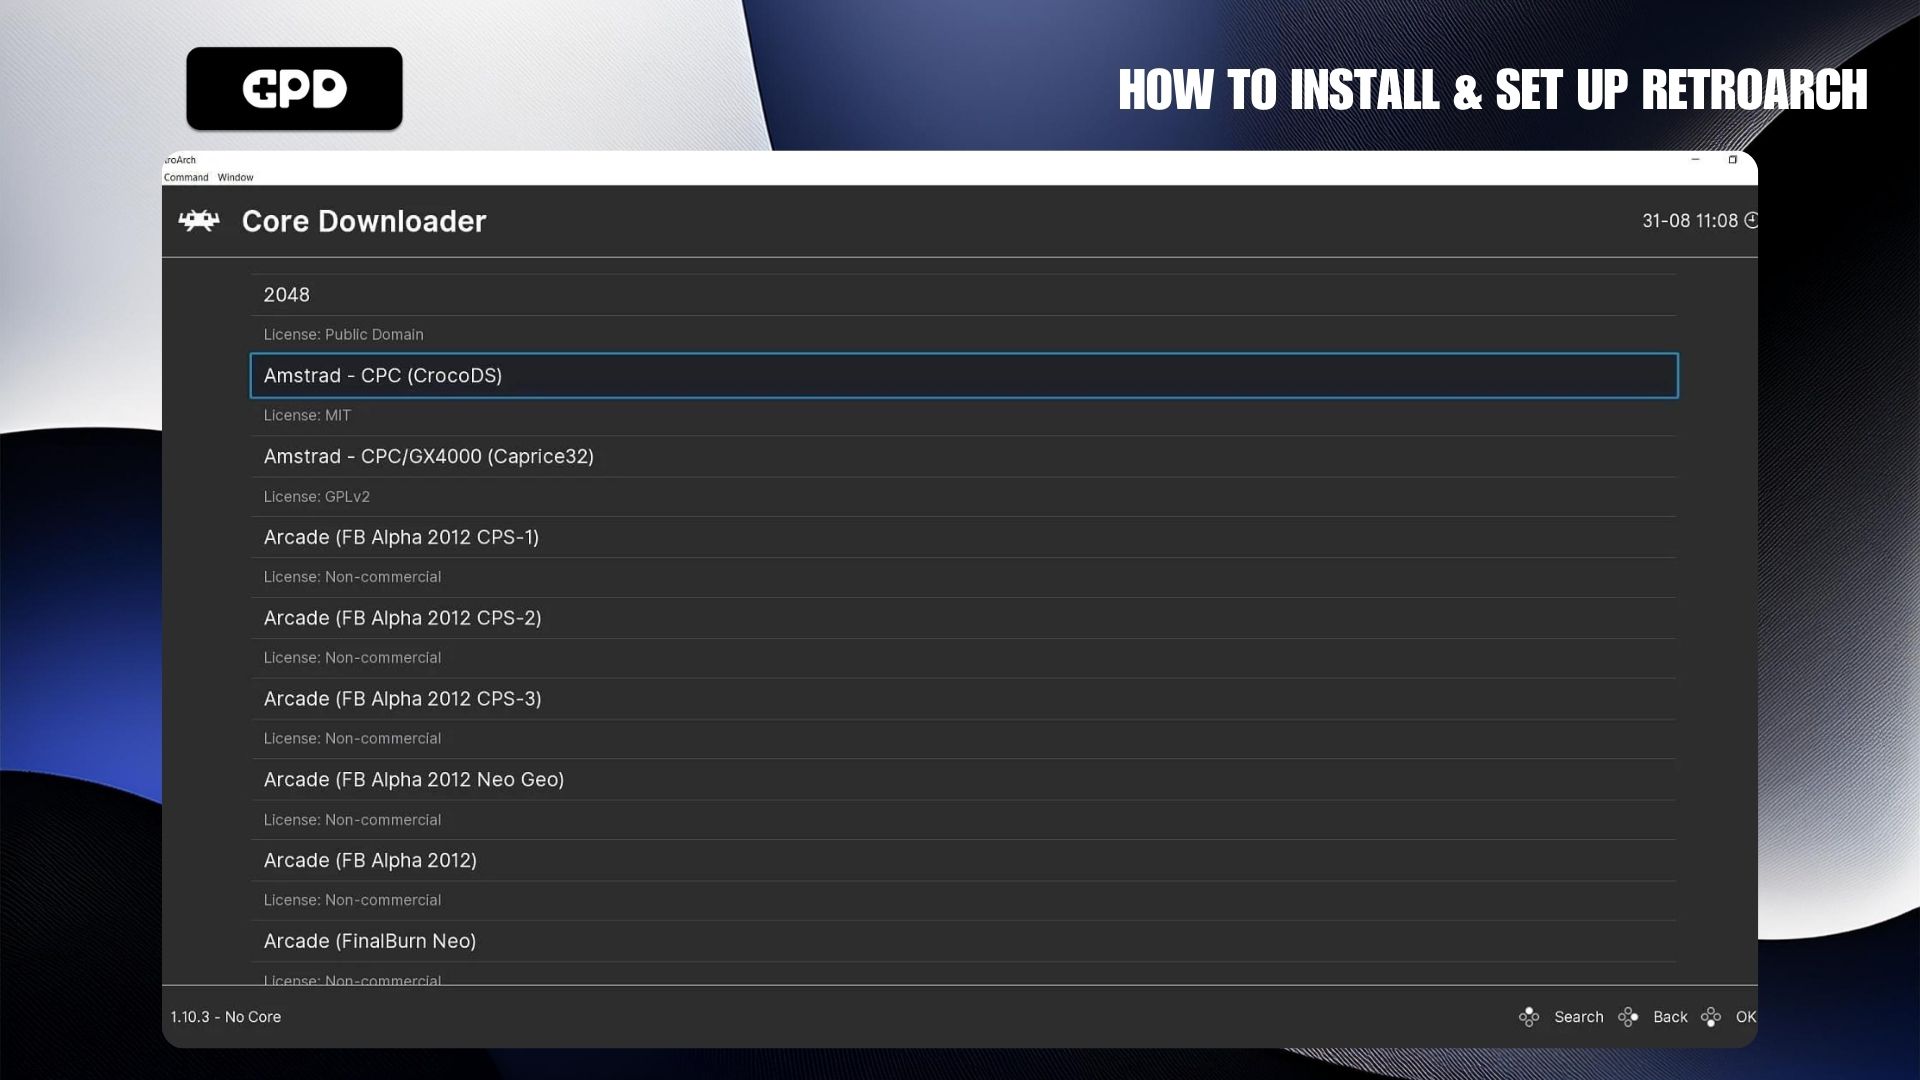
You will see a list of available cores. Some systems, like Arcade, may have multiple cores—Arcade, for example, has twelve. The term “Arcade” is generic, and certain cores may support specific systems, while others support multiple.
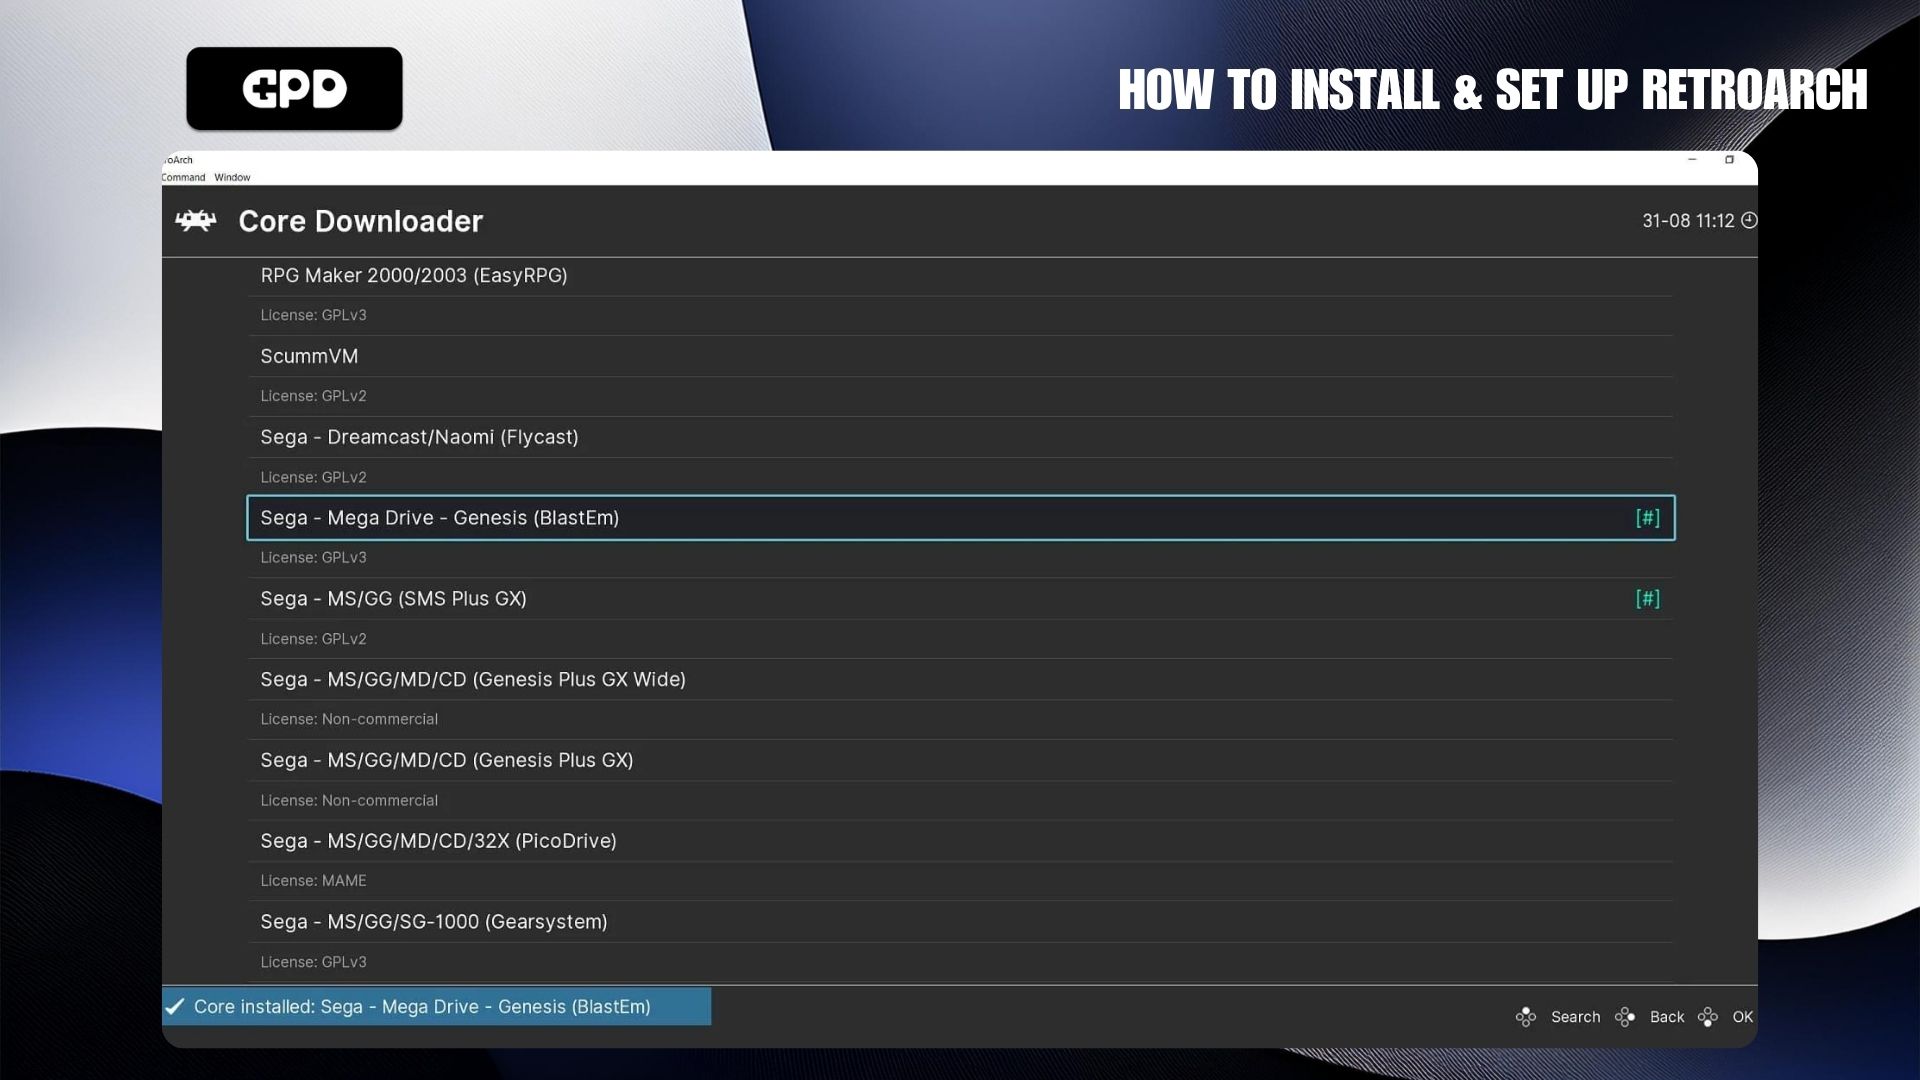
To download a core, simply click on it, and it will automatically download and install on your device. If you’re unsure which core to select when multiple options are available, you can download them all and test each one to find the best fit for your needs.
Adding New Games #
Once you’ve downloaded your desired cores, the next step is to add your game ROMs. If you haven’t already added any ROM files, we recommend checking out our how to add new ROMs guide on where to find and how to add them.
After your ROMs are on your device, you can scan them using RetroArch. From the main menu, select Import Content, then choose Scan Directory.
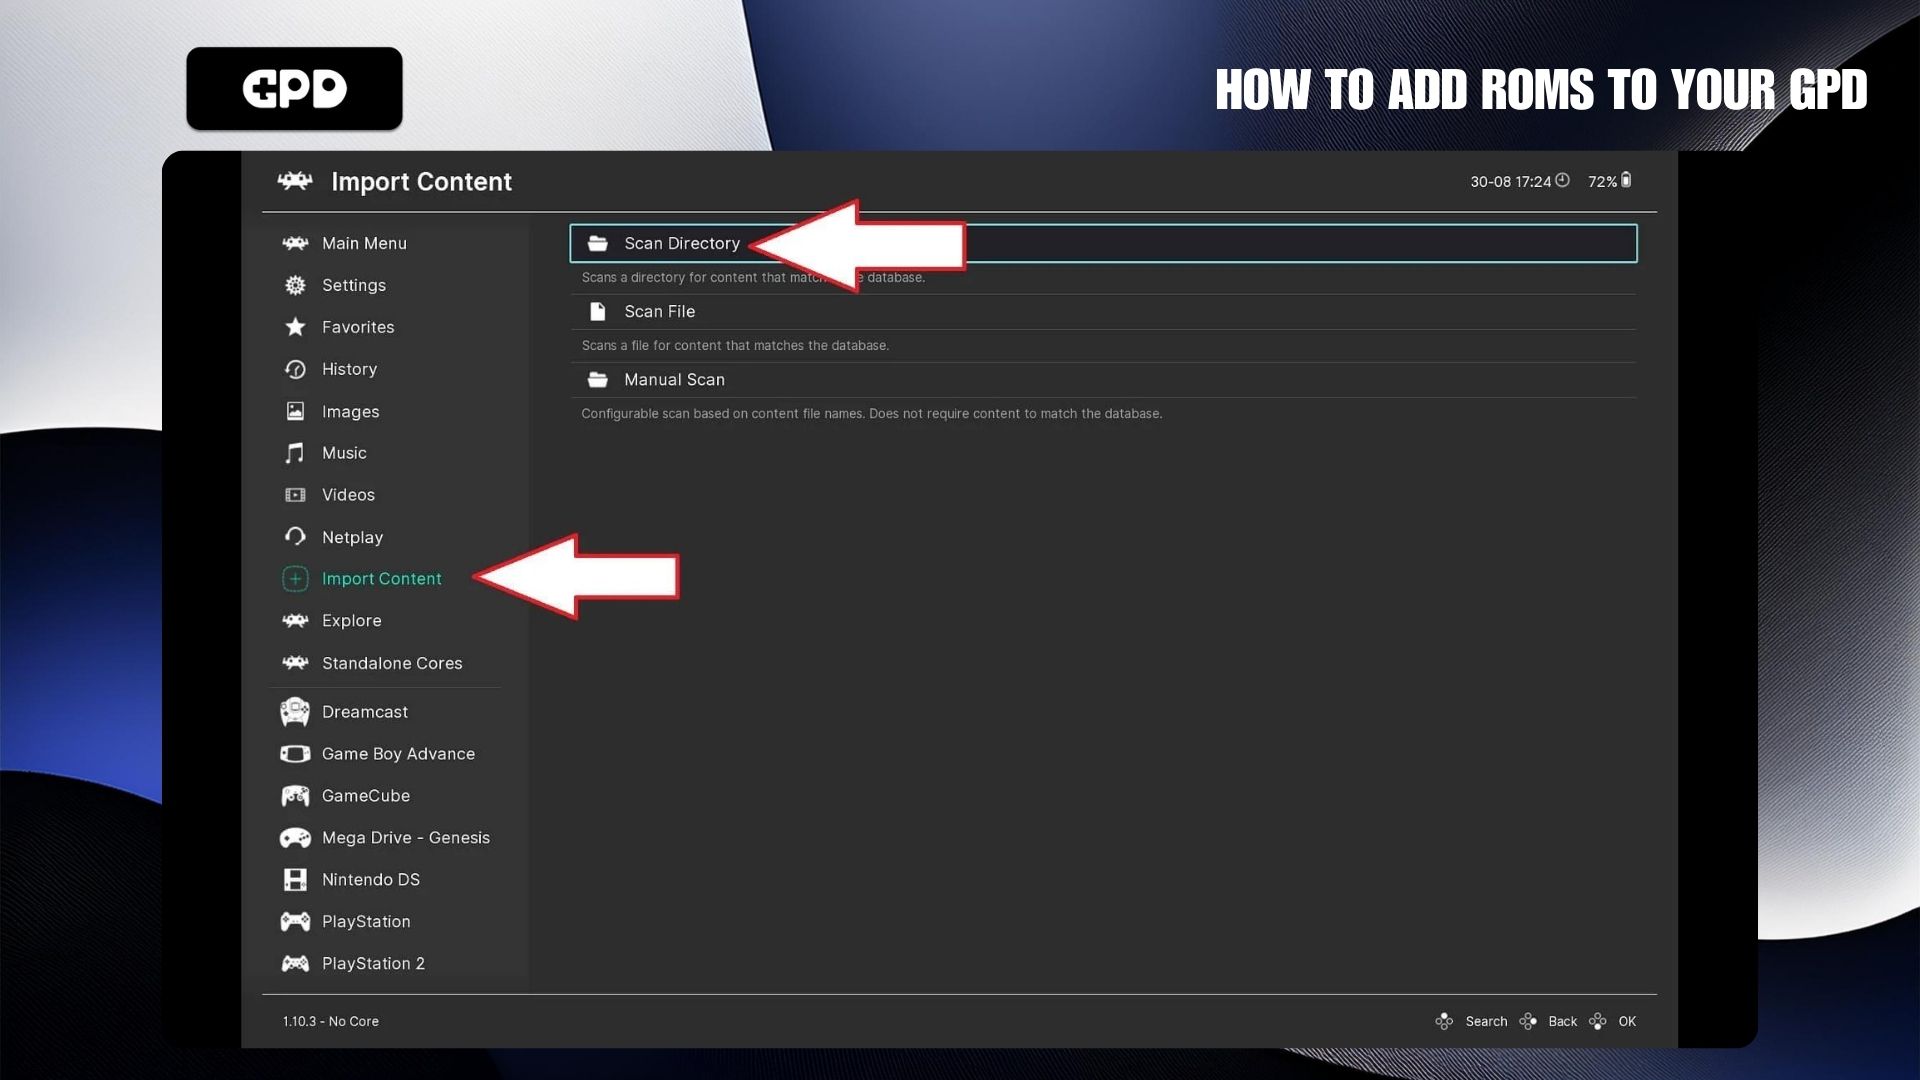
Navigate to the folder where your ROMs are stored. You can choose to scan all folders or select a specific system if your ROMs are organized by platform. Click on <Scan This Directory>, and RetroArch will scan the folder, adding the games to your library.
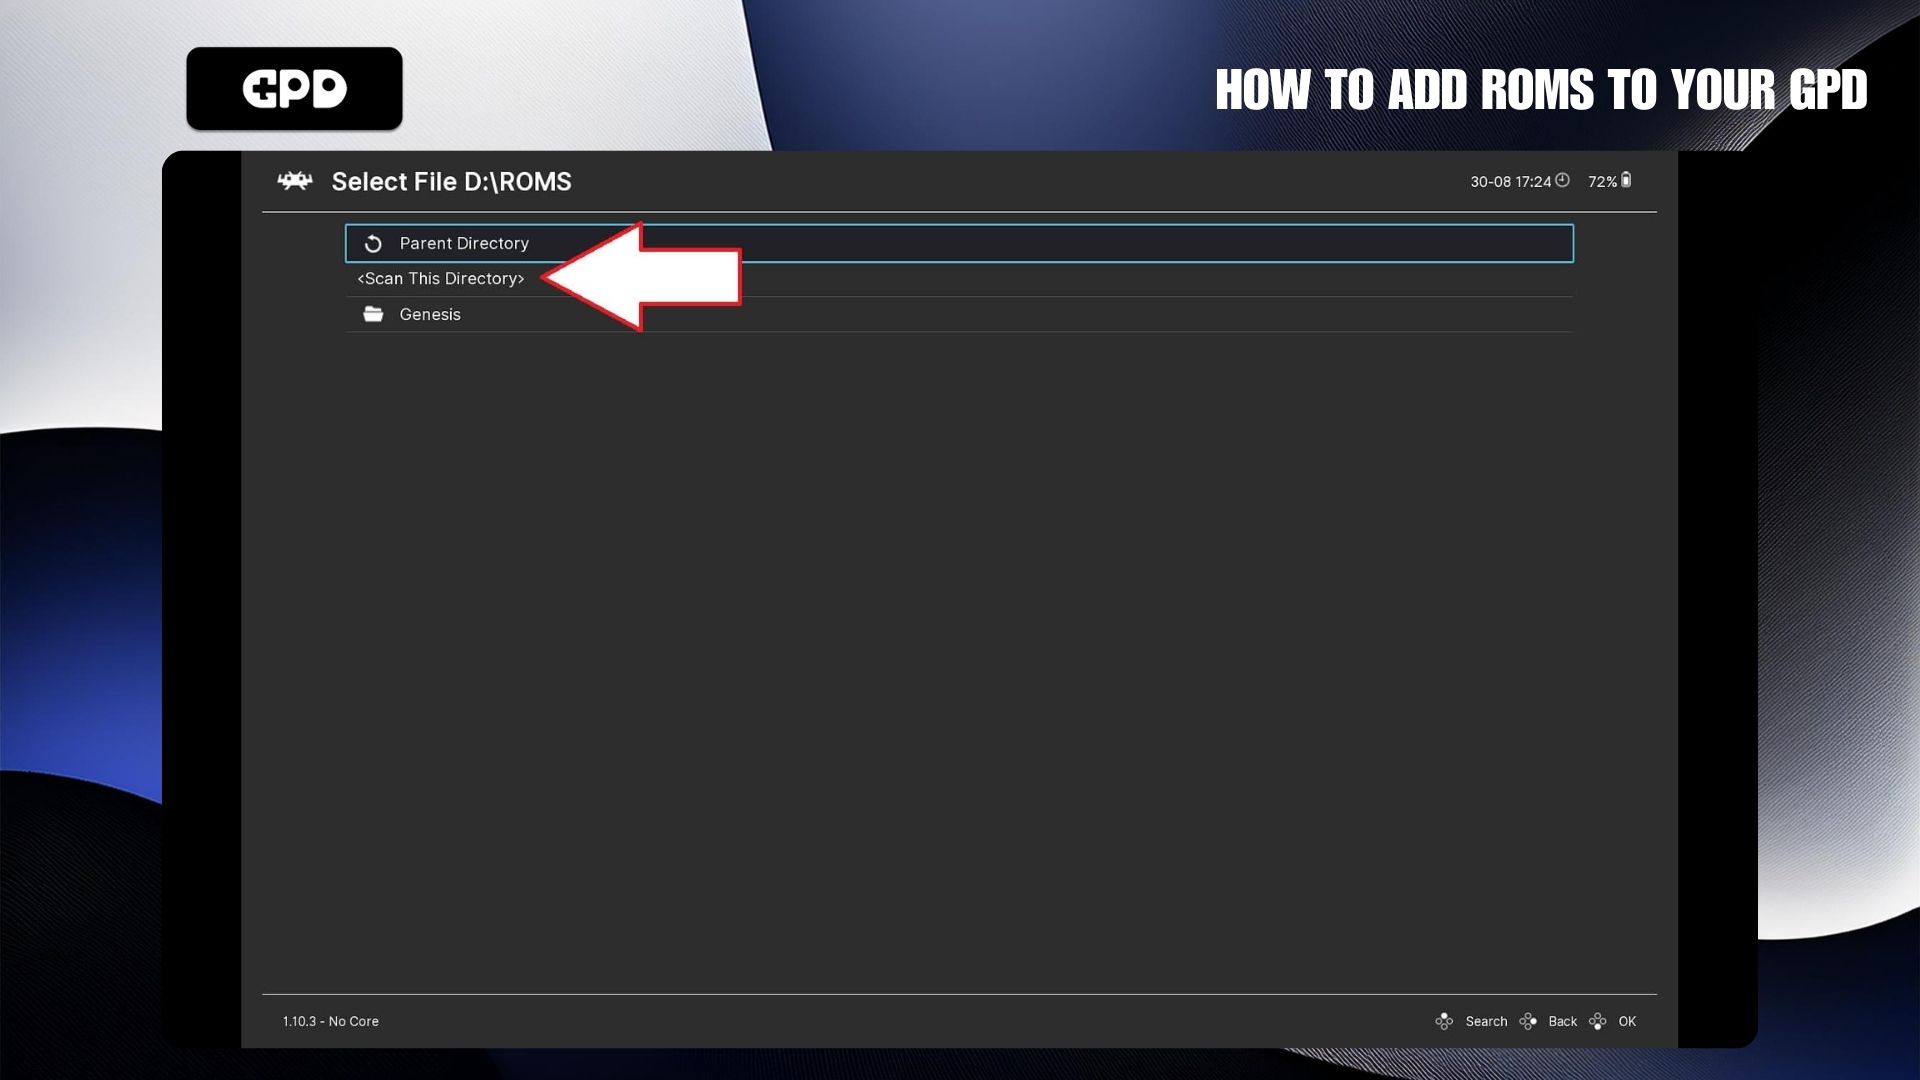
Depending on how many games you’re scanning, this process might take a while—just let RetroArch complete the task.
Loading an Imported Game #
From the main menu, scroll through the list and you’ll see the gaming systems you previously scanned.
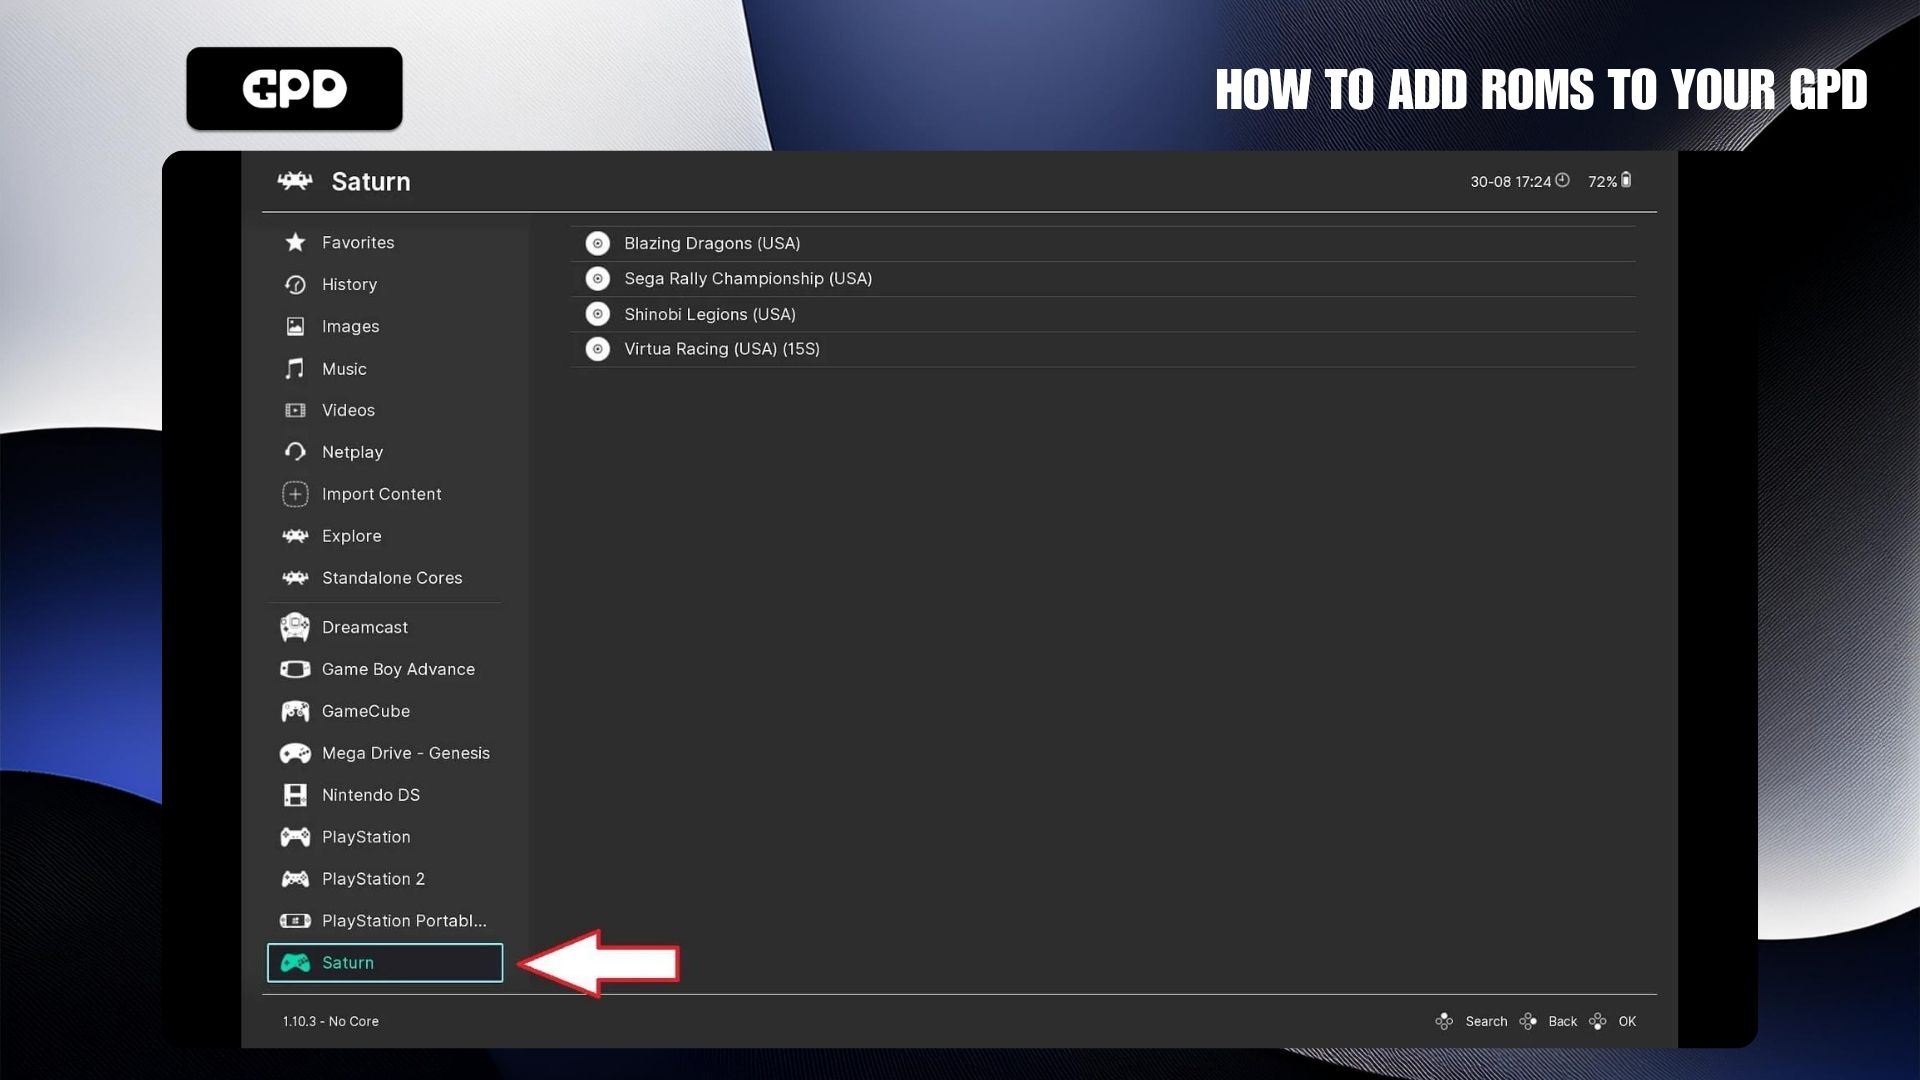
Select a gaming system, and on the right side, you will see a list of the games found during the scan. Choose the game you want to play.
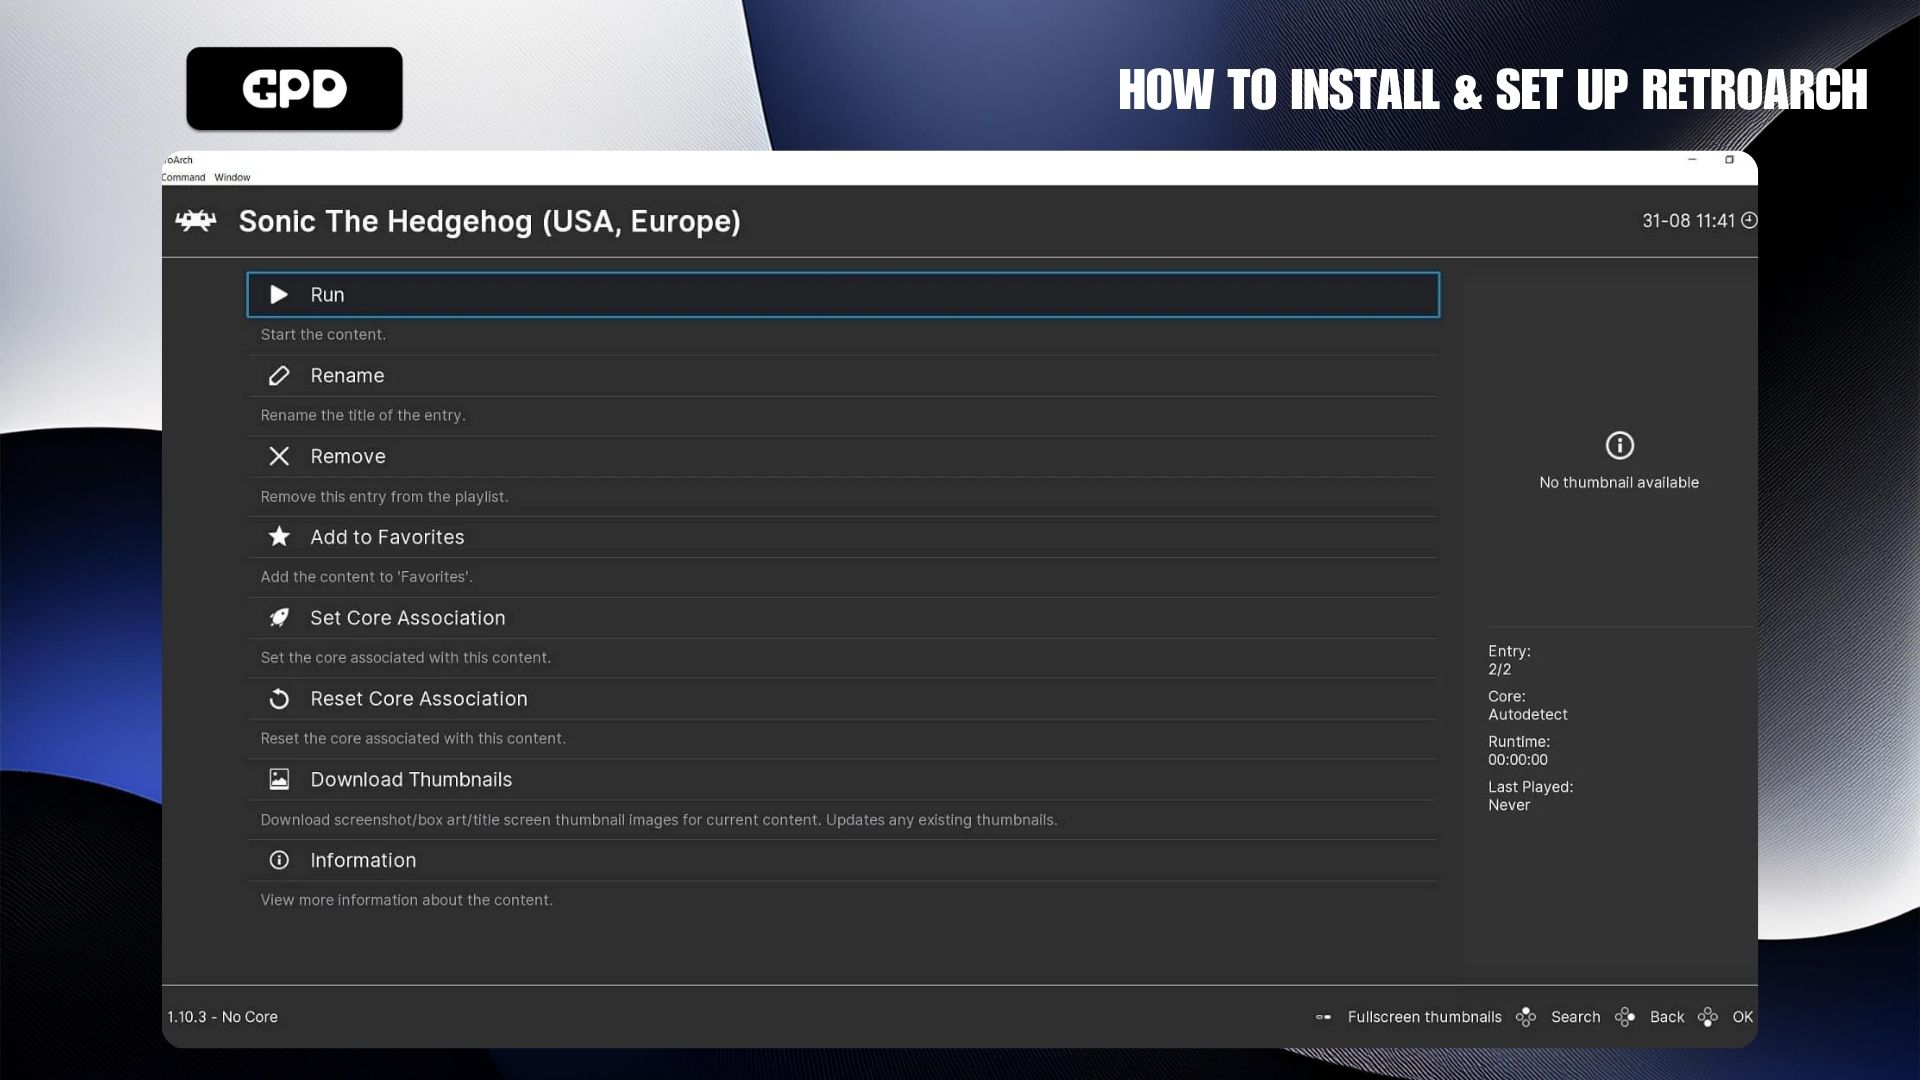
Once selected, a menu will appear with several options. For now, since we’re focusing on playing the game, simply select Run.
Another menu will appear, showing a list of emulator cores that are compatible with the game. The number of cores listed depends on how many you have installed—you might see one or several options. If you’re not satisfied with the performance of a particular core, you can always return and try another.

Select the compatible core you want, and you’ll be taken back to the previous menu. Click Run again, and your game will load. Enjoy!
Configuring the Controller #
RetroArch should automatically detect your game controller or built-in controller when the software starts. However, you can further customize the configuration, such as setting up shortcuts for common functions. These include bringing up the in-game menu, saving/loading states, and even rewinding games on compatible emulators.
Adding a Hotkey in RetroArch #
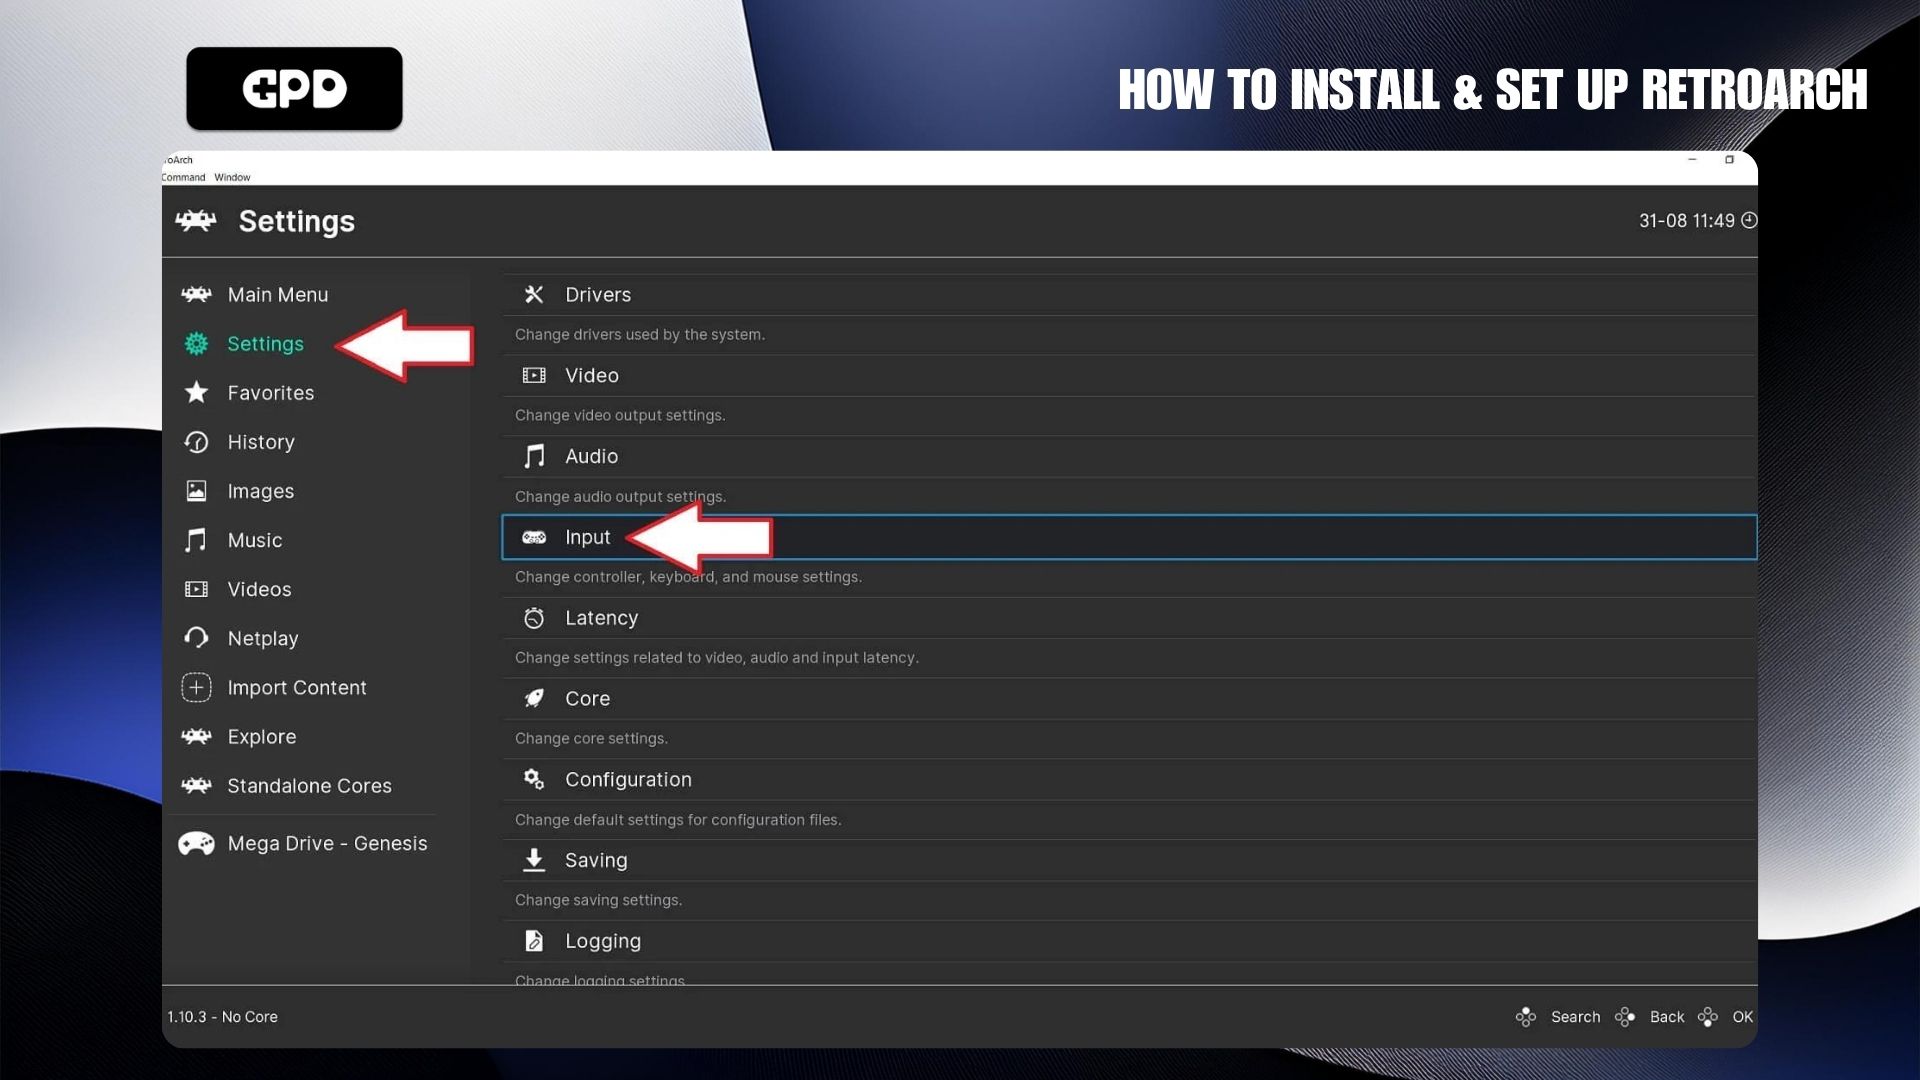
Hotkeys allow you to use button combinations for shortcuts. To set up a hotkey, you first need to define which button will serve as the hotkey. The most commonly used hotkey is the SELECT button, but you can choose any button you prefer. From the main menu, go to Settings, then select Input.
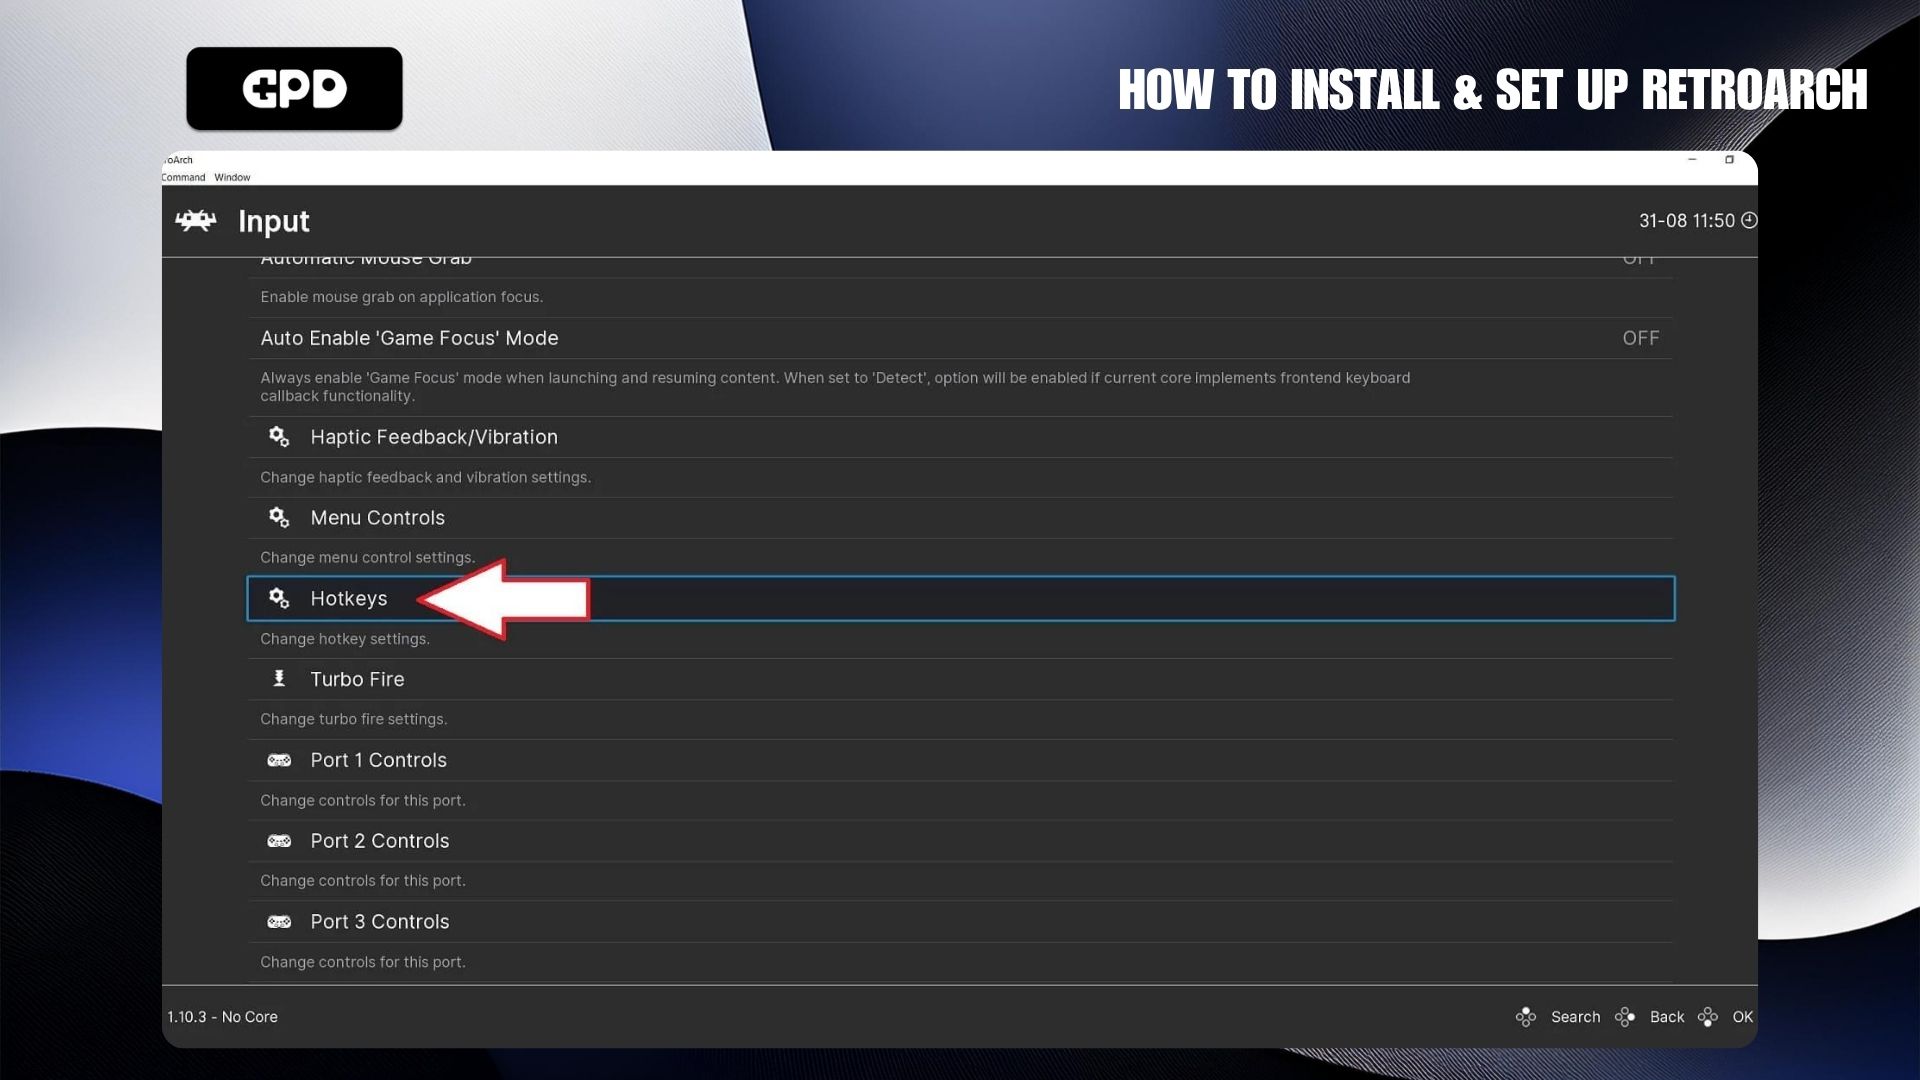
Scroll down to find Hotkeys and select it.
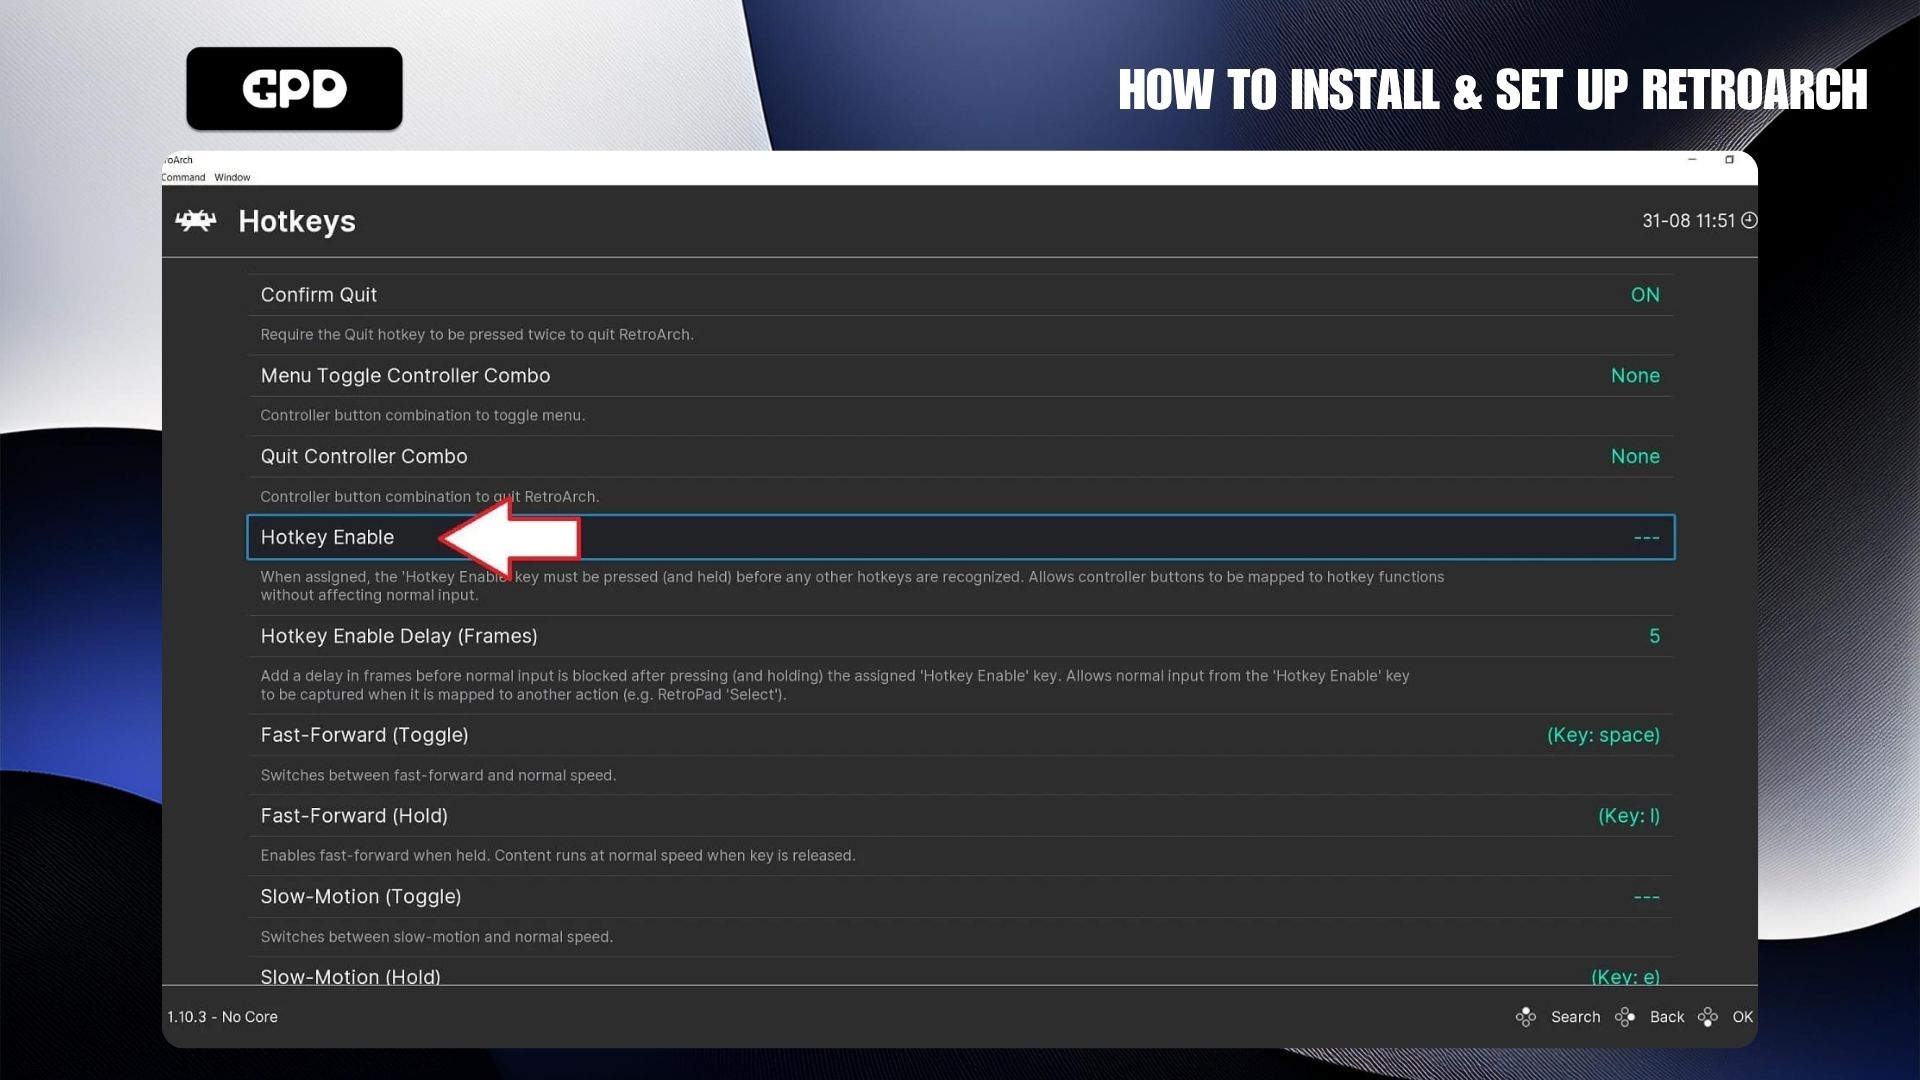
Next, choose the Hotkey Enable option. A popup will appear, prompting you to press a button on your controller. Press the SELECT button or any other button you’d like to assign as your hotkey.
Your hotkey is now enabled! Let’s move on to configuring it for various shortcuts.
Setting Up Hotkey Combinations #
On the Hotkeys screen, you’ll find a list of shortcuts that can be configured. Here, we’ll show you how to set up the Load and Save State functions. These options allow you to save your exact progress in a game and pick up right where you left off later. We’ll use the L1 and R1 buttons for these combinations, but feel free to assign others if you prefer.
Scroll down to the Load State entry and select it. When prompted, press the L1 button to set it. Then, select Save State and press the R1 button to assign it.
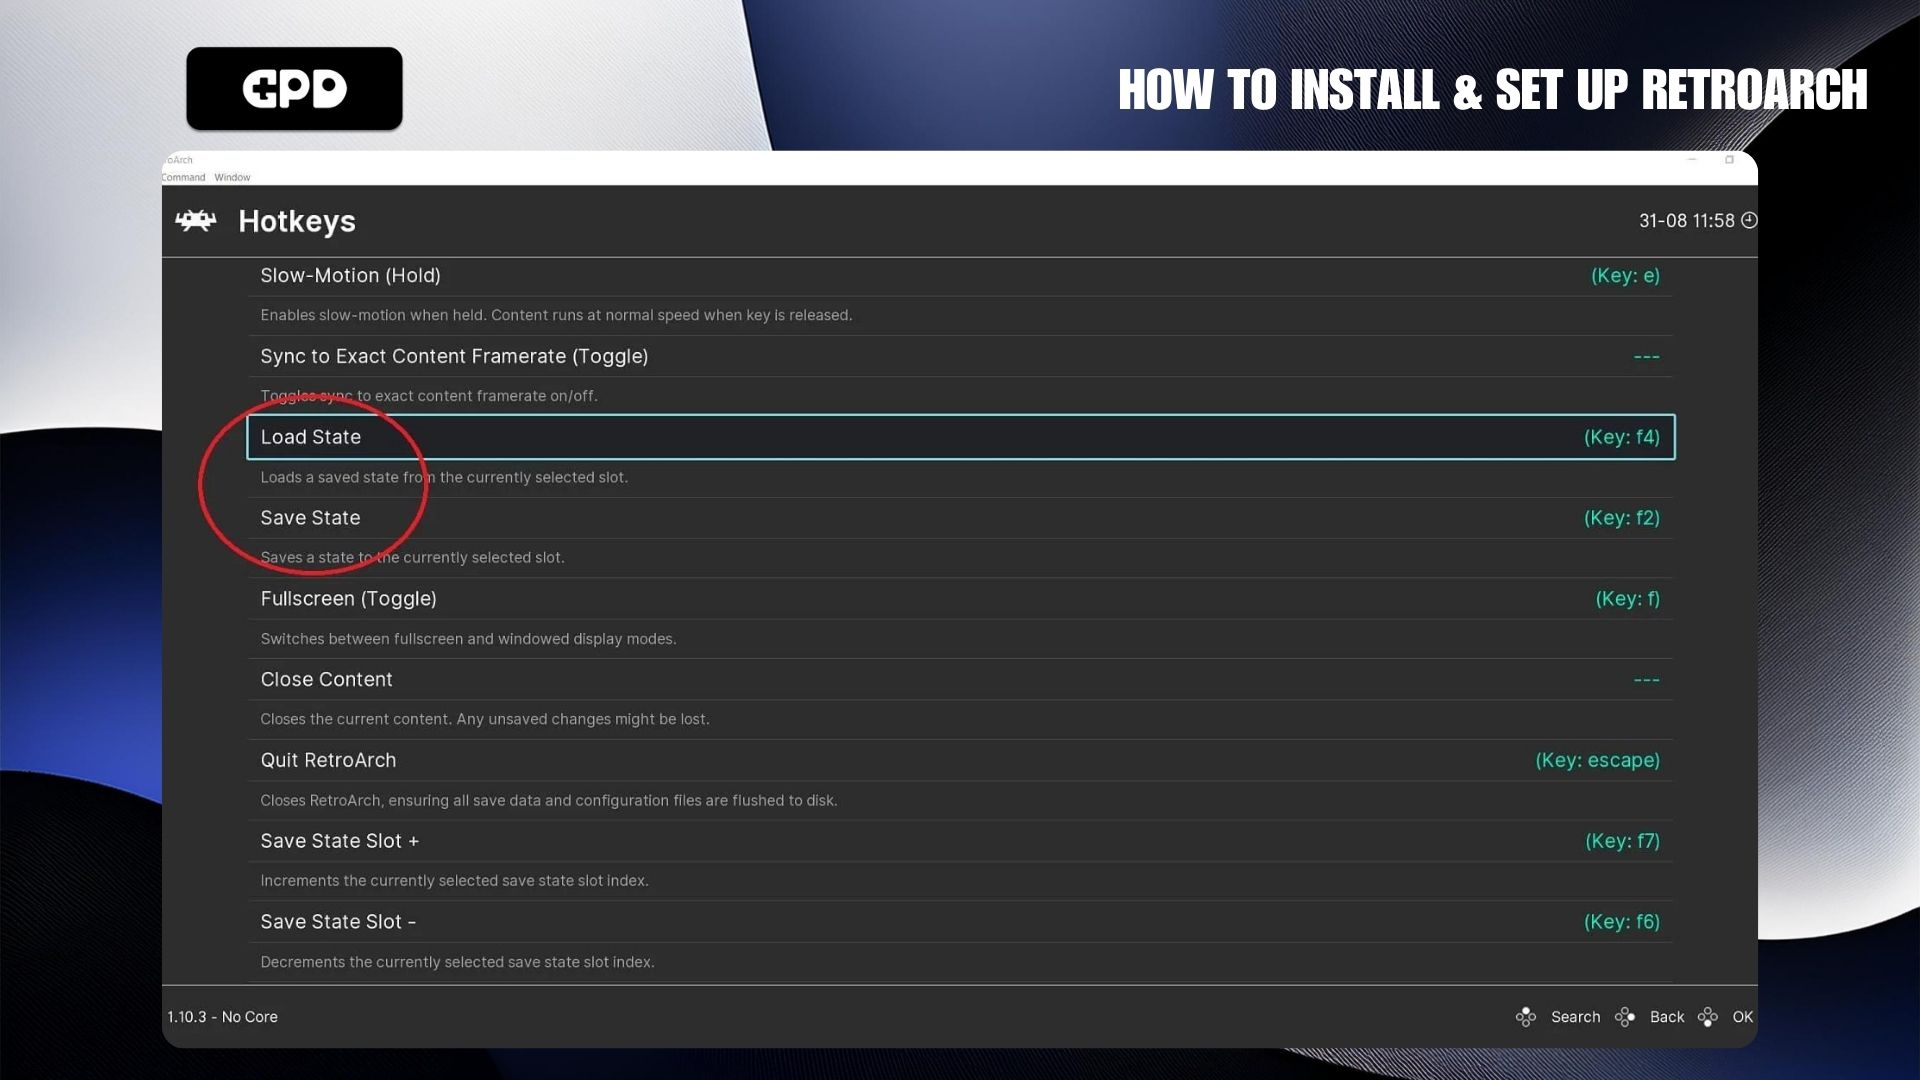
Now, when you’re playing a game, you can hold the SELECT button and press L1 to load a save state, or press R1 to save a state.
We also recommend setting up the Menu Toggle Controller Combo, which allows you to bring up the in-game menu. This is useful if you need to tweak settings or safely exit the game and return to the main menu. Additional hotkey functions, such as Rewind (for supported systems) or Fast Forward (great for skipping cutscenes or long dialogues), can also be activated to enhance your gaming experience.
Other Useful Hints and Tips #
Where to get ROMS? #
You can find where to get ROMs in our guide here.
How to Make the RetroArch Window Full Screen #
You can set RetroArch to display in full-screen mode permanently or create a shortcut to toggle between windowed and full-screen modes. In the Hotkeys menu we discussed earlier, there’s an option to set up this toggle.
However, if you want RetroArch to always start in full-screen mode, follow these steps:
From the main menu, select Settings, then choose Video.
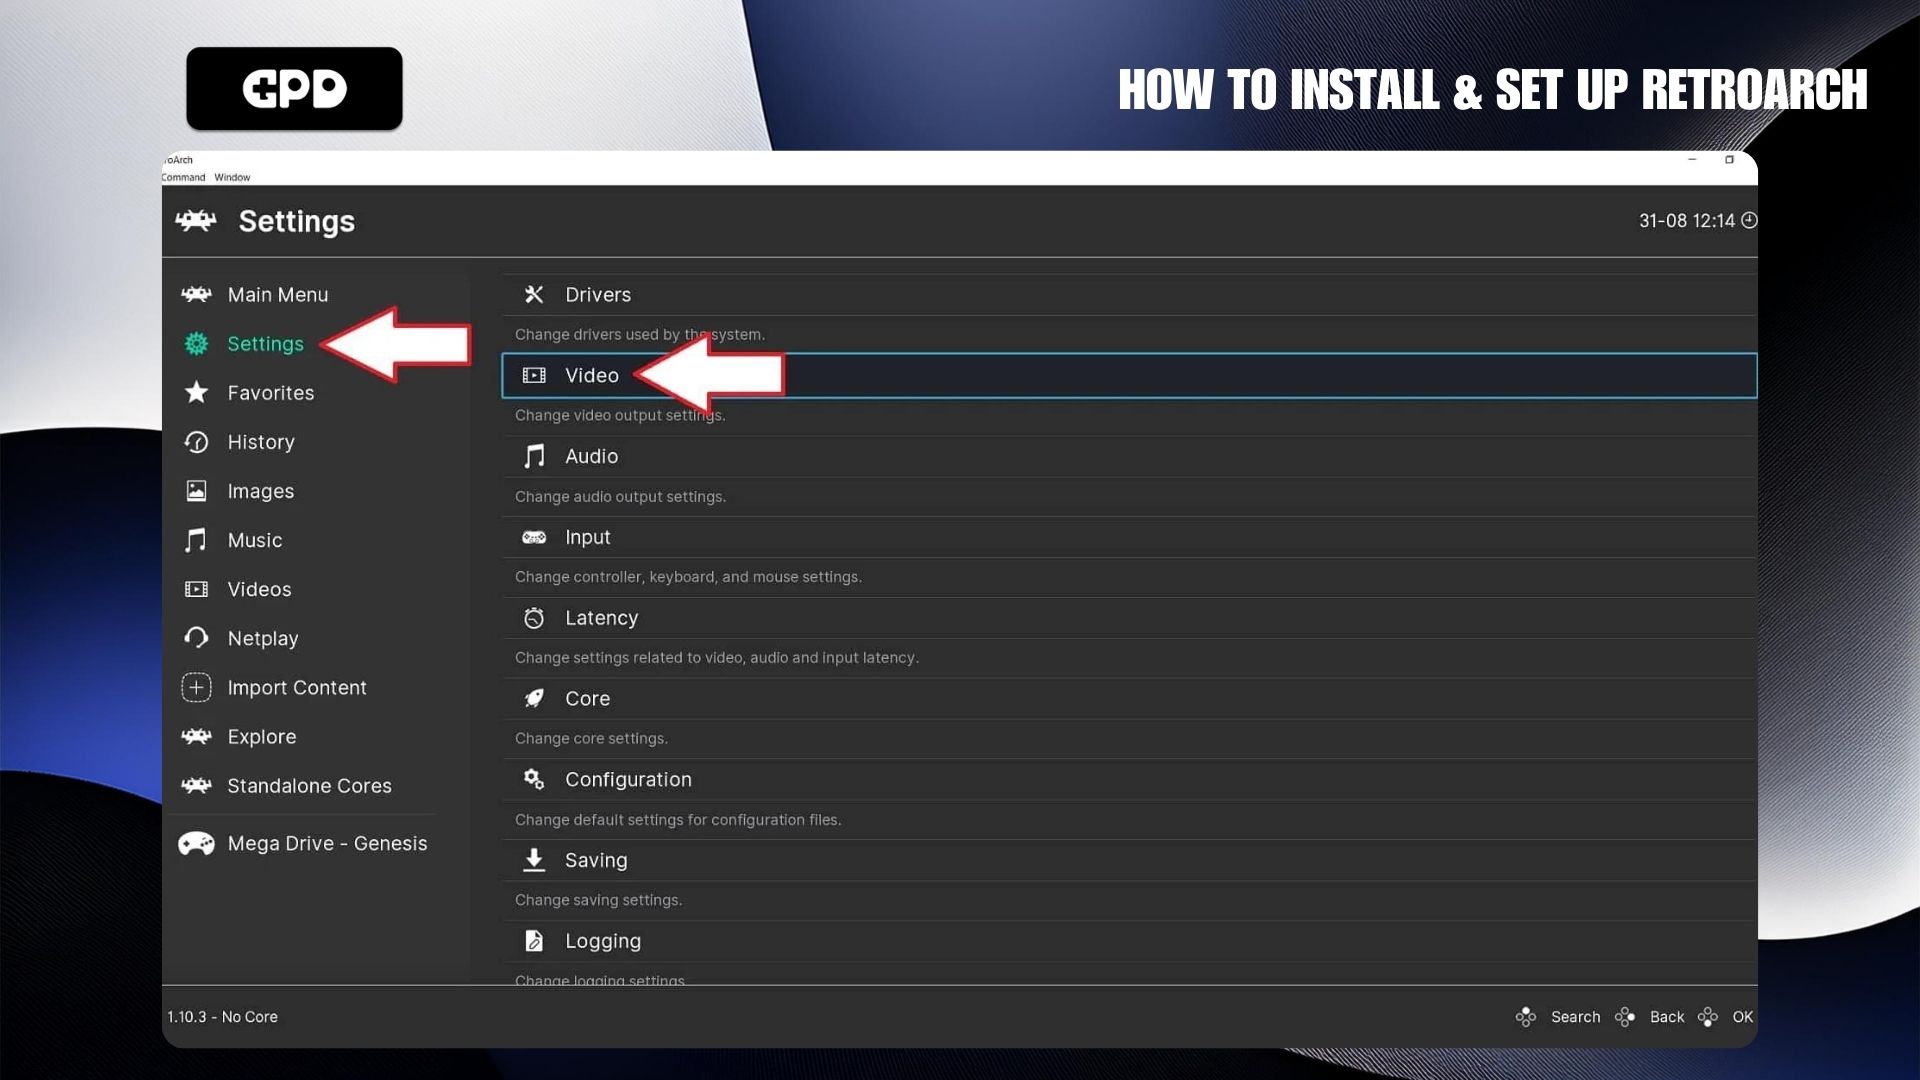
In the Video Settings menu, select Fullscreen Mode.
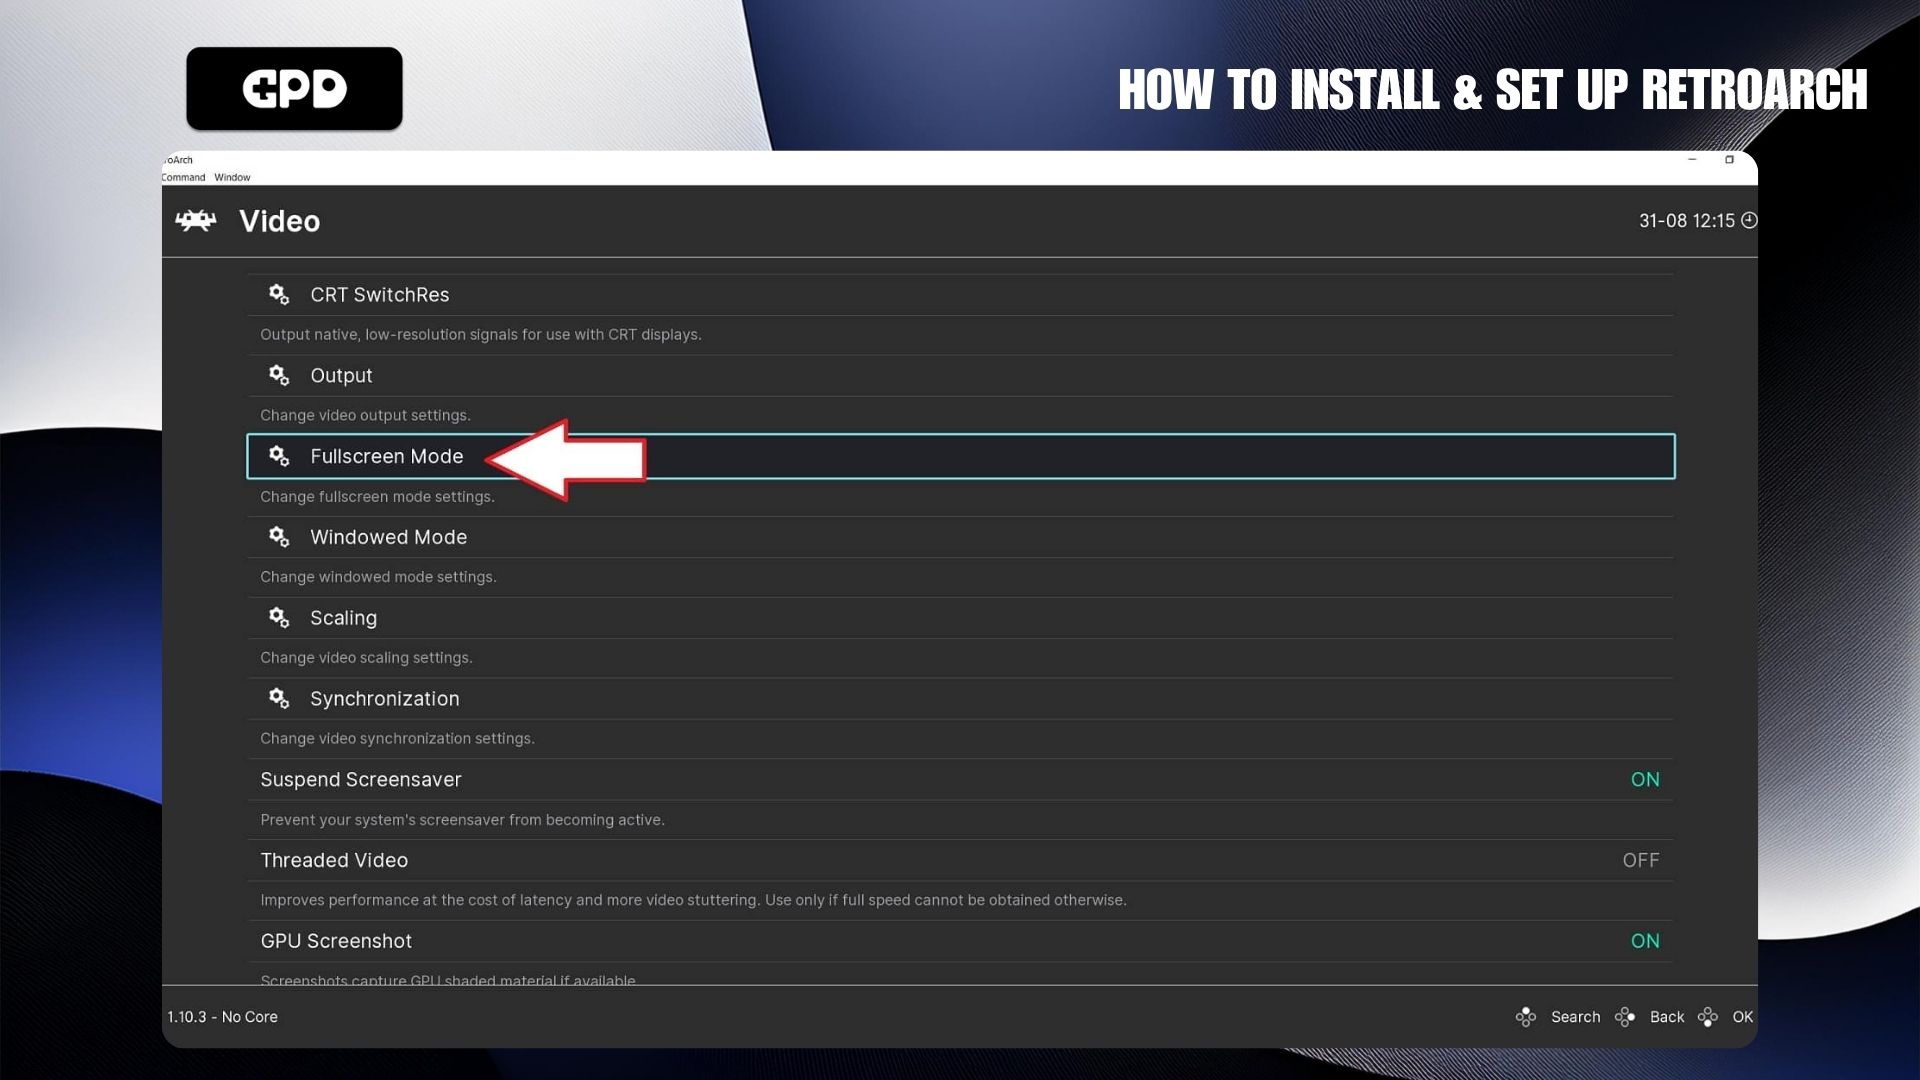
Then, choose the option Start in Fullscreen Mode.
RetroArch will briefly restart and then open in full-screen mode. If you wish to switch back to windowed mode, simply return to the Start in Fullscreen Mode option and disable it.