In this article, we’ll cover everything you need to know about factory resetting your GPD handheld gaming PC and mini laptops. We’ll explain what a factory reset is, when it’s necessary, and guide you through both the preparation and execution of the process on how to factory reset your GPD.
What is a Factory Reset? #
At some point, you might feel the need to completely reset your device and start over. A factory reset, also known as a hard reset, master reset, or formatting, is a process that erases all data on your device and restores it to its original settings using specialized software. This means all user data and installed applications can be deleted, while the operating system and pre-installed apps are reverted to their original state, as if the device were brand new.
Why Would I Want to Reset My Device? #
If a factory reset deletes everything, why would you consider doing it? This process can be very helpful, especially when addressing performance-related issues. For example, if your device frequently freezes, crashes, or slows down, or if an update goes wrong, a master reset can resolve these issues by removing problematic settings, corrupt files, or malware.
A factory reset is also essential when you are preparing to sell, dispose of, or transfer ownership of your device. It ensures that all personal data is completely erased, saving you time compared to manually deleting files.
Note: If you plan to reset your device, be sure to follow this guide carefully. Incorrect use can render your device inoperable. GPD Store assumes no responsibility for any damages that may occur.
UEFI OS vs. Native Windows #
When it comes to factory resetting Windows devices, there are typically two methods available:
- Resetting the device using the native Windows utility (the “Reset this PC” feature)
- Resetting the device using a manufacturer-developed recovery partition
In this section, we’ll highlight the pros and cons of each method.
Resetting via Native Windows Utility (“Reset this PC”) #
The “Reset this PC” feature is built directly into Windows and allows you to restore your device to its factory settings. This option is easy to access and use, as it does not require any additional software or tools beyond what is already installed on your device.
- Pros:
- Convenient and user-friendly
- Allows you to keep or remove personal files
- No need for additional recovery software
- Cons:
- May not fully restore the system to its original state if critical files are missing or corrupted
- May not include device-specific drivers or firmware
Resetting via Recovery Partition #
Some devices come with a manufacturer-developed recovery partition, which is a separate section of your hard drive containing a clean version of the operating system, device drivers, and any pre-installed software. This allows you to perform a more comprehensive reset, often restoring the device to the exact state it was in when first purchased.
- Pros:
- Restores all factory settings, including pre-installed software and drivers
- Ideal for resolving more serious issues
- Cons:
- Requires sufficient storage space for the recovery partition
- May not be available on all devices
Each method has its benefits depending on the situation, so choose the one that best suits your needs when performing a factory reset.
How to Reset via Native Windows Utility #
Resetting your device through the native Windows utility is a built-in feature available on almost every Windows device.
To access this utility, simply type “Reset this PC” into the Windows search bar.
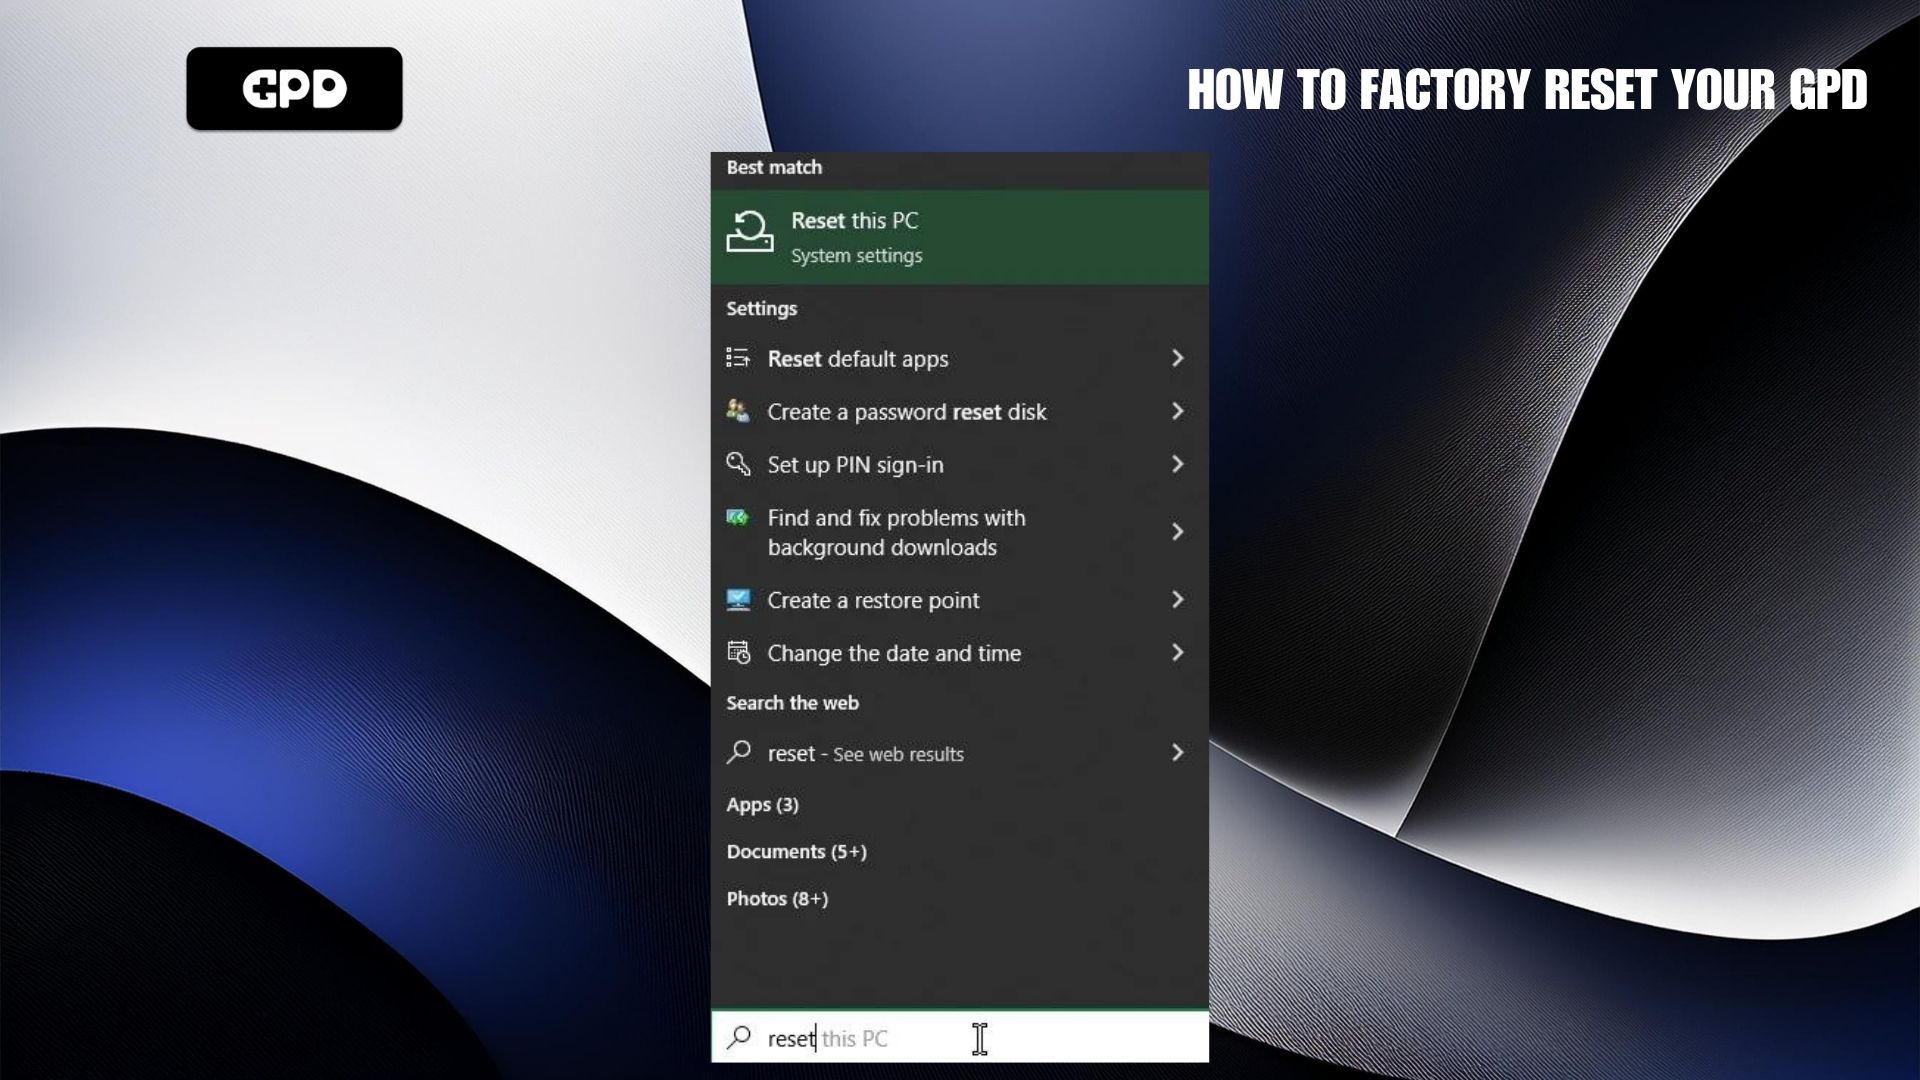
Once the utility opens, you’ll be presented with two options:

- Keep your personal files (e.g., photos, documents, etc.), while resetting system settings and removing apps.
- Remove everything, which will completely erase all your personal files and applications.
While this tool is convenient and universally available on Windows devices, it tends to take longer than reinstalling Windows or using a recovery partition. However, it remains a simple and reliable option for most users.
How to Reset via Recovery Partition #
This method of resetting a device depends on the specific Windows installation and the manufacturer, and is not universally available across all devices.
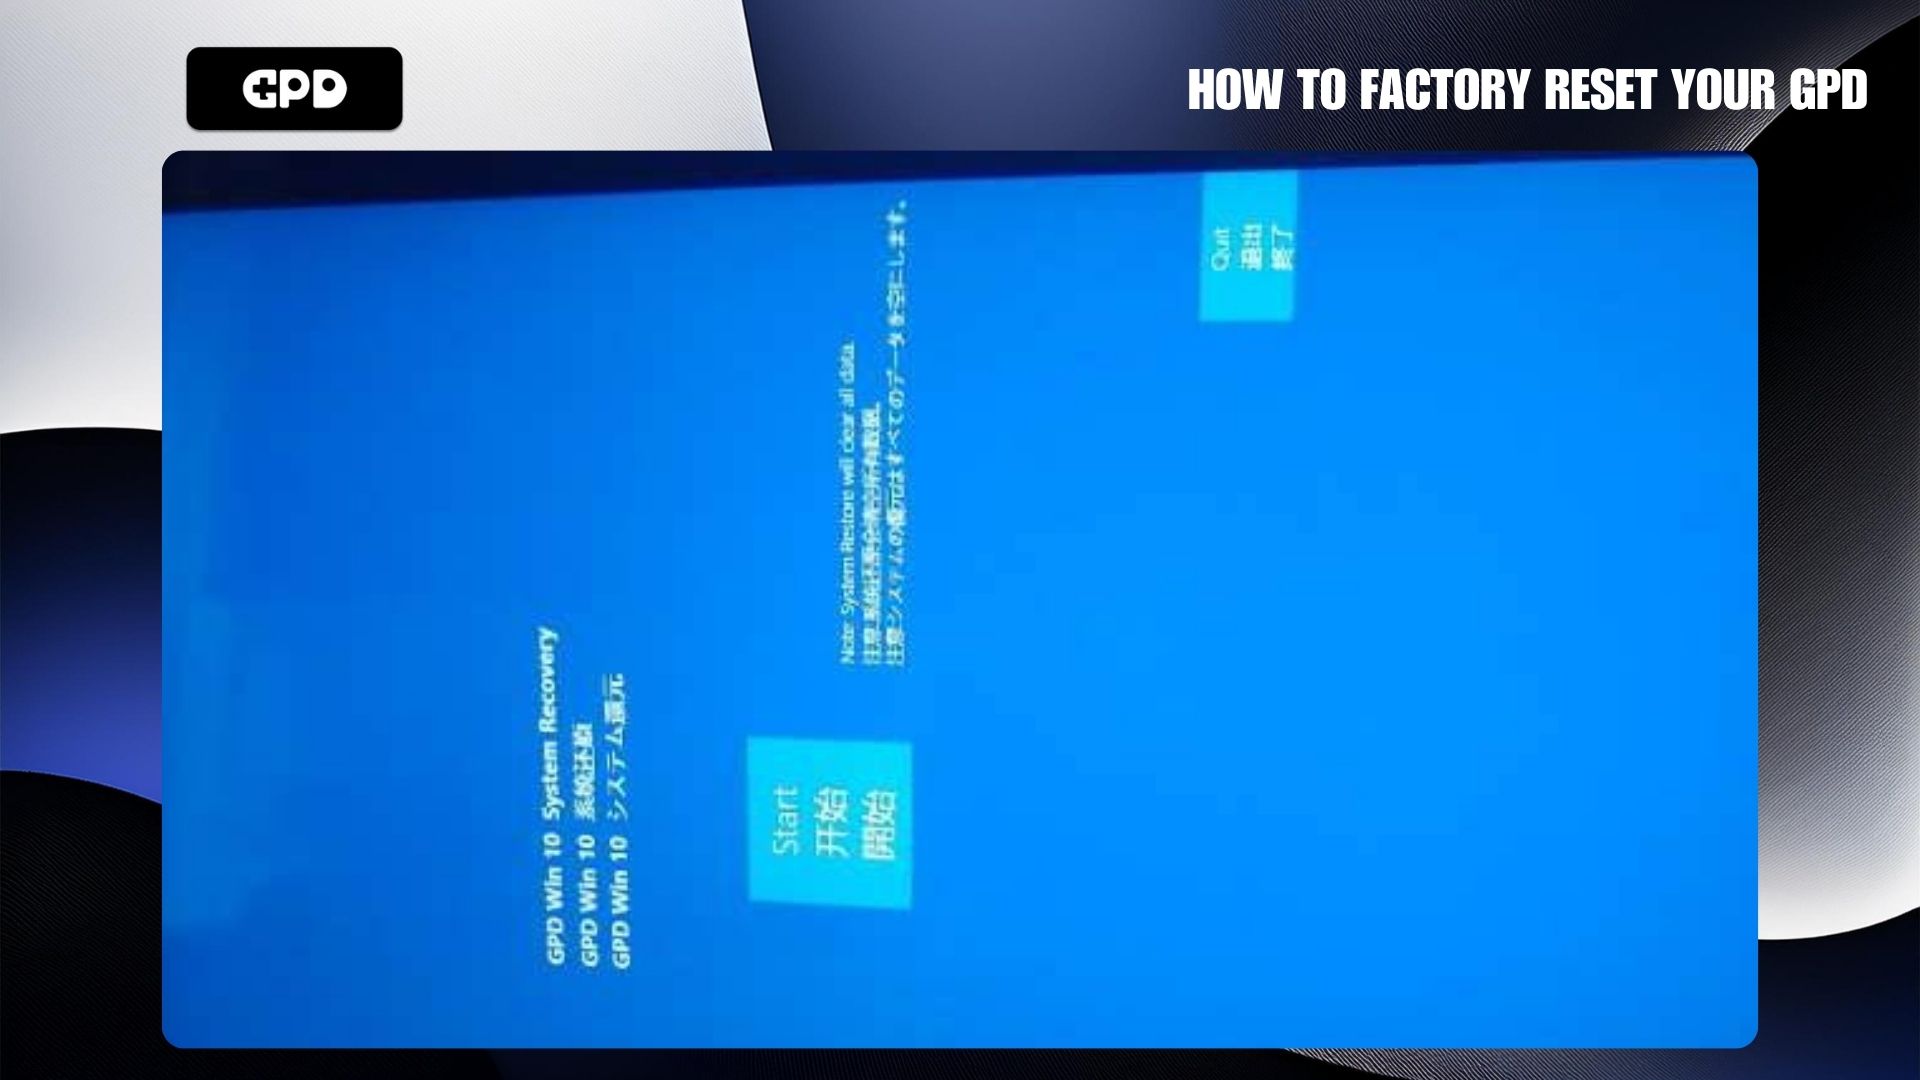
Some devices come with a second partition on the hard drive, known as a recovery partition, which contains a built-in utility that can wipe the device’s main partition and restore it to factory settings. These utilities are usually simple, often featuring a basic “reset” button on a plain blue background.
For example, the GPD WIN MAX 2 features a GPD reset utility on its recovery partition.
To access this partition, you have two options:
- Enter the BIOS or Boot Menu during startup and select the recovery partition.
- Use Windows Advanced Startup Settings, which will also give you the option to boot into the recovery partition.
This method is generally faster than using the native Windows utility, and it restores the device to its original factory state, including any pre-installed software and drivers.
Accessing the Recovery Partition #
The exact steps to access the recovery partition will vary depending on the device you’re using. Below are some common methods:
- Press F7 repeatedly after you switch on the device: This is one of the most common ways to enter the boot menu. If successful, a blue window will appear, allowing you to choose the recovery partition.
- Enter the BIOS: You can also access the BIOS by pressing keys like ESC, F1, F2, or whichever key is specified for your device during startup. Once inside the BIOS, navigate to the boot options using your keyboard and select the correct drive.
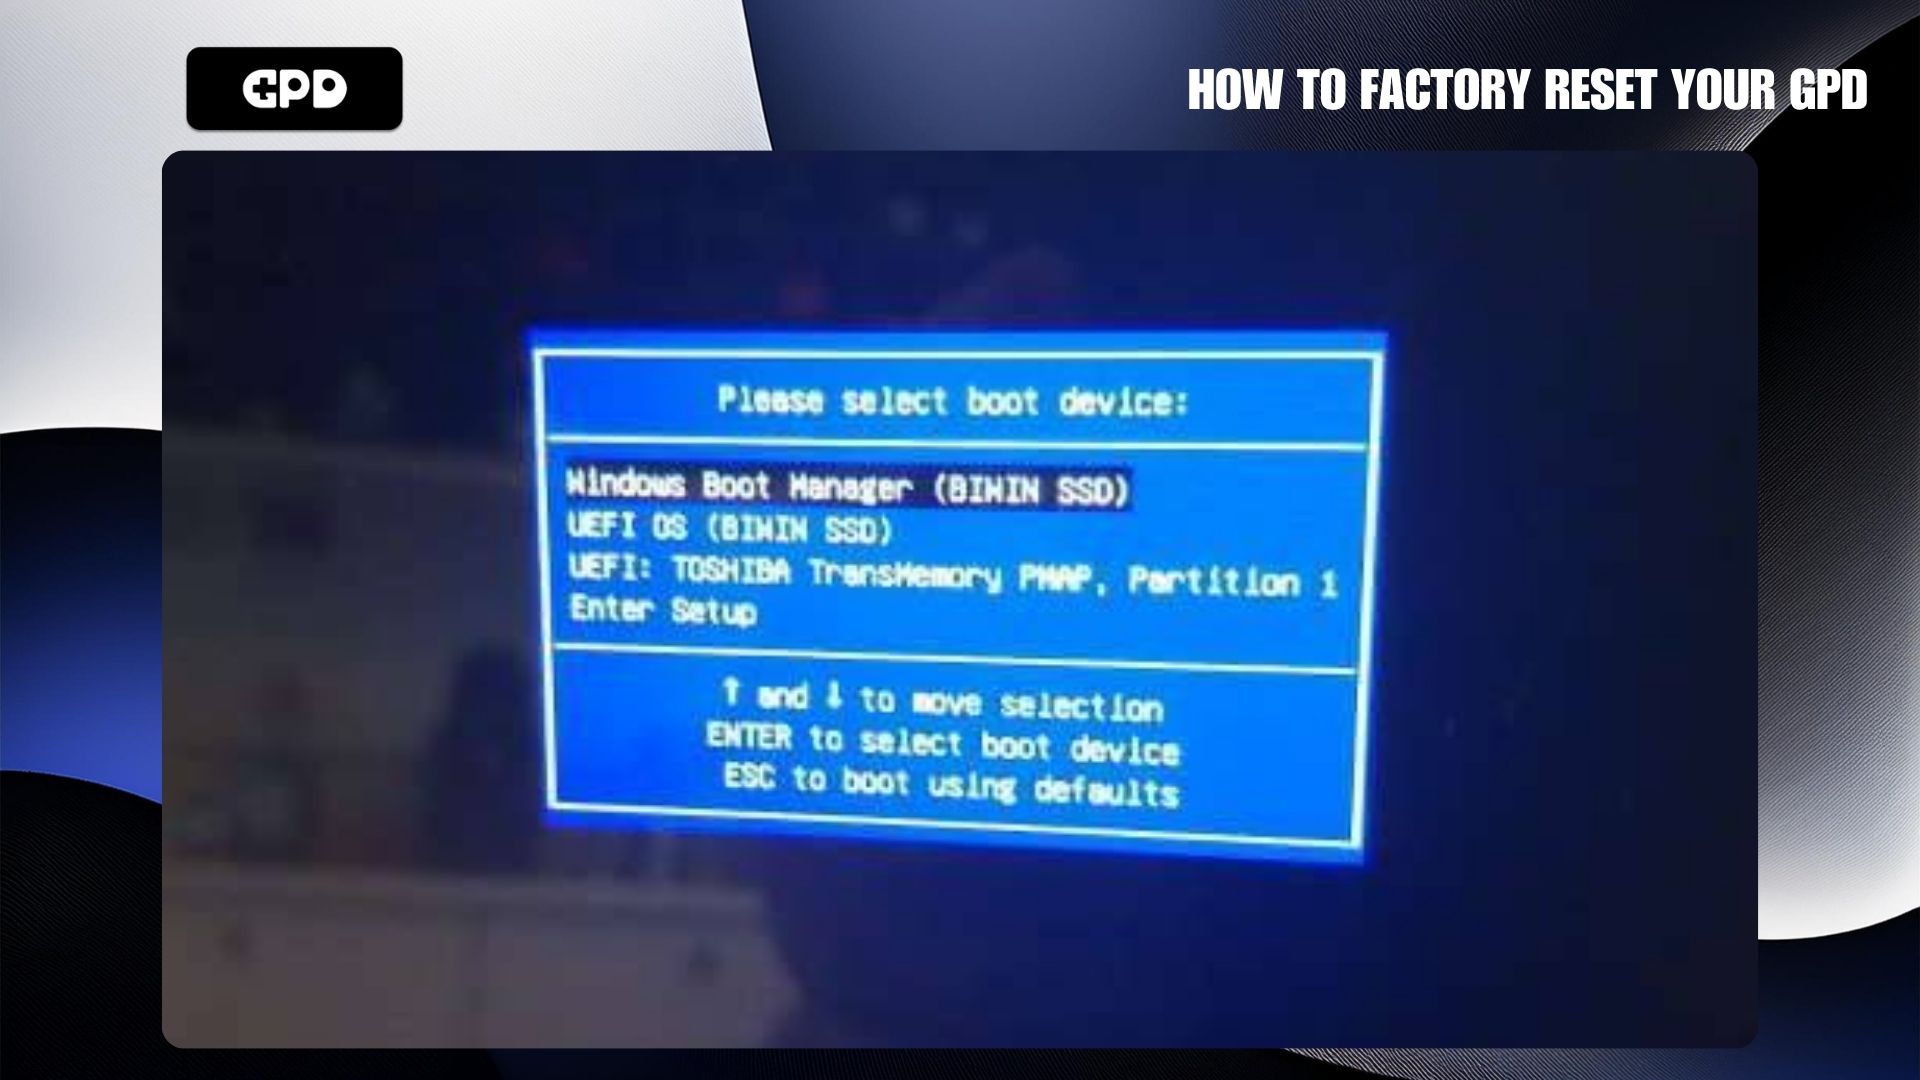
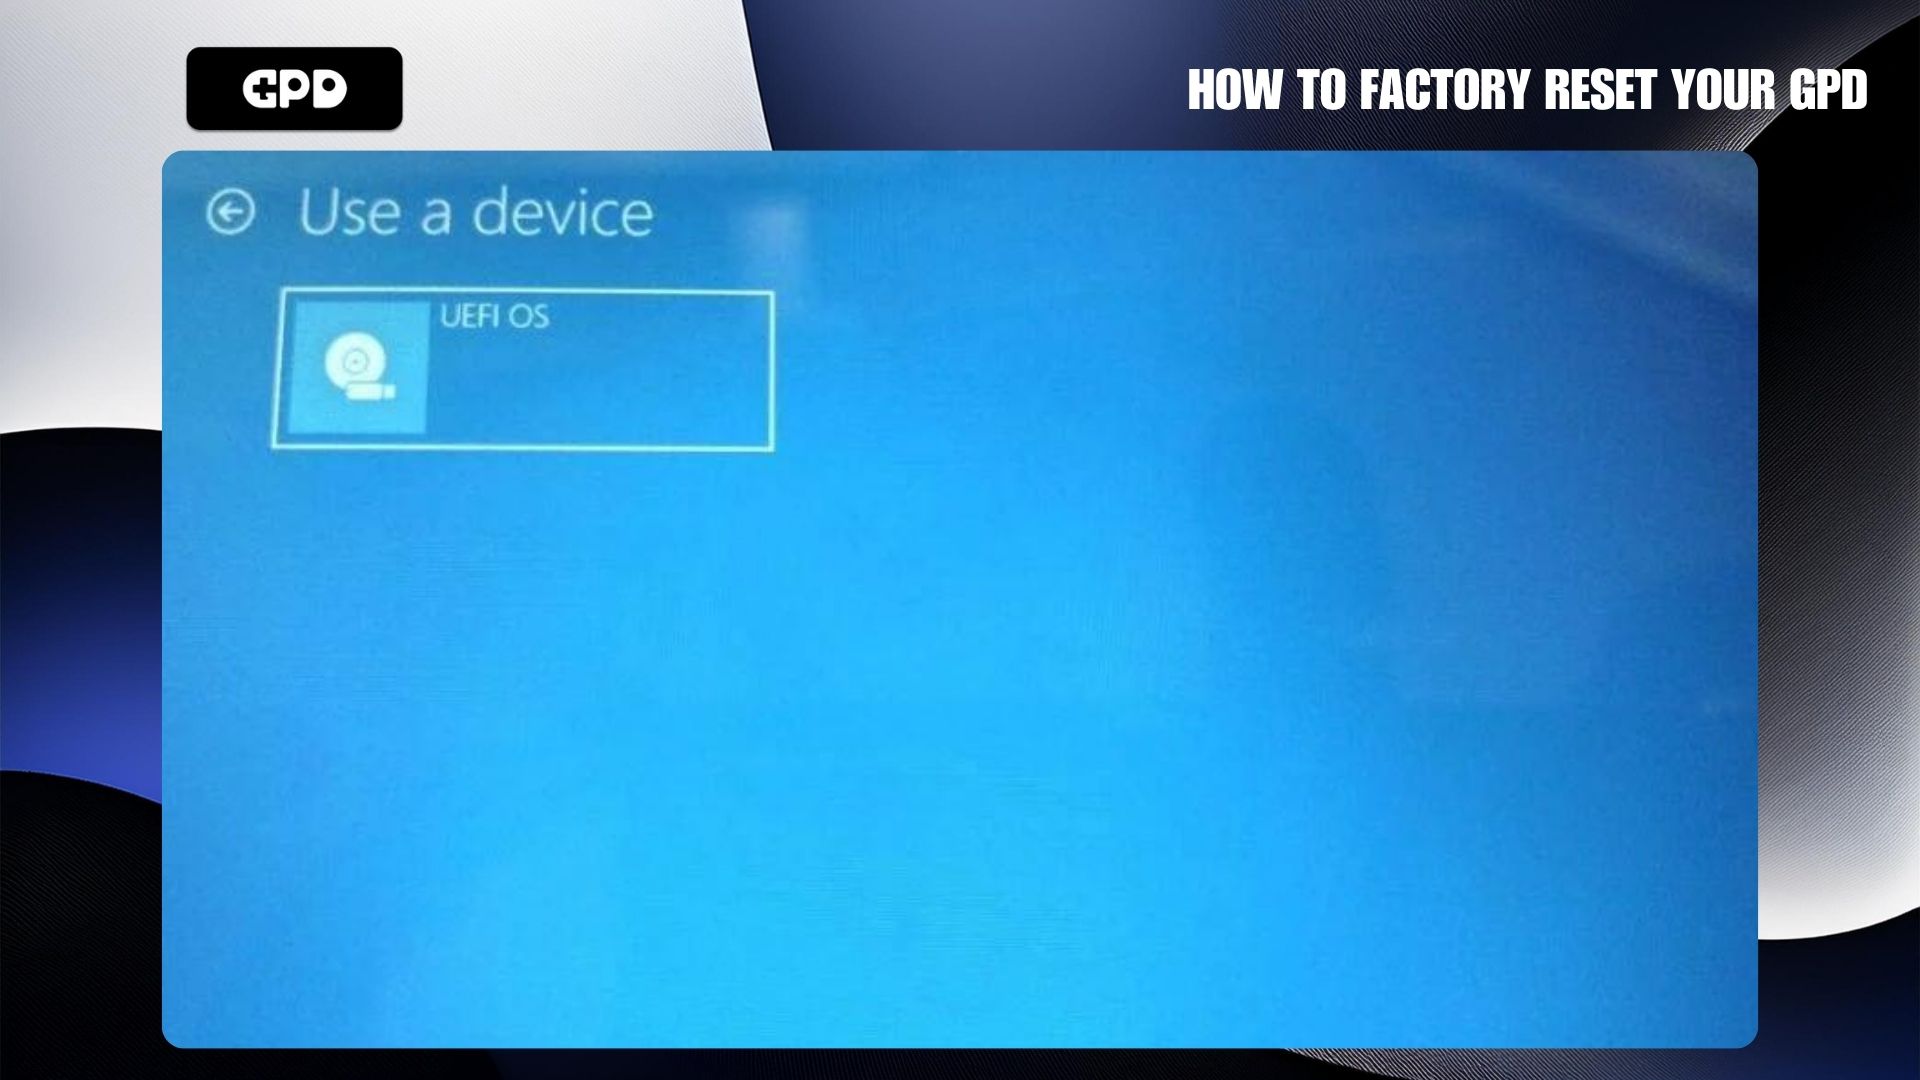
In most cases, the recovery partition is labeled as “UEFI OS” occasionally followed by some more text.
Advanced Startup Menu #
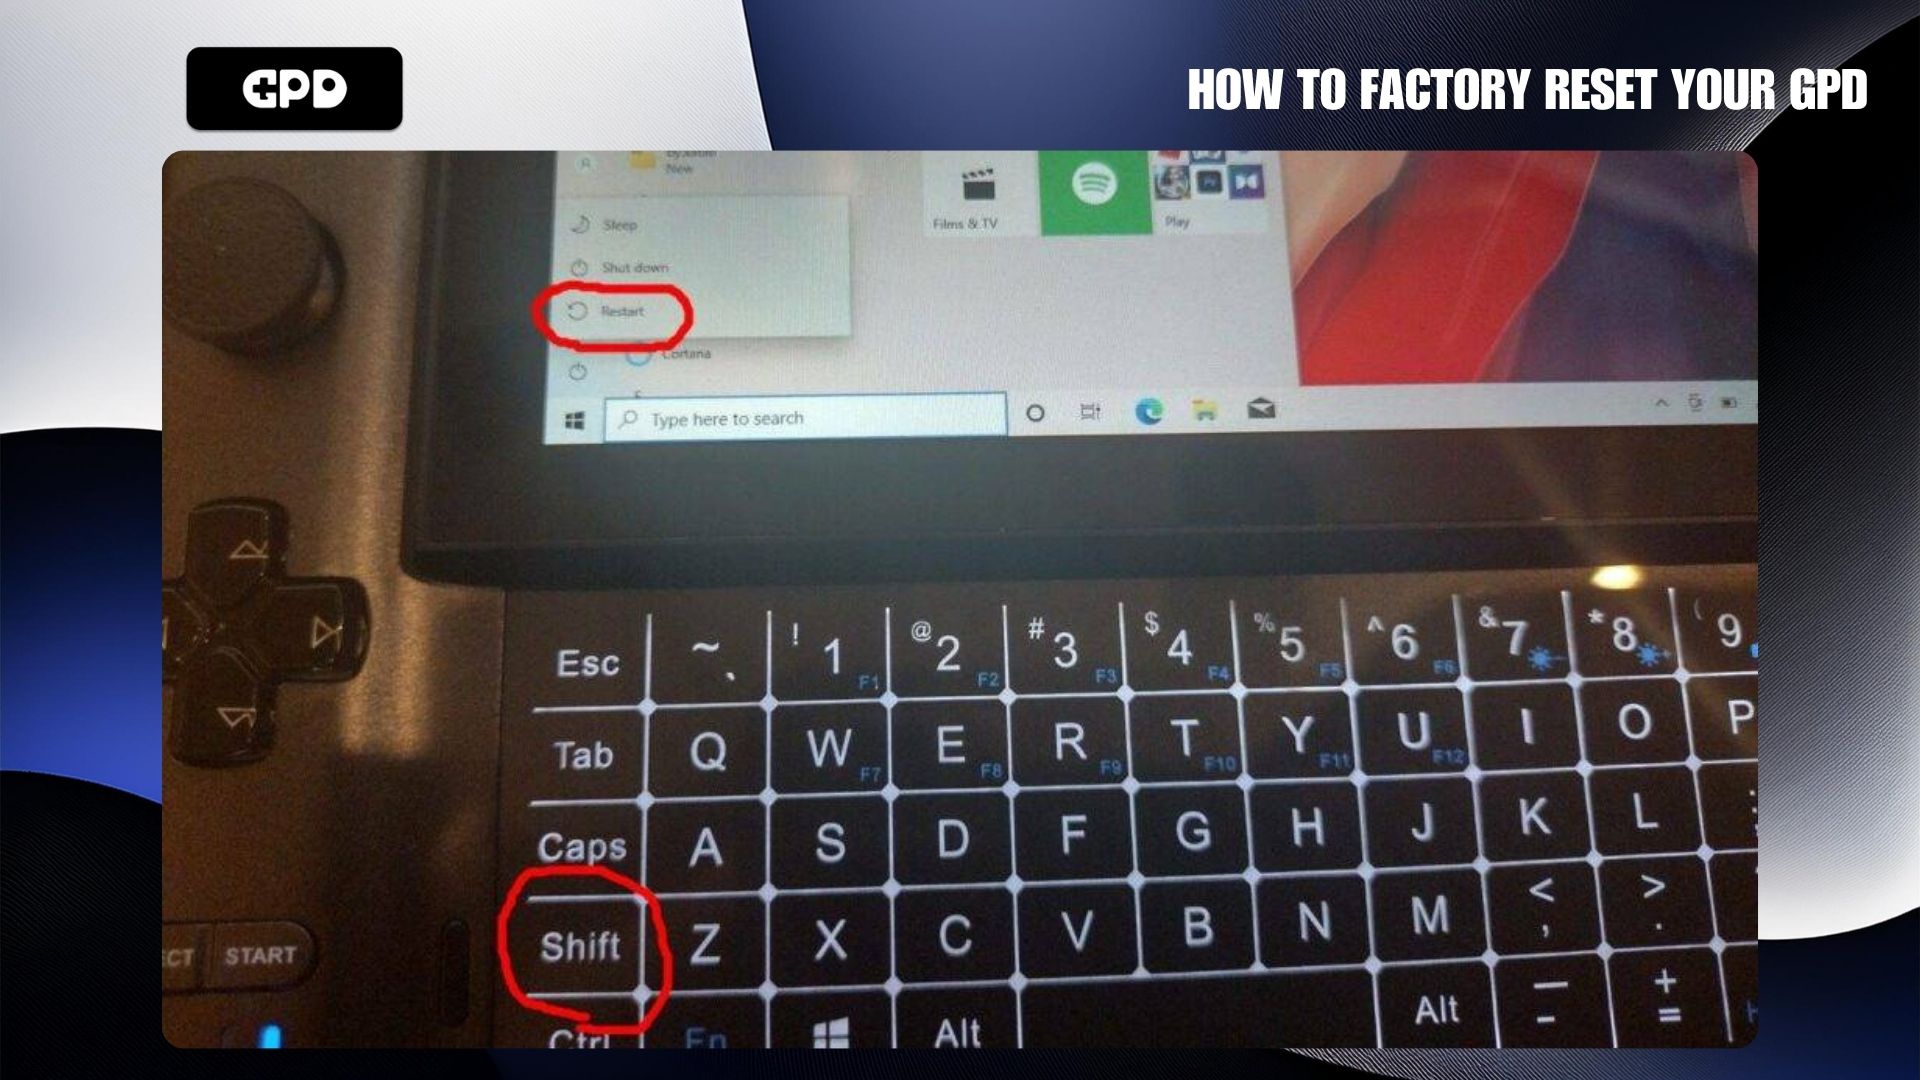
The fastest way to access the advanced startup menu is by holding the LEFT SHIFT key and selecting the Restart option from the Windows Start menu, like this:
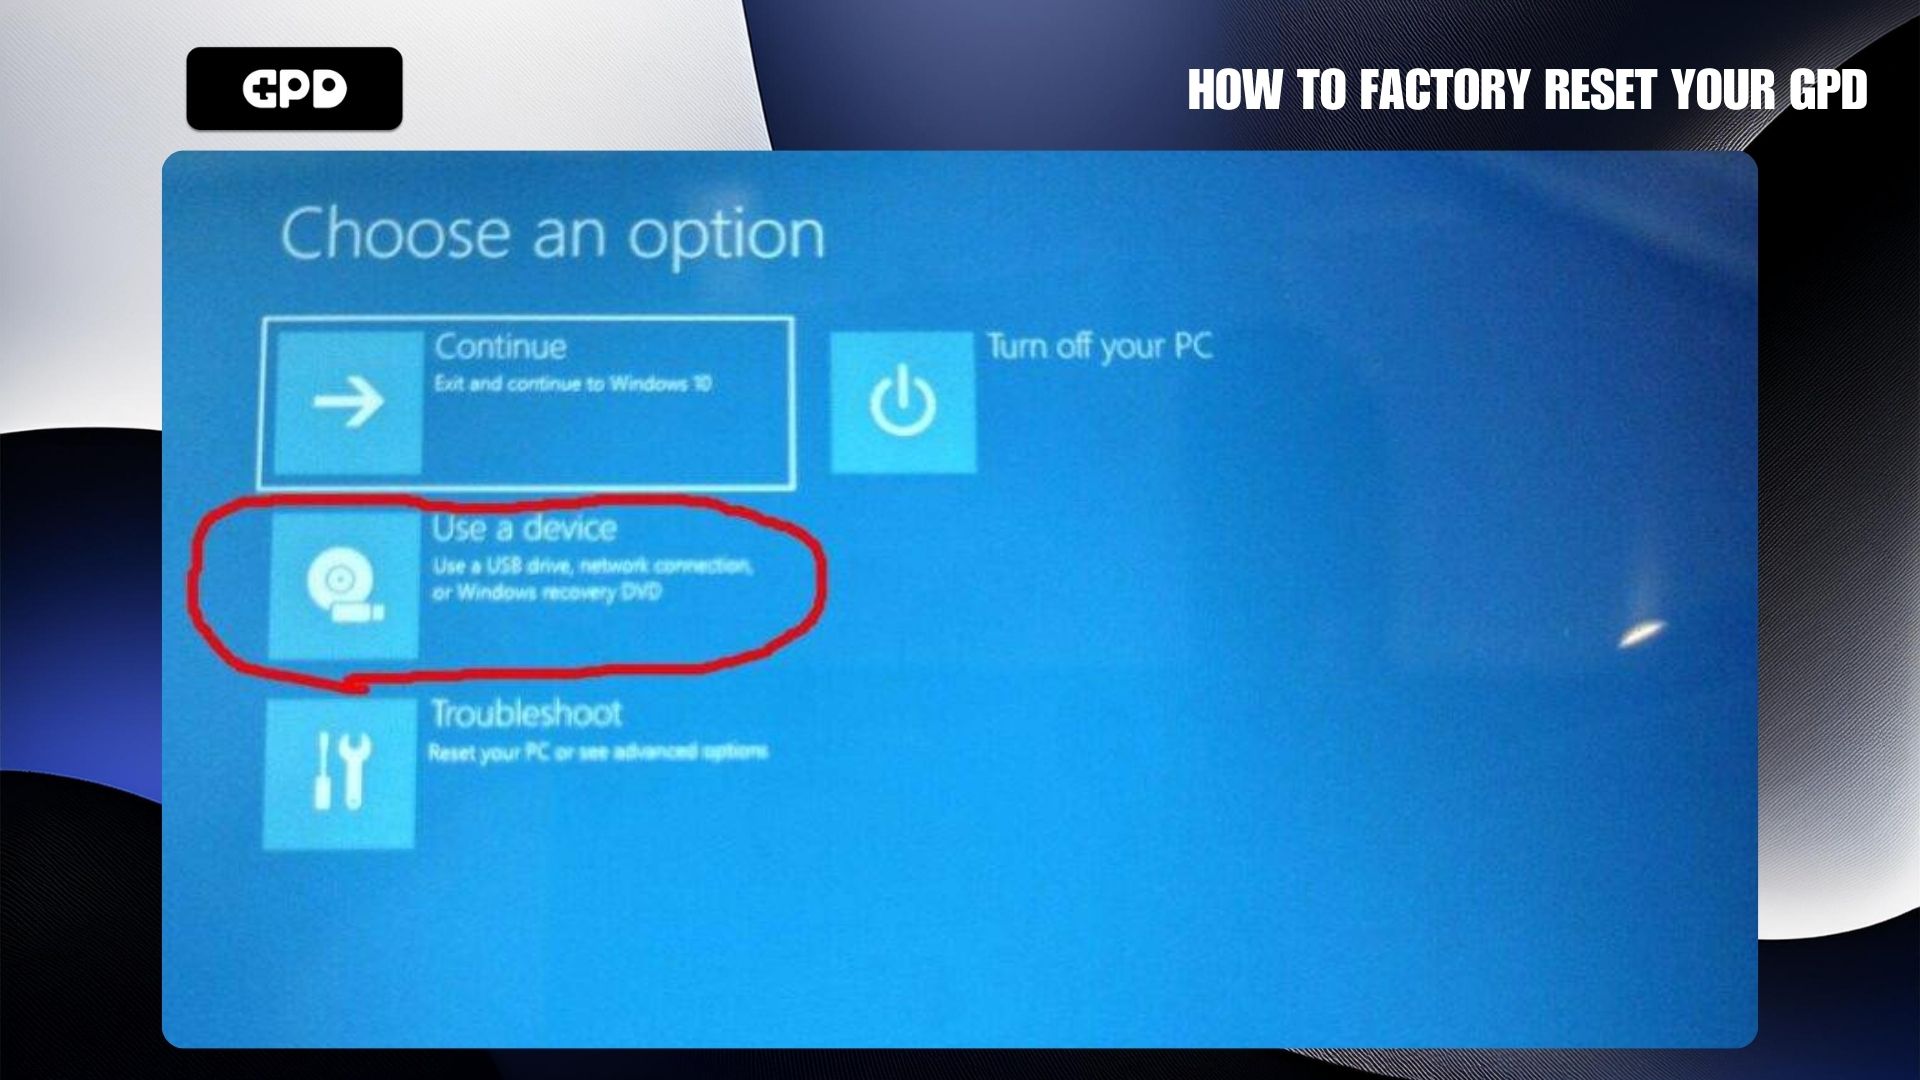
Once the system restarts, you’ll be presented with several options. Select “Use a device” from the list.
In the next screen, choose UEFI OS from the available options. Depending on how your hard drive is partitioned or what USB devices are connected, you may see a large number of options, so make sure to select the correct one.
The system will then reboot into the recovery partition. From this point, the reset process will begin automatically. Ensure that your device is connected to a charger or has sufficient battery life (above a certain percentage) for the process to start.
The entire reset should take about 15-20 minutes to complete. Once finished, the system will reboot, and you’ll have a fresh install of Windows!