If you do not wish to factory reset your GPD handheld gaming PC or mini laptop, you can alternatively do a complete reinstall of Windows. This how to reinstall Windows on your GPD guide will show in a step by step process.
What you will need #
You will need a 16GB or larger USB stick to copy the Windows set up to. Download the correct Windows .ISO file for your device. If your device is not shown or download link is not working, please contact our customer service.
Please note: if you receive a notification that the file has been downloaded too many times please log in with your Google Account to Google Drive, and you will be able to download the file.
| DEVICE | DOWNLOAD |
| GPD WIN 5 (MAX+ 395 / MAX 385) | DOWNLOAD HERE |
| GPD WIN Mini 2023 & 2024 (7640U, 7840U, 8840U) | DOWNLOAD HERE |
| GPD WIN Mini 2025 (8840U / HX 365 / HX 370) | DOWNLOAD HERE |
| GPD WIN 4 2022 (6800U) | DOWNLOAD HERE |
| GPD WIN 4 2023 & 2024 (7640U, 7840U, 8840U) | DOWNLOAD HERE |
| GPD WIN 4 2025 (8840U / HX 370) | DOWNLOAD HERE |
| GPD WIN MAX 2 2022 (6800U) | DOWNLOAD HERE |
| GPD WIN MAX 2 2023 & 2024 (7640U, 7840U, 8840U) | DOWNLOAD HERE |
| GPD WIN MAX 2 2025 (8840U / HX 370) | DOWNLOAD HERE |
| GPD DUO (HX 370) | DOWNLOAD HERE |
| GPD DUO (8840U) | DOWNLOAD HERE |
| GPD POCKET 3 (1195G7, 1125G4, 7505) | DOWNLOAD HERE |
| GPD POCKET 3 (N6000) | DOWNLOAD HERE |
| GPD POCKET 4 (8840U / HX 365 / HX 370) | DOWNLOAD HERE |
| GPD WIN 3 (1195G7) | DOWNLOAD HERE |
| GPD MICROPC 2 (N250/N300) | DOWNLOAD HERE |
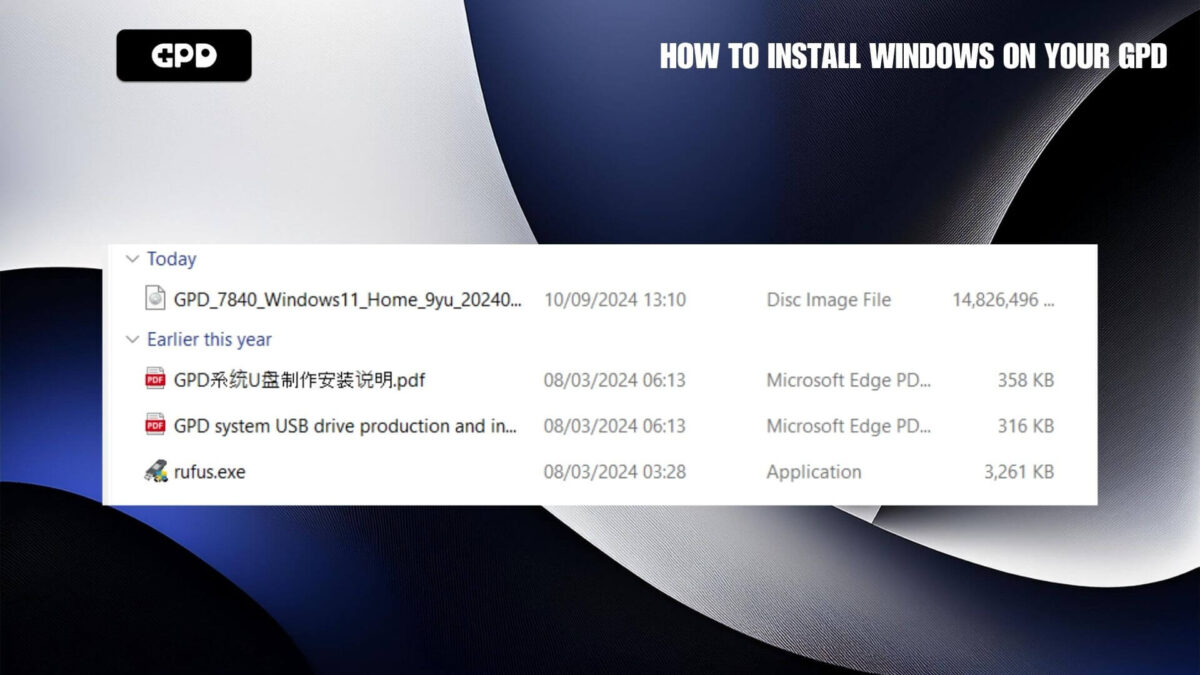
You will also need Rufus to create the bootable USB stick. You can download it from here, or GPDs own version here.
Prepare the USB stick #
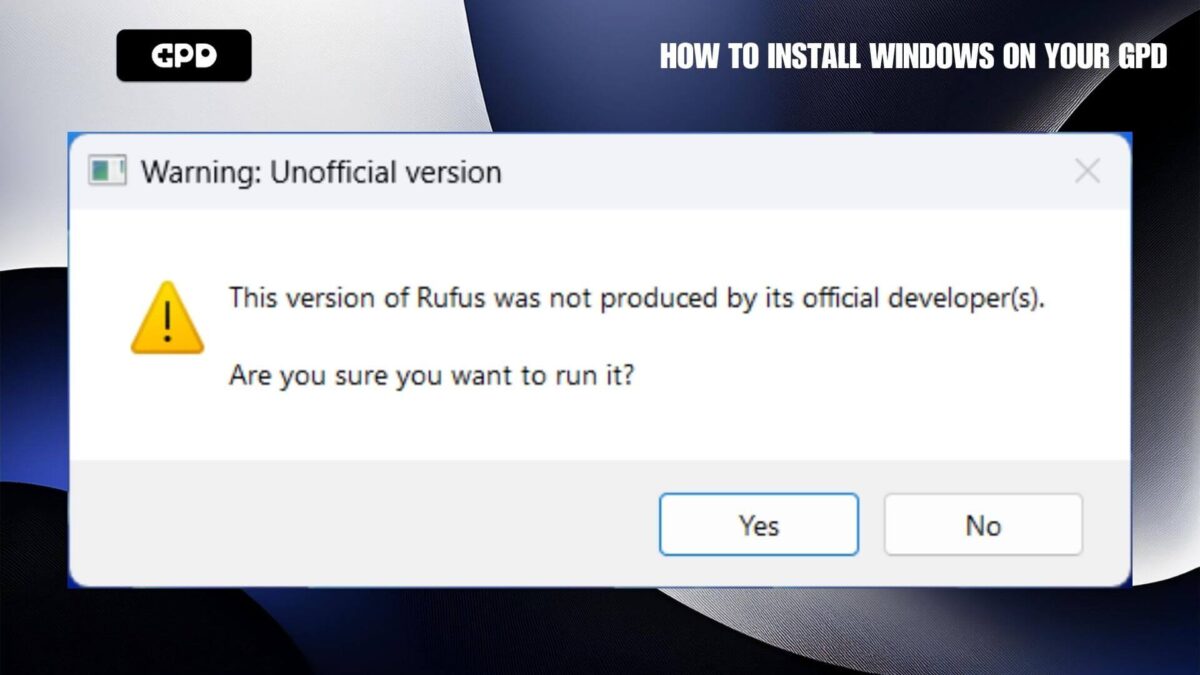
You should have Rufus and the Windows .ISO file for your GPD device. Load Rufus and if prompted click Yes to continue
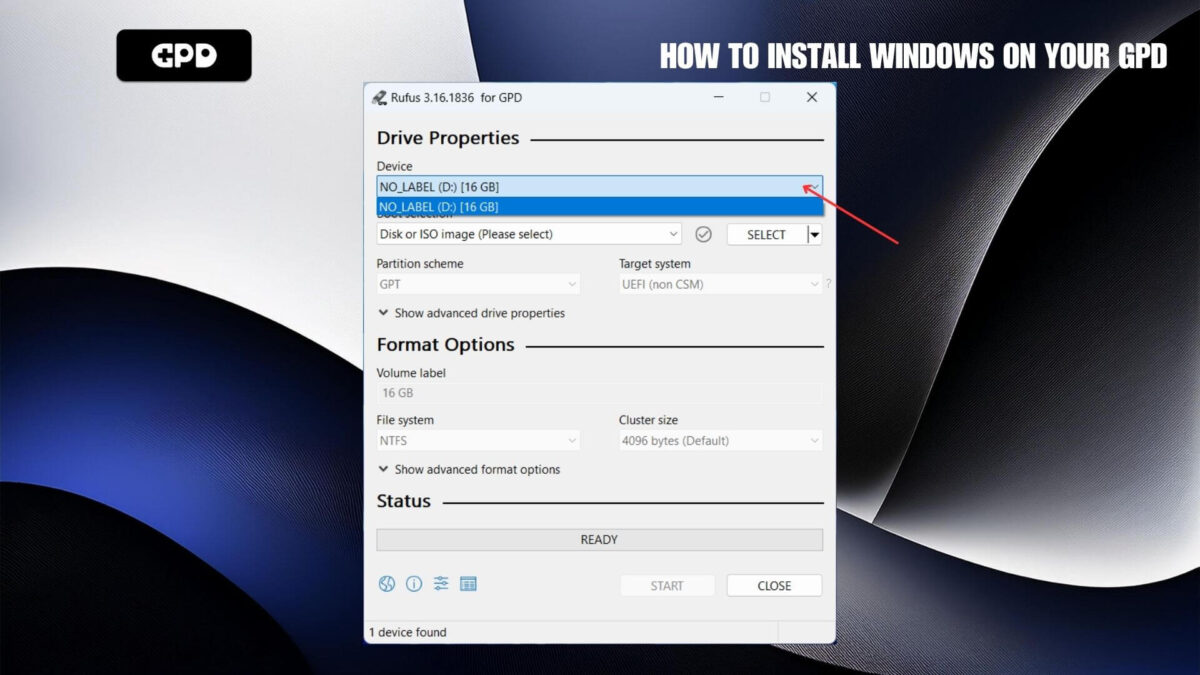
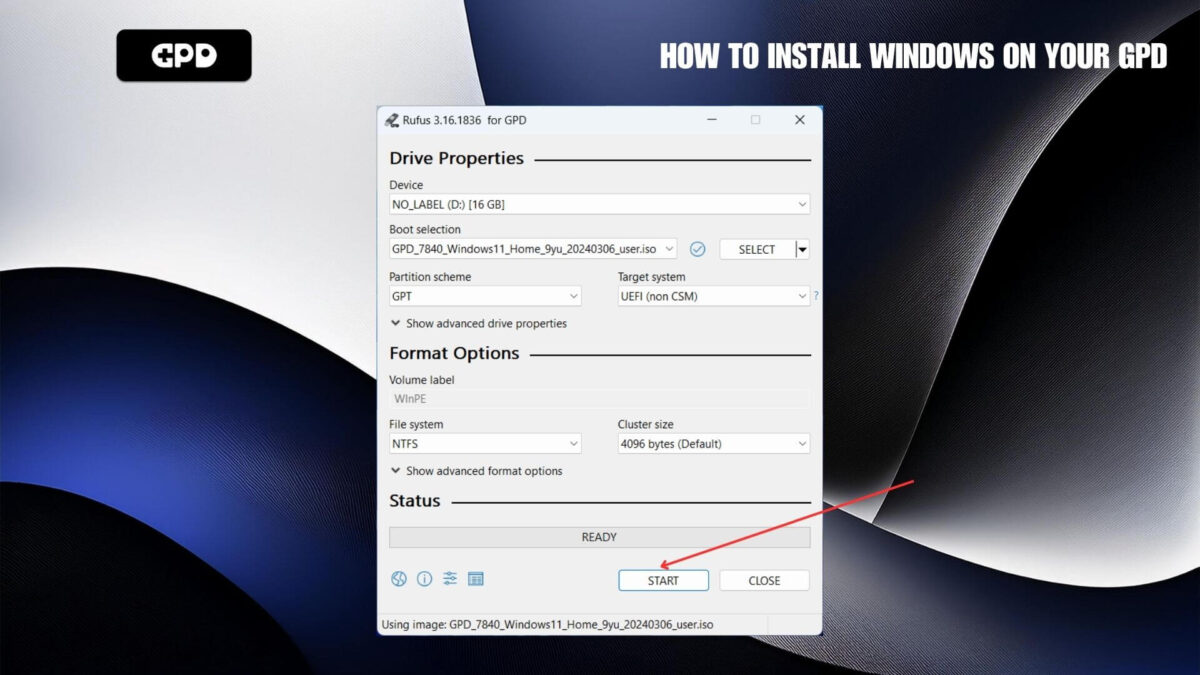
On the device drop down box, select your USB stick drive. Double check to confirm it is the correct drive as the data will be wiped from it.
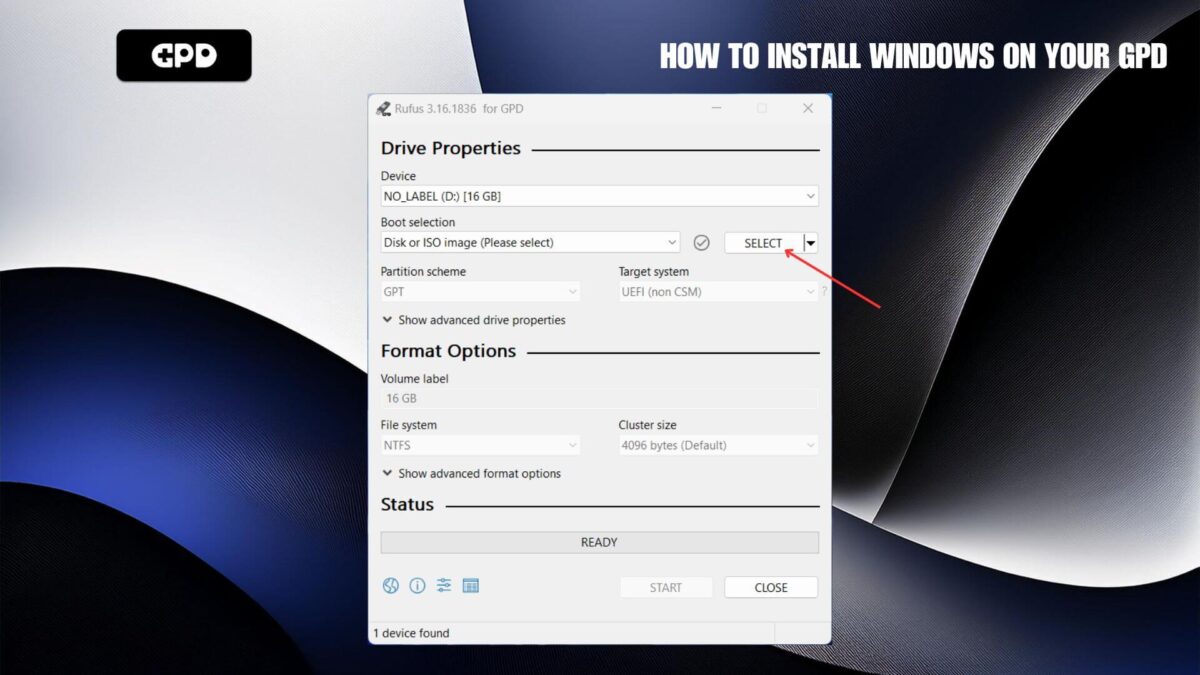
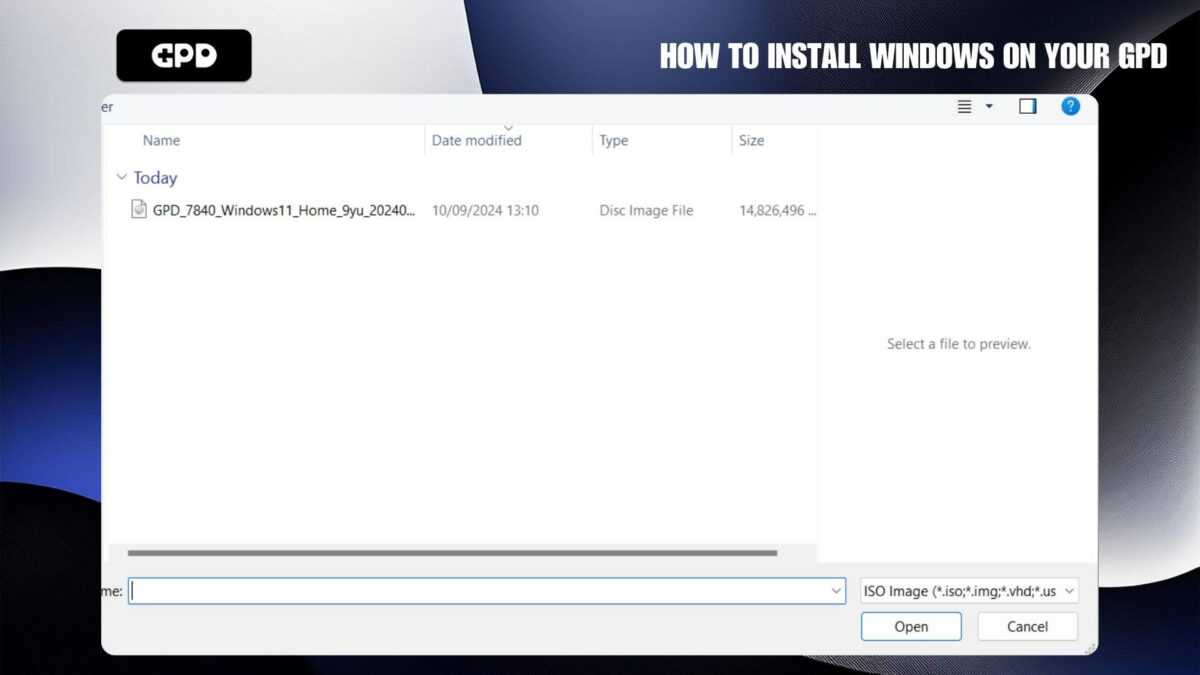
Next, select the ISO file by clicking on the SELECT button.
Double check you have selected the correct USB stick drive and then click on the START button.
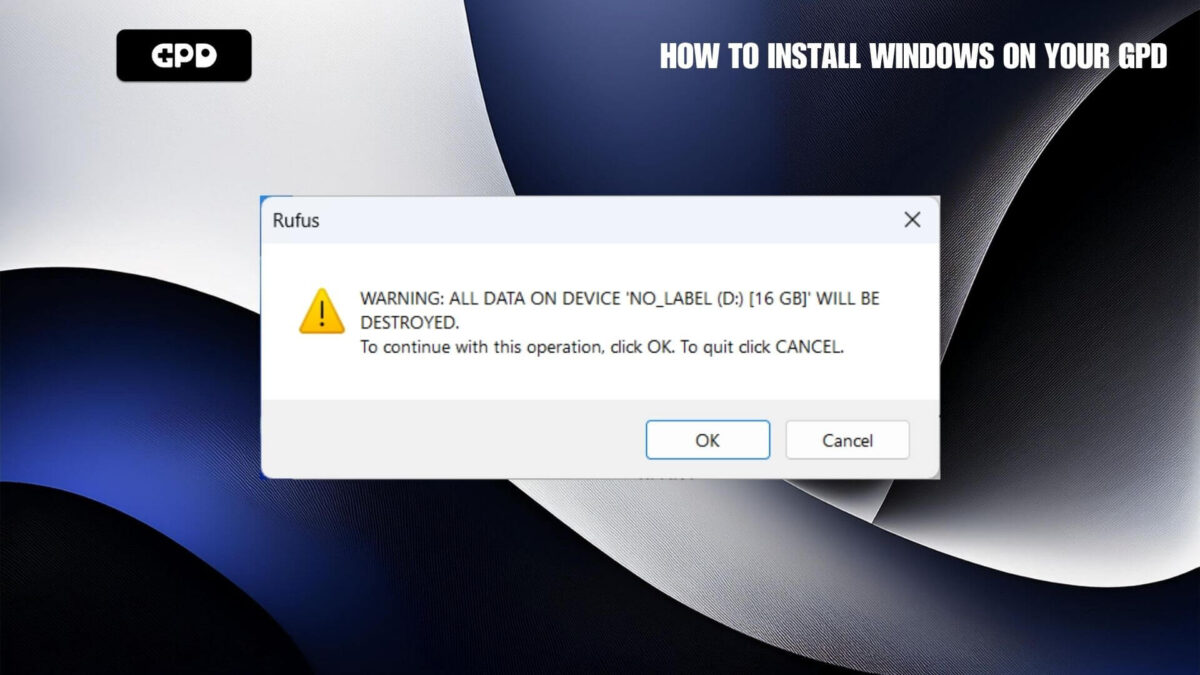
And if you sure everything is correct, press OK to begin the process
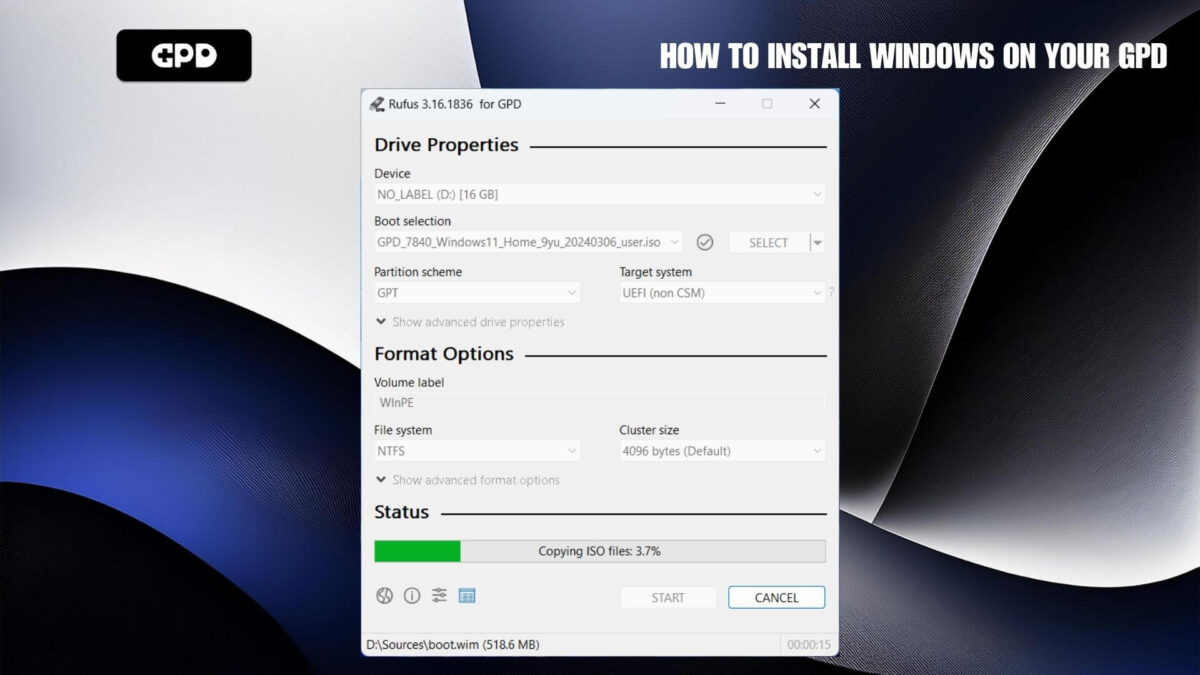
Click OK to proceed
The process will take around 20 minutes, faster or slower depending on the speed of your USB stick. Do NOT remove the USB stick until the process is completed.
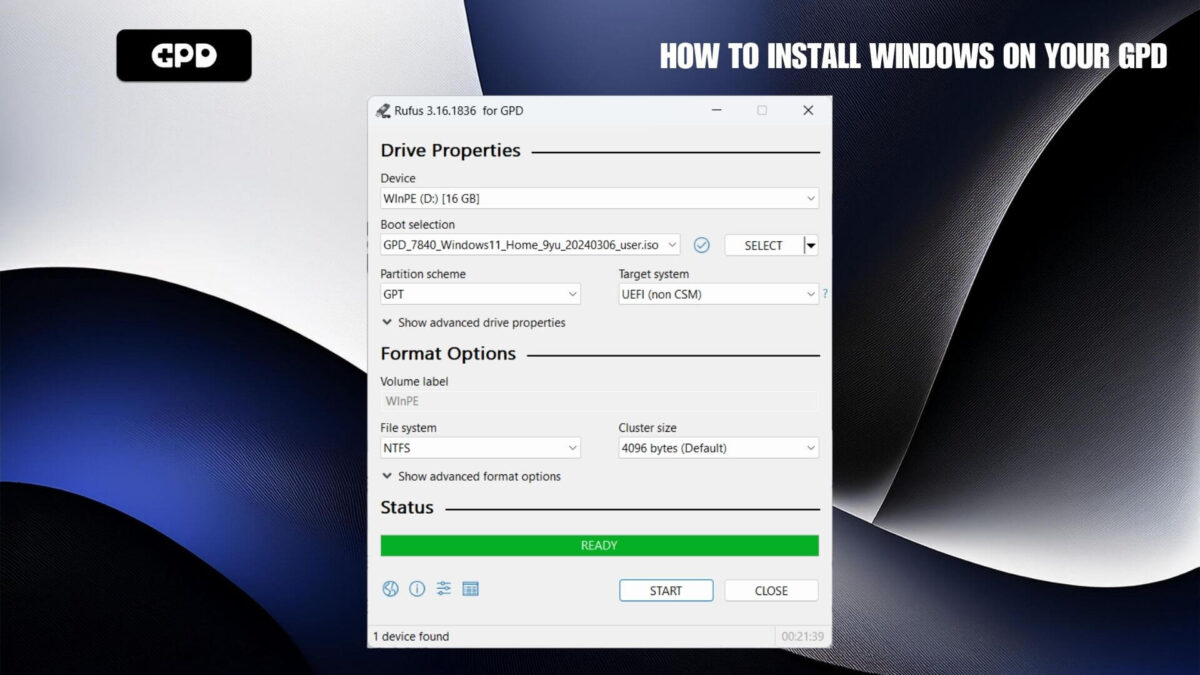
When completed you can safely eject the USB stick.
Installing Windows #
Insert the USB stick into a USB port on your GPD. Power on the device and press the F7 keyboard key repeatedly until the Boot Menu is displayed. Select the USB Stick from the menu and press Enter.
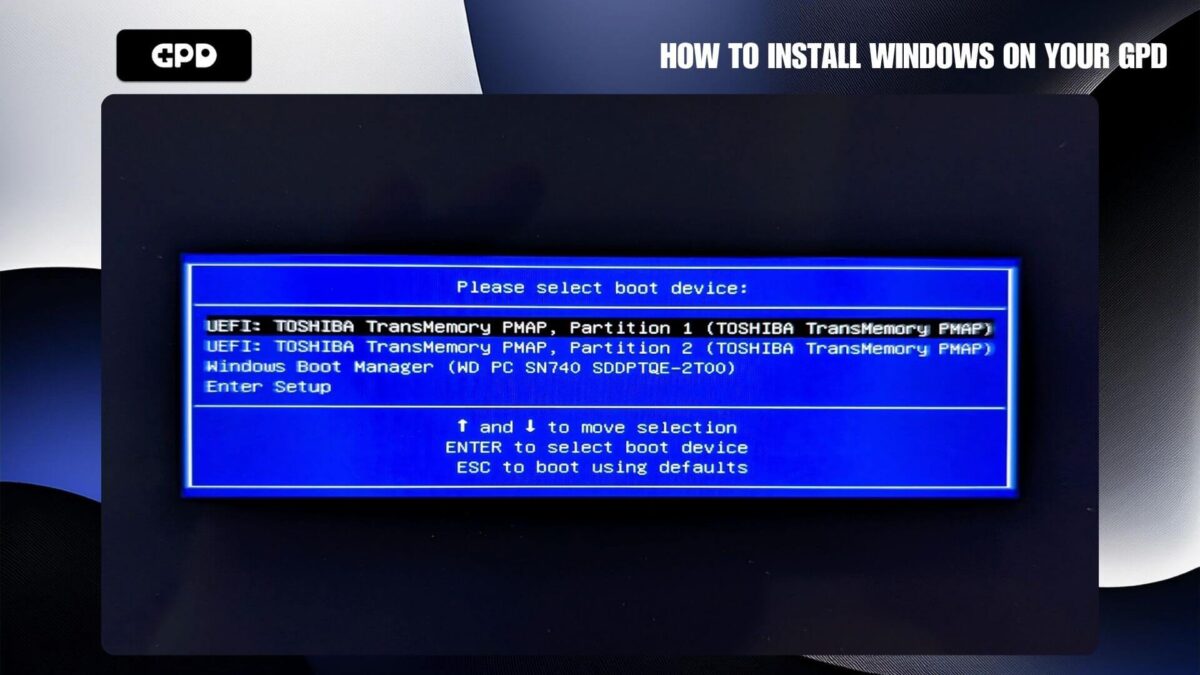
The device will reboot and load the software from the USB stick. This may take a few moments.
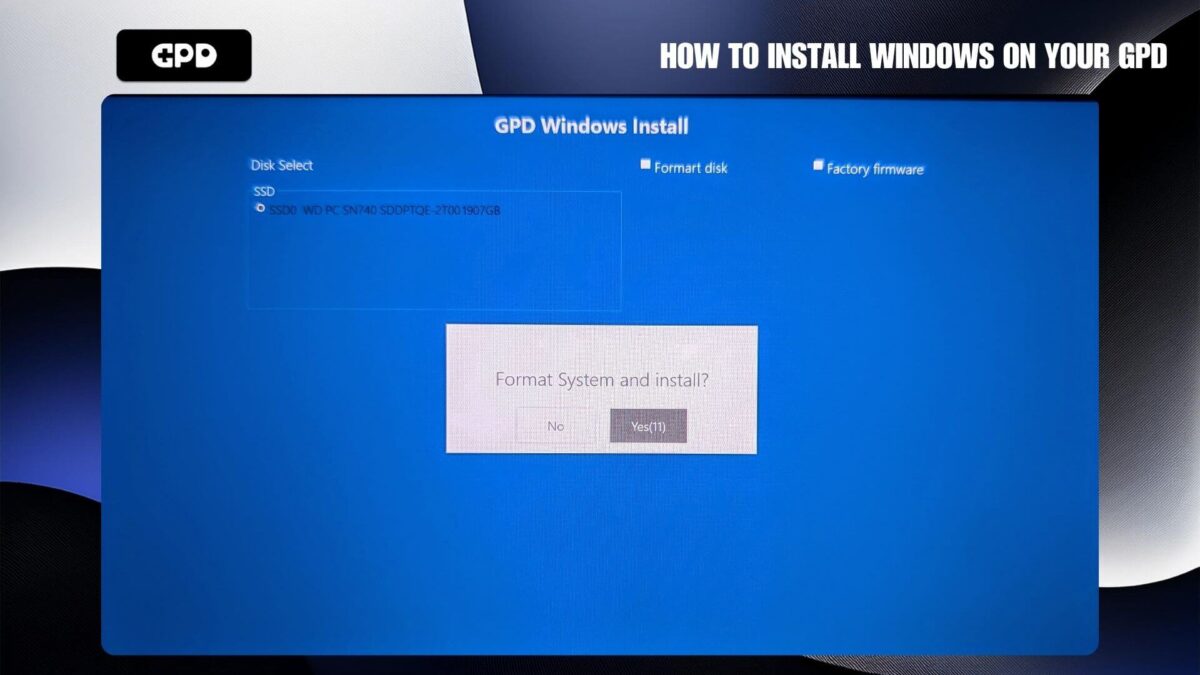
Tick the Format disk checkbox and enter the size of your devices storage size which is shown on the left side. You can choose the Factory firmware mode optionally. Next, press the START button to begin.
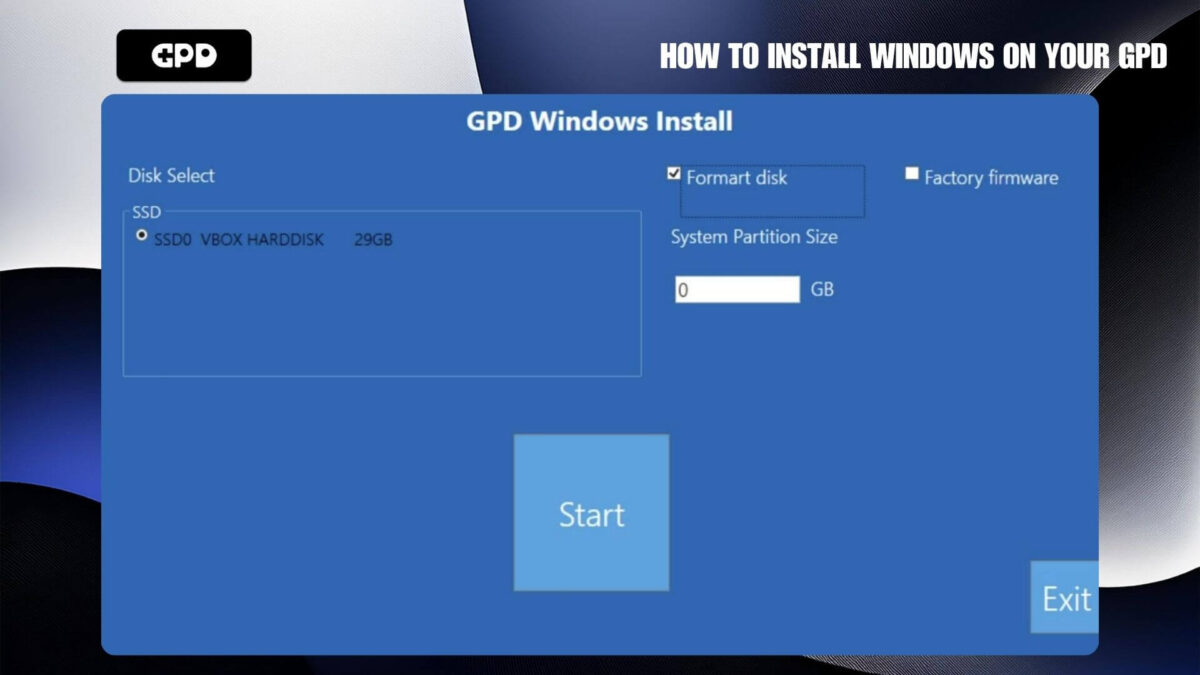
It will then begin the process to install Windows, first copying the files then applying them. The process will take around 20 minutes, do not switch off the device or remove the USB stick until it has completed. Once completed, you will be notified that the device will reboot.
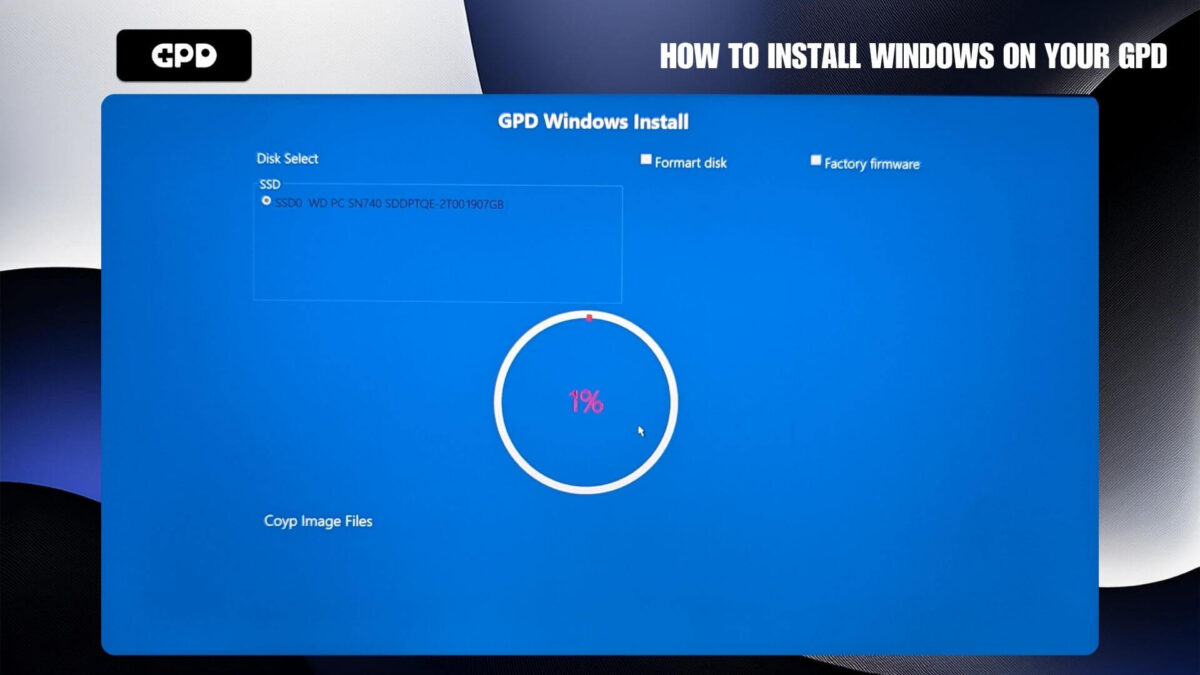
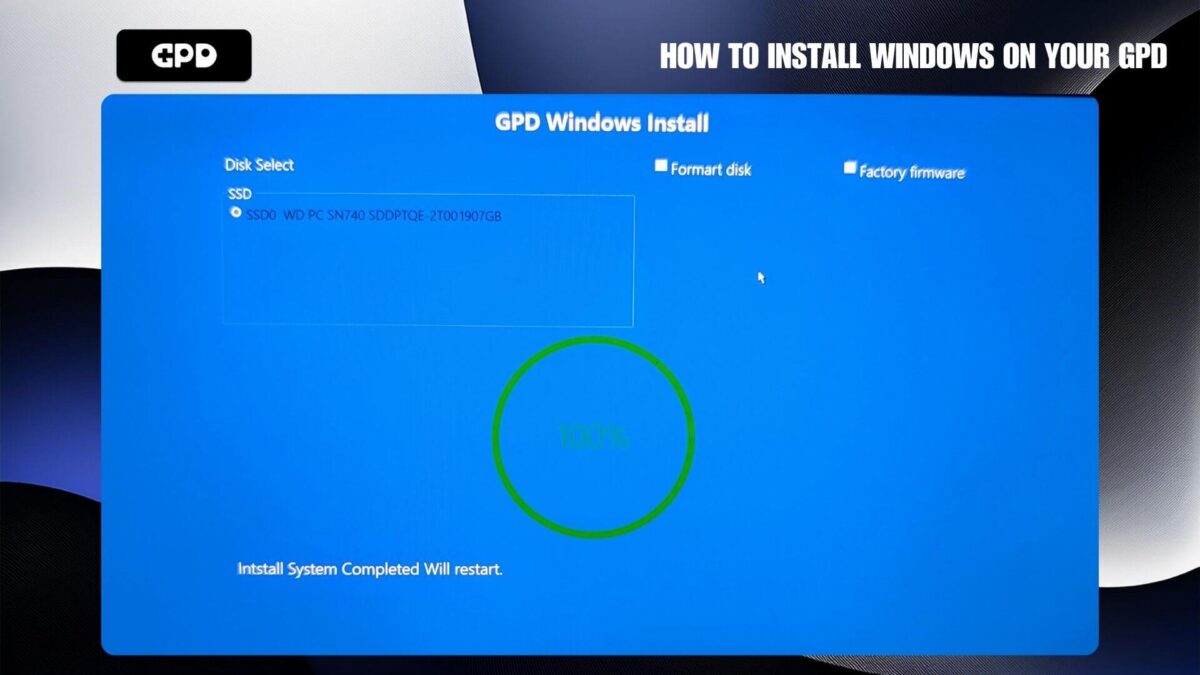
The device may reboot once or twice, it will also take a little longer than usual to boot, this is fine and will return to normal boot speeds afterwards.
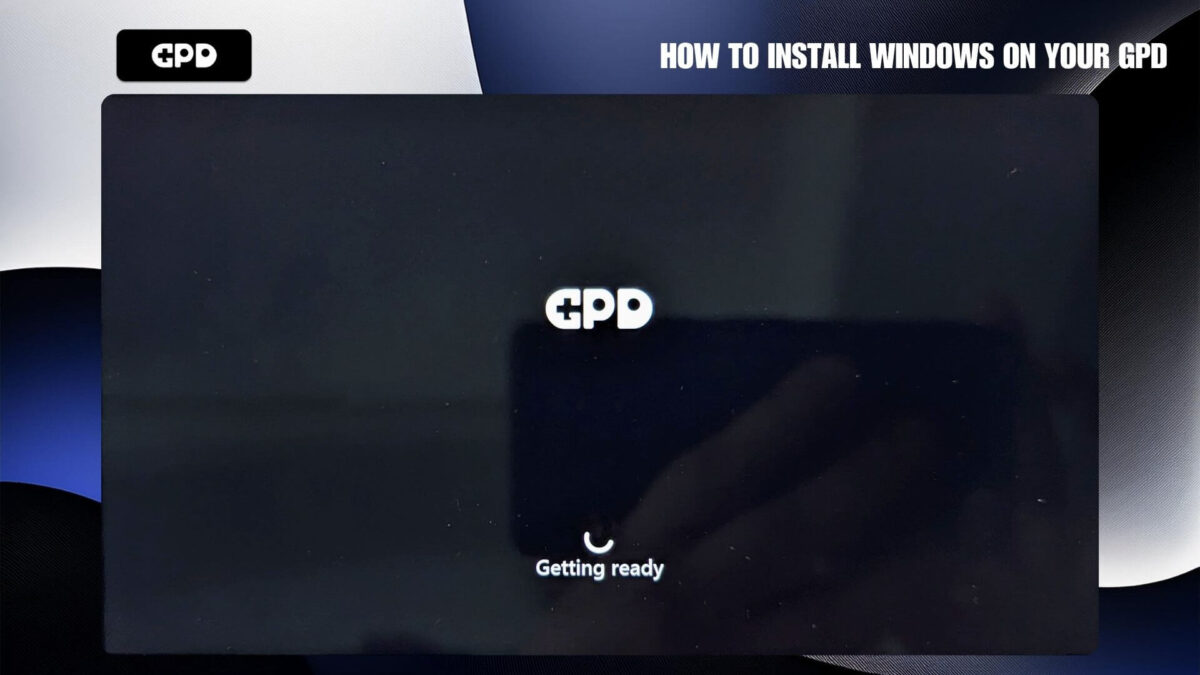
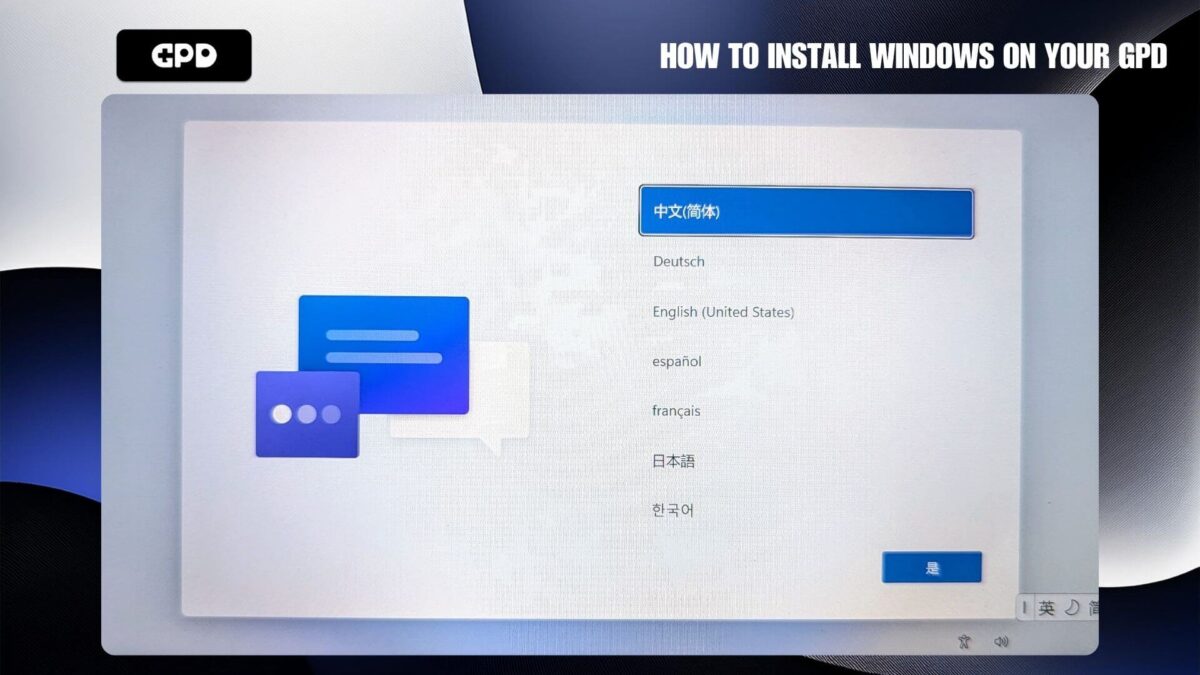
After a few moments, the Windows setup screen will display. Follow the prompts to set up Windows.


potresti gentilmente darmi un link per i driver del micropc 2 con N300, Grazie
Puoi scaricarlo qui https://drive.google.com/file/d/1un7FLw62x0_WAWxMiNgEMe6n-_aJC26_/view?usp=sharing Se riscontri problemi durante il download, accedi a un account Google per scaricarlo.
Got a DOA unit (brand new in box). Tried this and it wiped out the recovery and keeps crashing on boot with a 0xc00000001 error. Stock Windows will install (but the AMD drivers soft brick it) and Linux *kind of* works (it’s fragile and installing anything causes the whole thing to kernel panic).
Memtest86 comes up clean.
SSD comes up clean, but I admit it could just be that the WD Black in this might have something else going on. I haven’t tried swapping the drive because I want to avoid technicalities when I go back to the Amazon seller for an exchange or a refund.
It sounds like an issue with the SSD. I would recommened contacting the seller and get it returned for inspection.
Is everything currently up to date for the win mini 2025 ai hx370, I’m going to try this right now because my controls got messed up and wouldn’t change back after just a regular factory reset
It is mostly Windows and the graphics drivers that would need to be updated after reinstallation to get those to the latest versions.
Good day, I got gpd win 5,
My initial problem that it always goes to BIOS, if not, it always goes to the Repair screen where it says it cant be repaired.
It always restart aswell.
So im trying to reinstall windows. Now it always stuck in a loop, where the SSD is need to be selected.
I notice that it doesnt load the SSD options, and unfortunately, it will always restart on that screen.
What to do please?
Thanks
It sounds like there may be an issue with the SSD. Check in the BIOS if the SSD is recognised and displaying the brand name and size of it. If it is not showing then the SSD may be loose inside or faulty. If you purchased your device from us, please get in contact with our customer service at [email protected] with your order number, they will be able to look into this further and provide assistance. Thanks.
I reinstalled Windows following the procedures, but now it is asking me for the activation key. How can I resolve this?
Thank you.
If you purchased the GPD device from us, please email [email protected] with your order number and we will be able to assist.
cant download GPD Win 2025 iso disk, somebody help please
Try logging into a google account and then download it again, it should work after logging in. If not, could you be more specific which device you are trying to download it for, GPD WIN 4 2025, GPD WIN MAX 2 2025 etc. Thanks.
can i use window pro from the microsoft website or do i need to use provided by the GPD windows i i want to install or reinstall windows
Yes, you can use the Windows file provided from official Microsoft website and drivers separately from GPD website for the device.
If you login to your google drive you will be able to download easy. Can you repair the startup and system files with that iso instead of wiping the whole drive out?
The installation will wipe both drives. I would recommend backing up any important files to a USB drive or Micro SD card before re-installing.
Every time I’ve tried to follow the instructions for the blue GPD Windows Install page I wait for it to install windows but it never boots into the windows setup, only back to the blue install page. It says “No system partition detected, please reformat the hard drive for installation” at the bottom. Was there a step I missed?
Are you sure the SSD is working correctly? Can you go into the BIOS (tap ESC or DEL key repeatedly when switching on) and check the SSD is showing there on the storage. If you are still having an issue and you purchased the GPD device from us, please email [email protected] with your order number and some information and our customer service team can look into this further. Thanks.
The data for the GPD WIN 3 (1195G7) is corrupted! The fingerprint authentication is not working.
Log into Windows with your password or PIN instead of the fingerprint scanner. Go to Settings > Accounts > Sign-in options and then remove the fingerprint login and re-enable it and add your fingerprint again.
Hello! There is a problem with installing windows 11. After installing GPD WIN 3, it reboots and, when turned on for the first time, displays an unknown error message asking to reinstall the operating system and then shuts down. The same problem occurs with windows 10. Can I switch the installation to Factory Firmware? But what size should I specify in the window, and what exactly does this option do? Does it affect the ssd partitioning? Please provide some advice.
If you mean when partitioning the hard drive during Windows setup, then allocate the full drive space. If you purchased it from us at GPDSTORE please get in contact with our customer service at [email protected] with your order number and some details and our customer service will be happy to help. Thanks.
GPD WIN MAX 2 2022 (6800U) and GPD WIN MAX 2 2023 & 2024 (7640U, 7840U, 8840U) have the same download link? Is there some mistake?
We can confirm that GPD WIN Max 2 (8840U / 7840U / 7640U / 6800U) uses the same firmware file from GPD so the links are the same.
What do i need for the original WIN MAX? Thanks
If it is the original “GPD WIN MAX” with Intel Core i5-1035G7 CPU, its quite an old device now and I think only Windows 10 was only ever officially supported on it. You should be able to install Windows 11 on it and the easiest way is to use Windows Media Creation tool at https://www.microsoft.com/software-download/windows11 . If you want to stick with Windows 10 then you can download the install from https://drive.google.com/file/d/152xHiHqRIUBmIopz6XQERUgcQRWqosOv/view?usp=sharing and drivers (if required) from https://drive.google.com/file/d/1fjCMhnHuCmI09WdWtP7jvpU1ev2zj3Dv/view?usp=sharing
thank you!
GPD pocket 3 reinstalling Windows 11 by downloading it from your GPD web site. After booting into the GPD windows install, it said there is no SSD detected! How to overcome this issue?
Can you check in the BIOS that the SSD is showing there. Also try the Windows media creation tool as this will be the latest Windows version https://www.microsoft.com/software-download/windows11
Well, the original issue resolved. Now the GPD Windows Install found thr SSD. However it is stuck at 0% over night. How can that be resolved?
Try installing it again as it may have been a random issue. If it happens again, it could be that you may have an issue with your SSD which is why it was not found, then found but then not installing. If you purchased it from us at GPDSTORE, please email [email protected] with your order number and our customer service will be able to look into this further with you and advise. Thanks.
Hi guys. Can’t download the windows file because google drive seems to block it. Do you have any solution please?
Try logging into your Google account and then you will be able to download it. If there is still an issue please let know which one is not working and we can look into it. Thanks.
Not working for me either. Trying to download the Pocket 3 1195G7 file
I have updated the download URL. Please log into a Google account when downloading as this can help with downloading it. Thanks.
Thanks for the link. I also got a new SSD as it turned out to be bad. Now windows 11 is running, except there are a lot of device drivers missing. Where can I get the GPD driver? Thanks!
GPD Pocket 3 1195G7 / 7505 / 1125G4 CPU model drivers https://drive.google.com/file/d/1Kr86AIS90oBTw5ui5qJQ8FqyvTFi-D0F/view?usp=sharing
GPD Pocket 3 N6000 CPU model drivers https://drive.google.com/file/d/1r7AUsWOYB8UxGkJ8AxtKkGS058er5CgV/view?usp=sharing
Also download and run Intel Driver & Support Assistant to ensure your drivers are up to date
Hello , I don’t see the GPD WIN 3 my model is, product name: G1618-03 with the cpu i7-1195G7 . If you have a link for a Windows version for this model it would be great. Have a nice day.
You can download it from https://drive.google.com/file/d/1uFH6NpiIlDHdrjZrX6CmgNKv1KOE4oeO/view?usp=sharing. Thanks.
I have GPD DUO (HX 370) model but when i click download from your google drive the file name (GPD_P4_MiniPro_D1_Windows11_26100_3476_20250314_User.iso) download seems not match with the model that i have. Can you confirm that ISO fir this model GPD DUO (HX 370) ?
Hi, yes this is the correct download. It generally goes by processor types and the Pocket 4, Win Mini 2025 and Duo have the same HX 370. It is fine to install on the Duo.
The links for many of the devices point to the same file. LOL. You didn’t even verify these. It’s dangerous to use a different installer for an incompatible device.
For example: There were 4 links that point to the below file:
GPD_7840_Windows11_Home_9yu_20240306_user.iso
I think that’s for GPD Win 4. But when I tried to click the link for GPD Win Max 2 (2022), it pointed to the same file! I tried other links and they point to the same one. CRAZY!
These are the correct files and are not dangerous to use. The Windows install contain the correct files for the appropriate CPU models. You can confirm this yourself as the exact same files are found on the GPD site.
What does the factory firmware option do and when would I ideally need to use it?
If using the GPD windows install, it will fully wipe the device and reinstall Windows with the drivers for your device. You should only need to do this if you are experiencing issues such as Windows not loading for example.
The download on this page is not working. The link to Google says too many downloads. try again later.
GPD WIN Mini 2023 & 2024 (7640U, 7840U, 8840U)
I just tried downloading it and was able to. Try it again at a different time and it will download.
GPD Pocket 3 Gold 7505 – what version do I download if I have the updated GPD Pocket 3? I see the I7 version and the earlier budget version.
If you have the Gold 7505 you can download this one https://drive.google.com/file/d/1L5Nwx3XZzO6GtnQB115NngUnNypl3Em2/view?usp=sharing
GPD obviously trying to take itself seriously with those prices… so my question is: Why not take their customers seriously then? Why not release their own driver packages and get a DECENT fix for a problem that has been around for months? Why make everyone who paid good money jump hoops and mess around with shady windows installers that you anyway can’t get downloaded because it’s on a… google drive? I take it back. GPD isn’t taking anything seriously, we just threw money in the bin.
Thank you for your message, we will pass on your feedback to GPD. If you are having any issues with your GPD device purchased from GPD Store or DROIX, please do email us at [email protected] and our customer service will be happy to help. Thanks.
Hello I had trouble installing latest windows updates so I did a clean fresh install of windows using official windows and flash drive and now I have bsod while installing windows. Please help gpd support
We would recommend first installing the GPD version of Windows which has all the drivers included. There are different installs depending on your model, please find it at https://gpd.hk/download and download from there.
I tried updating my win mini 7840u to windows 24H2 through windows installation assistant, and now it won’t boot up. It either freezes on the GPD logo or goes into the blue repair mode screen. I tried reseting windows through there or reverting the update but it didn’t help. Will reinstalling windows with this method work?
The latest Windows updates seems to be causing issues with some PCs, not just GPD devices. If you are unable to reset windows or doing an update rollback, then reinstalling Windows is probably the best option. You can download 24H2 from https://drive.google.com/file/d/1ZTyRcPTNitTTPaw__XtFkl1wjatJA4h3/view?usp=drive_link or older version at https://drive.google.com/file/d/1LY44bRqhijfFIsHbGPV0BARA8DGwy6i7/view?usp=sharing
Hi – the instructions have an ISO as the item to use in Rufus, but the download for the GPD Pocket 3 1195G7 is a zip file. How can I use that zip file with Rufus or should I use that zip to create an ISO before creating the bootable media?
The .ISO is inside the .ZIP file which is an archive format. On Windows, you can right click on the file and select “Extract” to get the .ISO file.
inside just folder not .iso file
Some Windows setups for these devices are not ISO that you write to a USB drive, some are simply files & folders that you copy instead. The end result is the same.
Hello GDP Support,
Can I have the Driver files for GPD Win 4 7840u? The Google Drive files cannot be downloaded. Thanks
You can download only the driver files from https://drive.google.com/file/d/19MALLPUxRZHsXjcP-VP3synRRxTwBc19/view?usp=sharing
디스크선택에 디스크포맷과 공장초기화가있던데 자세히 어떤작업이이루어지는지 알려주세요
영어 번역이 별로 좋지 않아서 완전히 이해하지 못해서 죄송합니다. “디스크 선택 화면”이 부팅 화면인 경우 부팅할 드라이브만 선택할 수 있습니다. 복구 메뉴를 의미하는 경우 Windows 복구, Windows 재설정 등과 같은 표준 Windows 문제 해결 옵션이 있습니다.
Hello GDP Support,
Is there any other link for Win11 iso for GPD WIN Mini 2023 & 2024 (7640U, 7840U, 8840U)? The google drive link seems not accessible.
I tried the link for the WIN Mini 2023/2024 and it seems to be working fine. Please try it again.
I had the same problem downloading the Win11 ISO from GPD. I finally got the Win11 installer set up in my USB drive through https://www.microsoft.com/en-us/software-download/windows11, I chose “Create Windows 11 Installation Media”
Hope this is helpful to other GPD users. And I hope GPD can do better in preparing the Win11 ISO download for users around the world.